Hello again!
I listened to a pod cast by Rob Bell (The Robcast – Episode 9) where he shares a Native American piece of wisdom that I just cant stop thinking about. The jist of said wisdom is in order to begin to understand why things are the way they are (with all the global conflict, suffering, social challenges, and on and on), you must make space within yourself to begin to understand the unexplainable. Truth is like the sun, we can’t look directly at it, but without it, nothing could be seen.
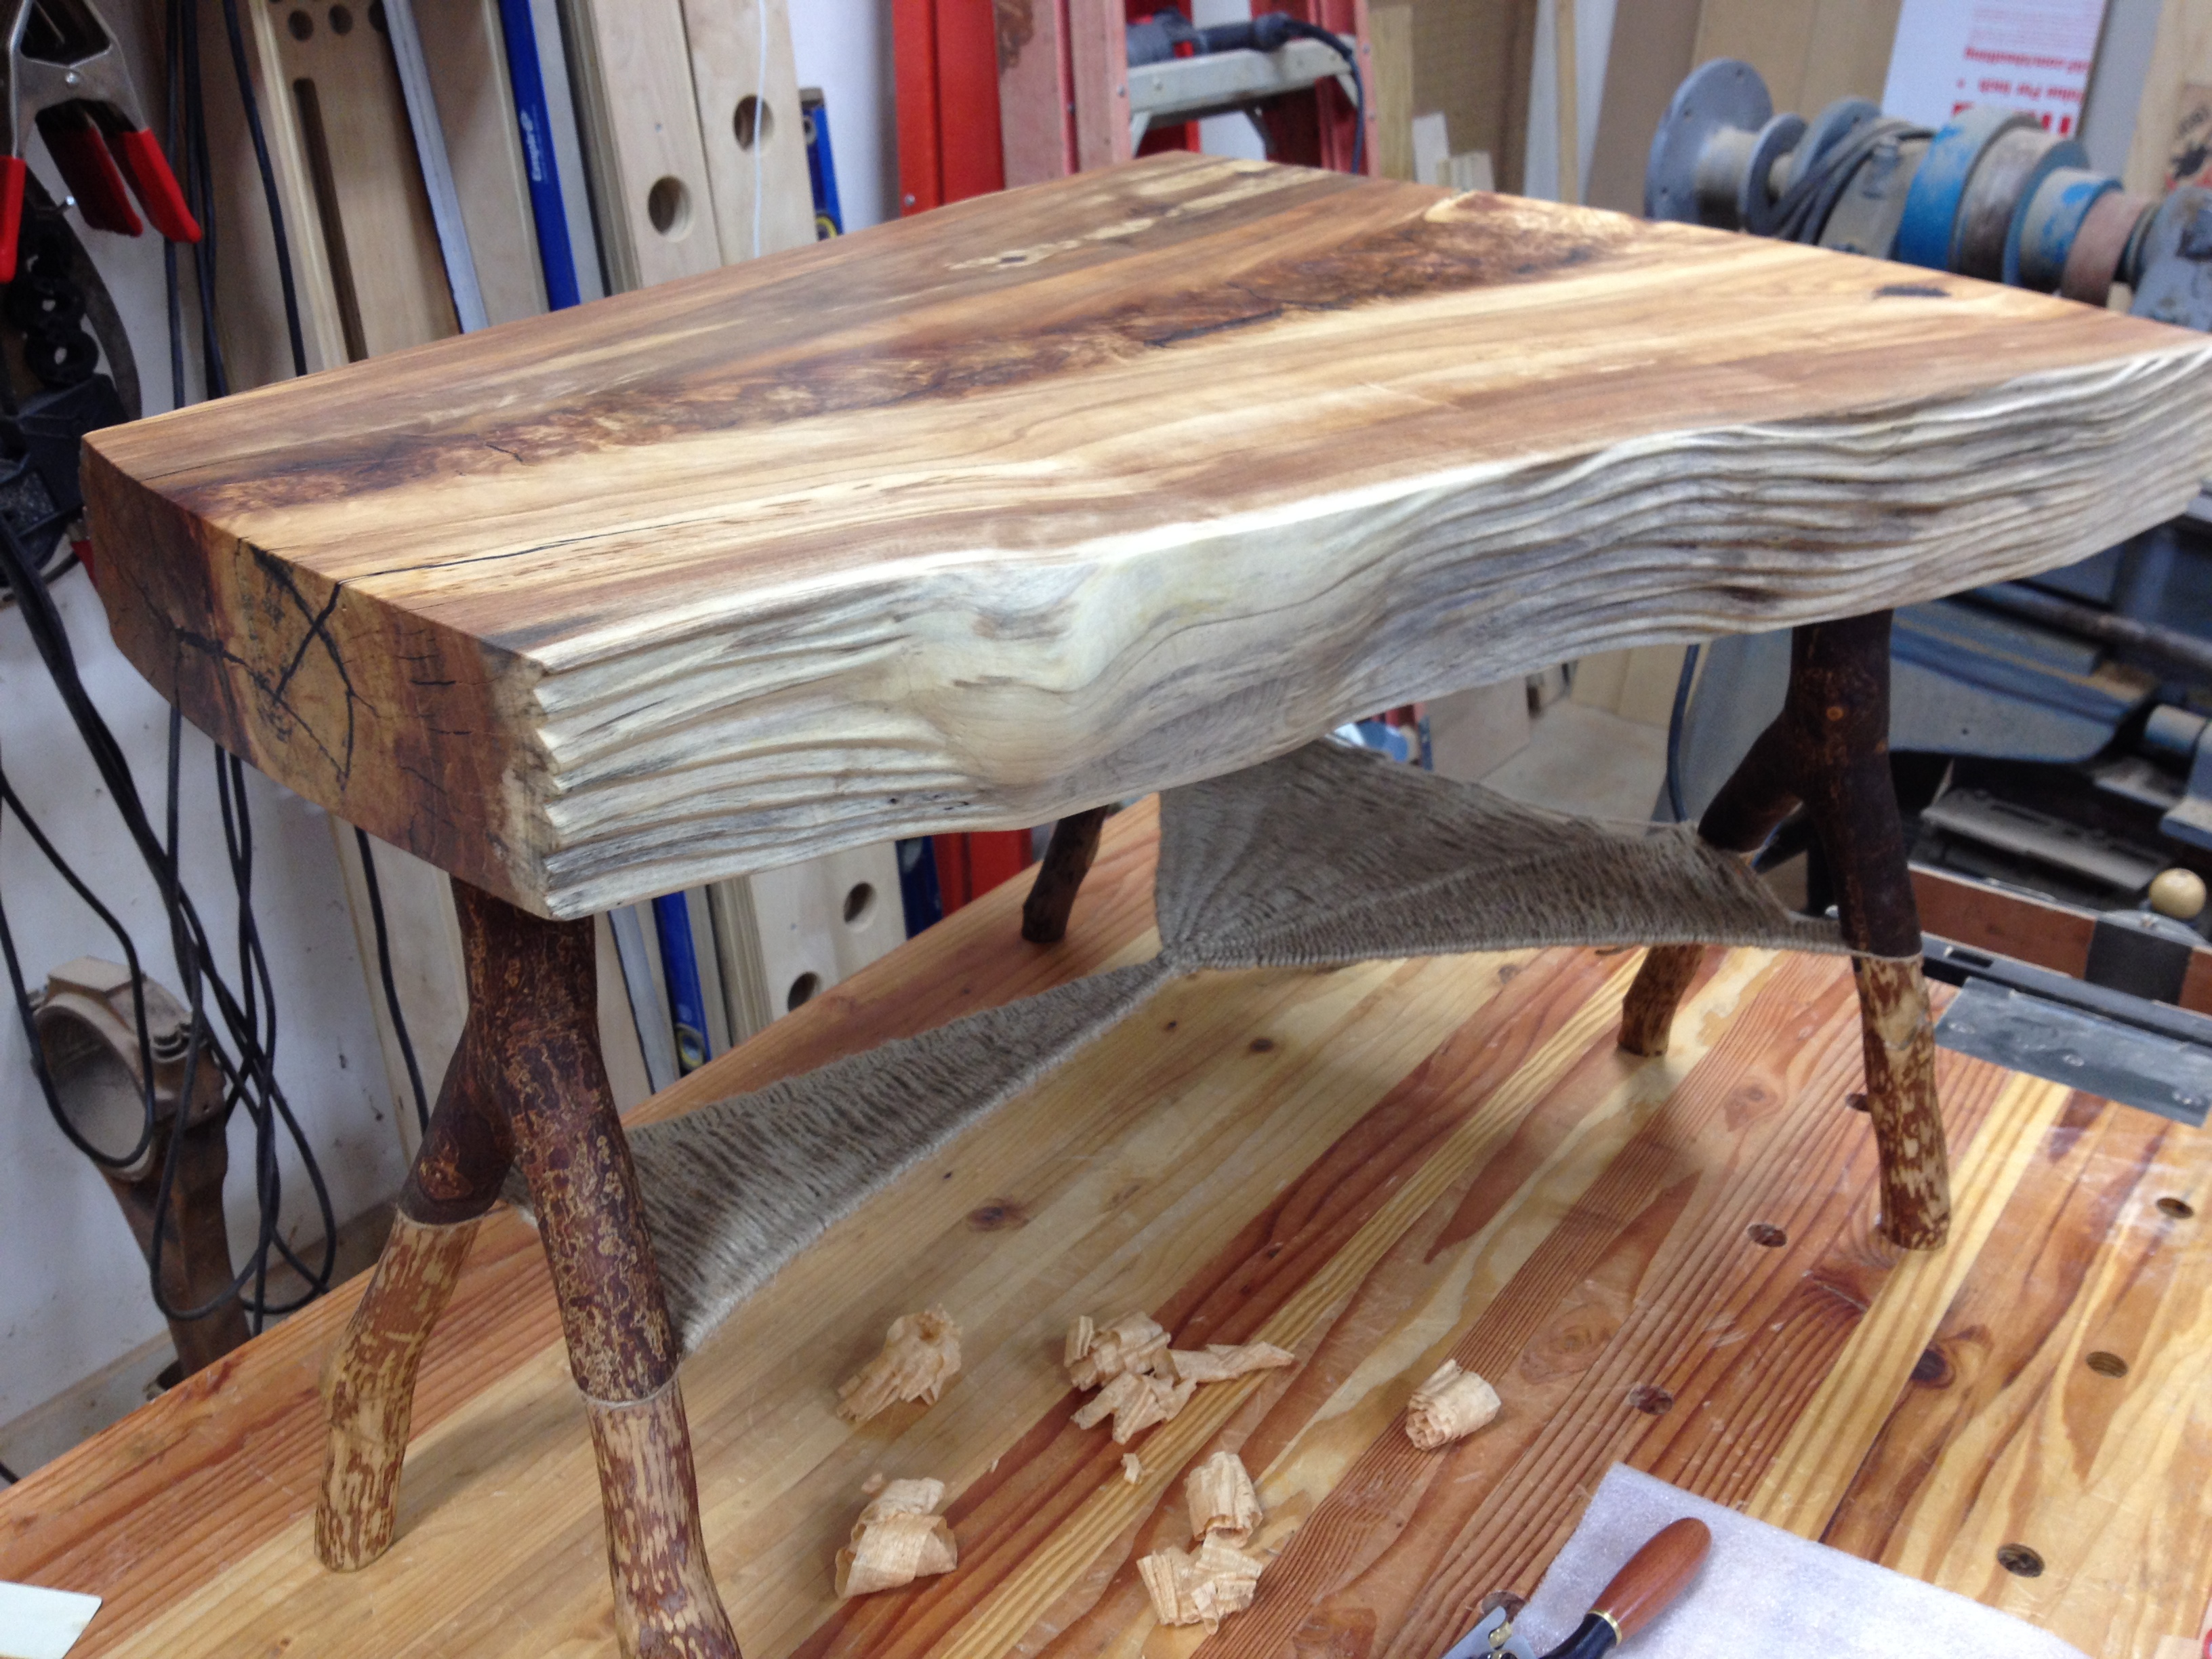
This post will highlight the natural leg coffee table finishing touches including the woven shelf and finishing process I applied to the piece. A huge thank you to Lisa McKenna for editing the video for this piece and putting it up on the blog, I love you.
The original design did not include a shelf but looking at the piece after the legs were installed I felt strongly that it needed a shelf of some kind for balance of the piece and functionality. I am a fan of danish cord used in modern pieces so I decided to go that route, sort of. I was able to find natural heavy duty jute cord at my local big box store and after some research selected this material for the shelf as a good choice for durability. So all told I wove about 400′ of jute cord in the suspended shelf taking about 20 hours!
The pattern of the weave was really just dictated by the final location of the legs resembling a spider web. I intentionally placed the height of the shelf just below the natural split in each leg, while still allowing enough height underneath for cleaning, it’s right at 6-3/4″ off the floor.
I knew I wanted the weave to converge at a center point below the top. So first I took a nail, heated it up and bent it in a circle. That nail was used as the center point in the weave where I connected all the supporting cords. I ran a continuous cord around each leg and back through the center ring (nail) until each leg had two runs of cord around it. This initial pattern is shown below.

Once the basic framework that supports the weaving was done, I broke this framework into four segments not wanting the weave to be round. I also added an additional two cords from the center ring outward within each segment for additional support. So each of the four segments has 4 supporting cords which the weave cord goes under and over. Once all these additional support cords were tied in and tightened, I began weaving one segment at a time using a continuous piece of cord for each segment. The weave is basic, just back and forth across the supporting cords going up and over, or down and over across each supporting cord. Rinse and repeat. I left the end of the cord for each of the four weave segments long and did not permanently tie them off until all four segments were done. I then went back and tightened up the four segments and tied off all the ends.


Prior to applying finish to any project, I look over the entire piece in detail for any surface flaws, machine marks, etc. I take this opportunity to address these surface flaws now. Any undesirable flaws will be magnified by surface coatings, stains, etc. This is also the last opportunity to smooth any sharp corners and final scrape or sand all the surfaces. I stronly prefer scraping to sanding because it results in a deeper reflection of the wood grain when finish is applied (this could be another post altogether). I place as much attention to detail in the finish surfaces and textures as I do in the actual building of the piece. Many times the finishing process can take longer that actually building the piece. Here is a photo of the top after surface preparation, it almost looks like it already has finish on it.

The finishing process for this piece involved a few simple steps using products available at any big box store. This is a finishing process that anyone can use and is almost foolproof, assuming we have the patience to allow each application of finish to cure properly. I used Watco Danish oil (natural color) and Minwax satin-sheen polyurethane. Both of these products can be wiped on with a lint free cloth.
The danish oil is flooded onto the surface and then wiped off 30 minutes after you apply it. Oil finishes penetrate the wood and leave no built up film. Oils do not provide great protection from moisture but they are great products when you are trying to achieve a “close to the wood” finish. The downside of oil based finishing products is the drying time of 72 hours between coats. I applied two oil based coats to this piece, allowing each to dry for 3 days.
Since this piece will serve as a coffee table, additional protection on top of the oil finish is needed to prevent water stains. I use polyurethane because it builds a good finish quickly, is compatible with oil based finishes, and is very durable. The process is simple, I apply two thin coats of satin sheen poly using a lint free piece of cloth. The key to getting a nice smooth finish with polyurethane is to put the finish on thin and quickly, never going back over any areas that get tacky. Going over an area after the surface has begun to dry even the slightest will result in two problems, the first is lines in the finish and the second is the surface will have a different sheen to it under certain angles of light. Between coats I very lightly sand using 400 grit sandpaper to knock down any debris that gets into the finish.


This finishing process has a quick learning curve and great results can be achieved without a lot of finishing experience.
That’s it! Thanks and shalom.
