I read a story not long ago that reminded me of the importance of trials in life. Stated another way, working toward a desired outcome in light of failures and setbacks until mastery or success is achieved. This is at the very roots of scientific theory and the road map followed by a majority of people involved in discovery.
The story is that of an art teacher instructing a pottery class who graded his students in two very different ways. The instructor separated the class into two groups at random. The instructor announced that Group A would be graded solely on the quantity of pieces they produced, regardless of quality. Group B was to be graded solely by the quality of the pieces they produced, regardless of how many pieces each student made. Only one perfect piece was required to get an A.
By the end of the course an interesting pattern was clear: the works of highest quality were all produced by Group A, the group instructed to churn out large quantities of work regardless of quality. While the “quantity” group was busy churning out piece after piece and learning from each experience or trial, the “quality” group had sat theorizing about ceramic perfection, and in the end had little more to show for their efforts than formless head knowledge and dead clay.
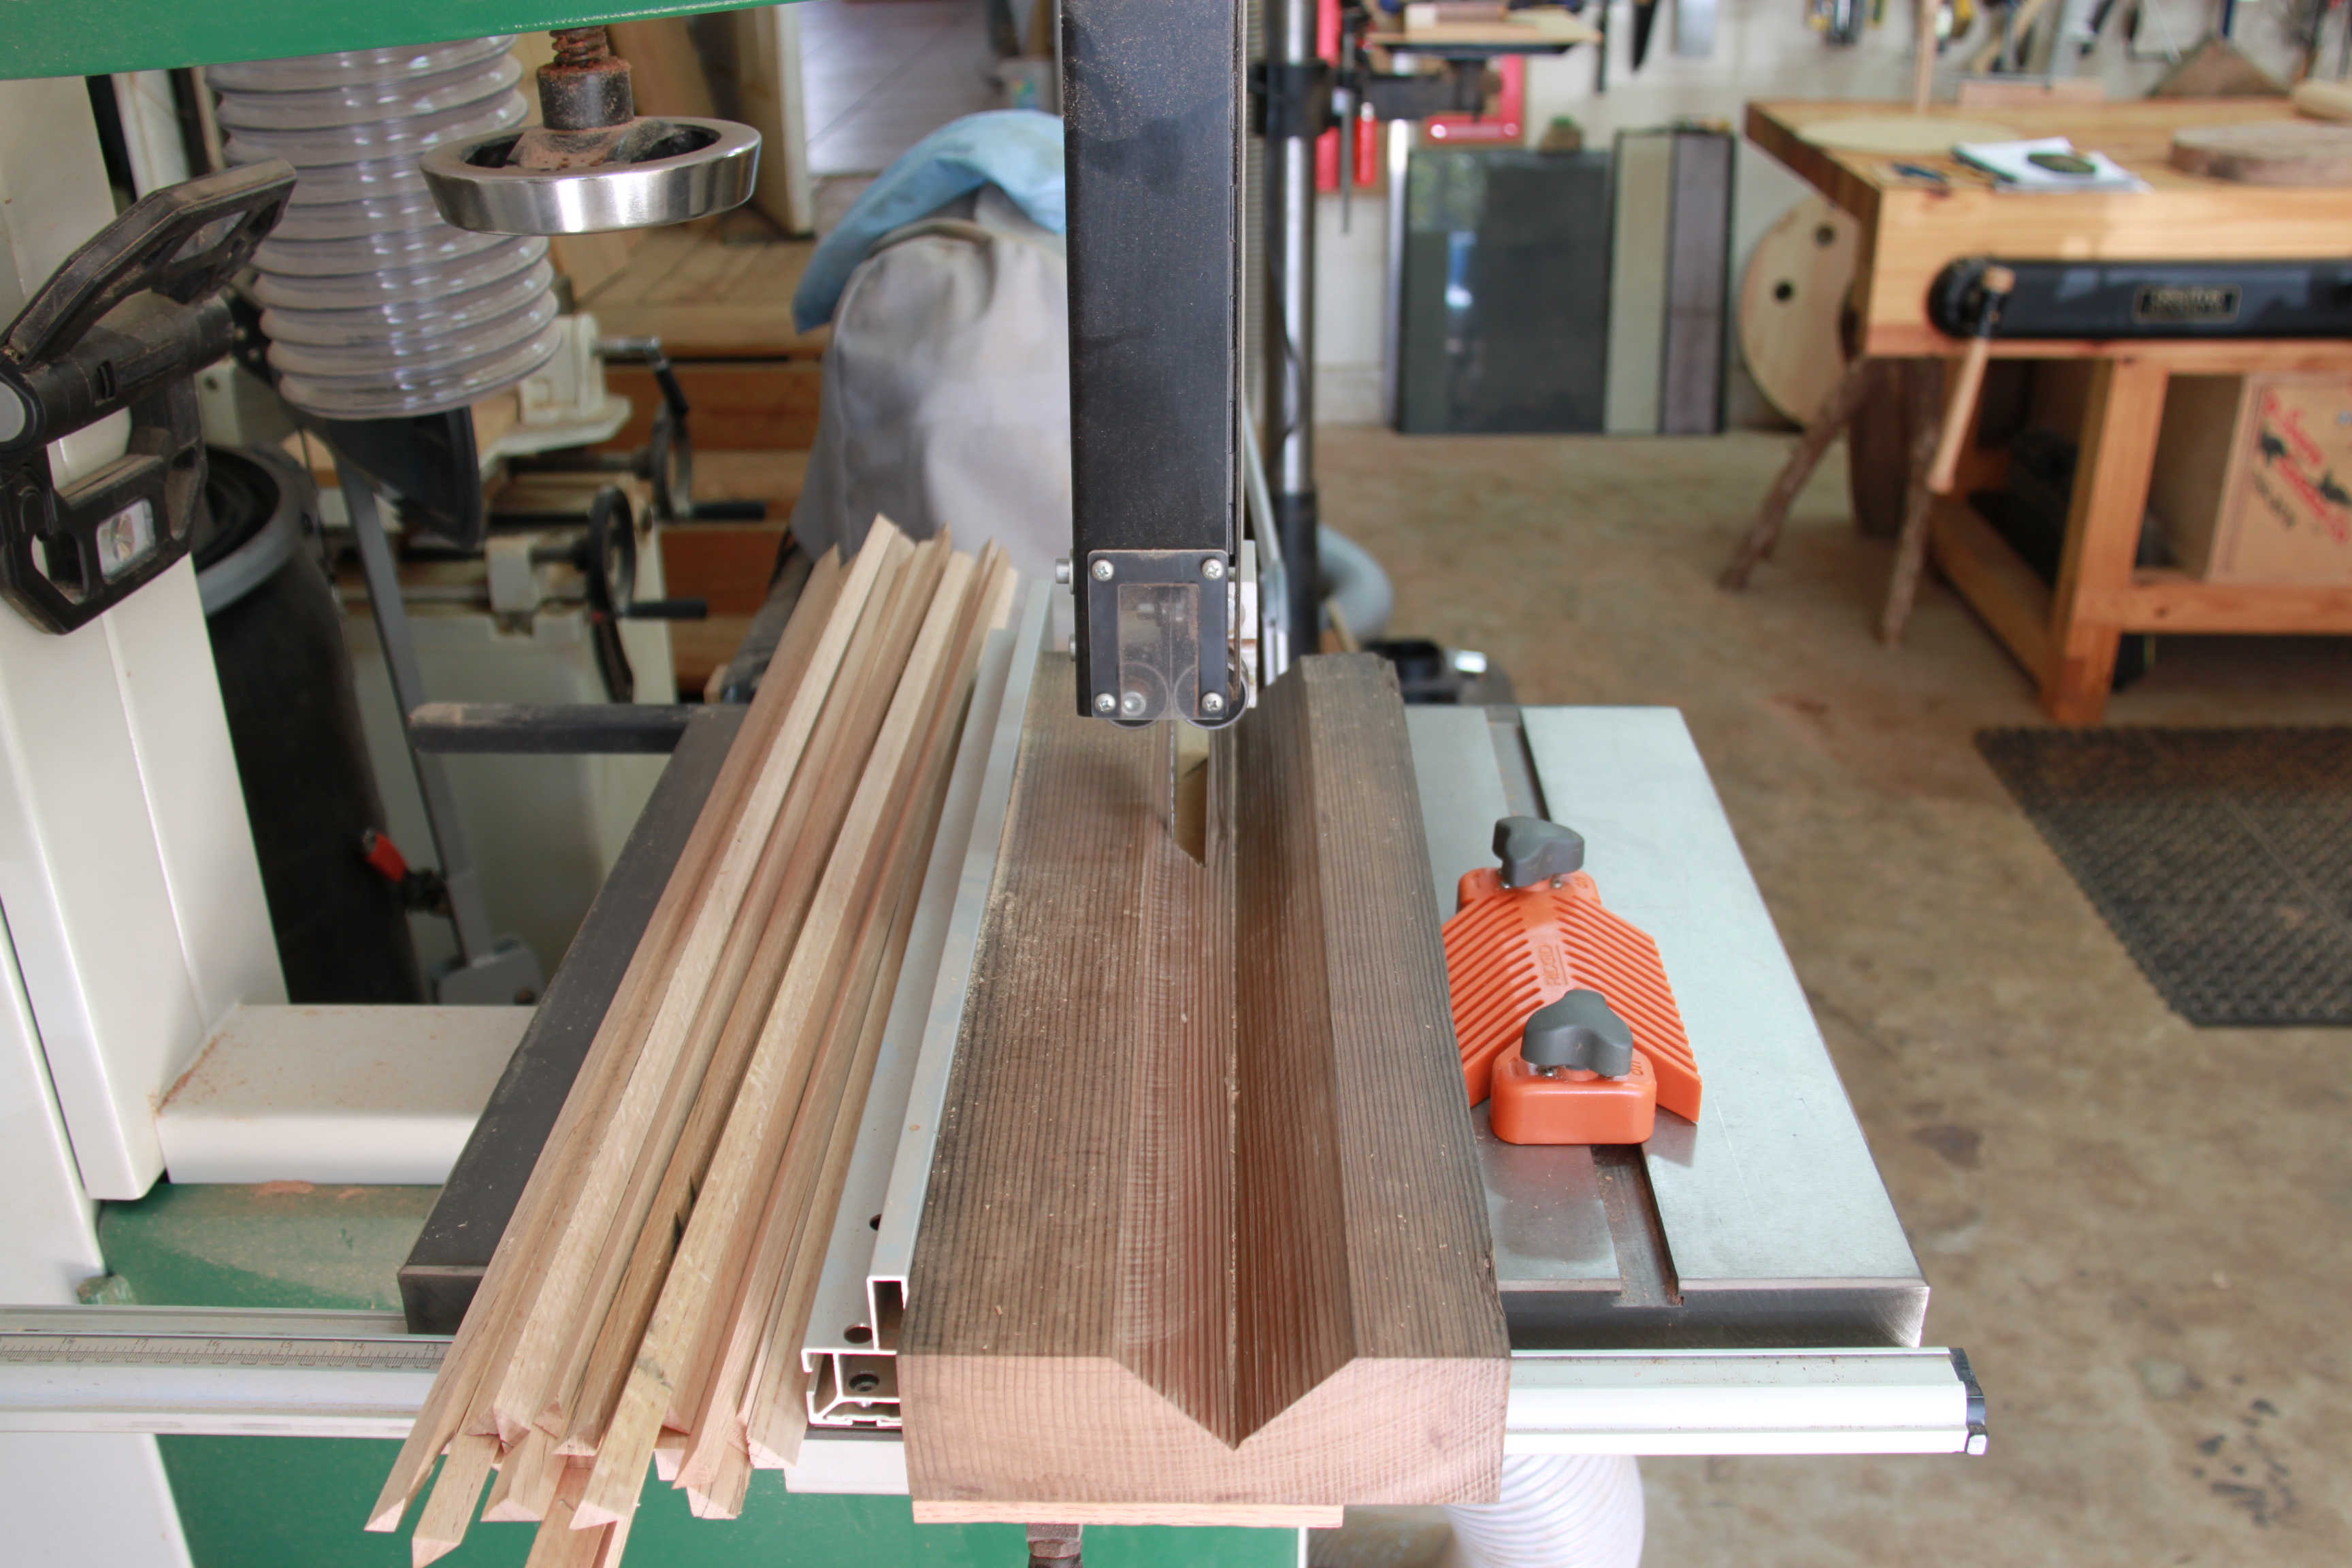
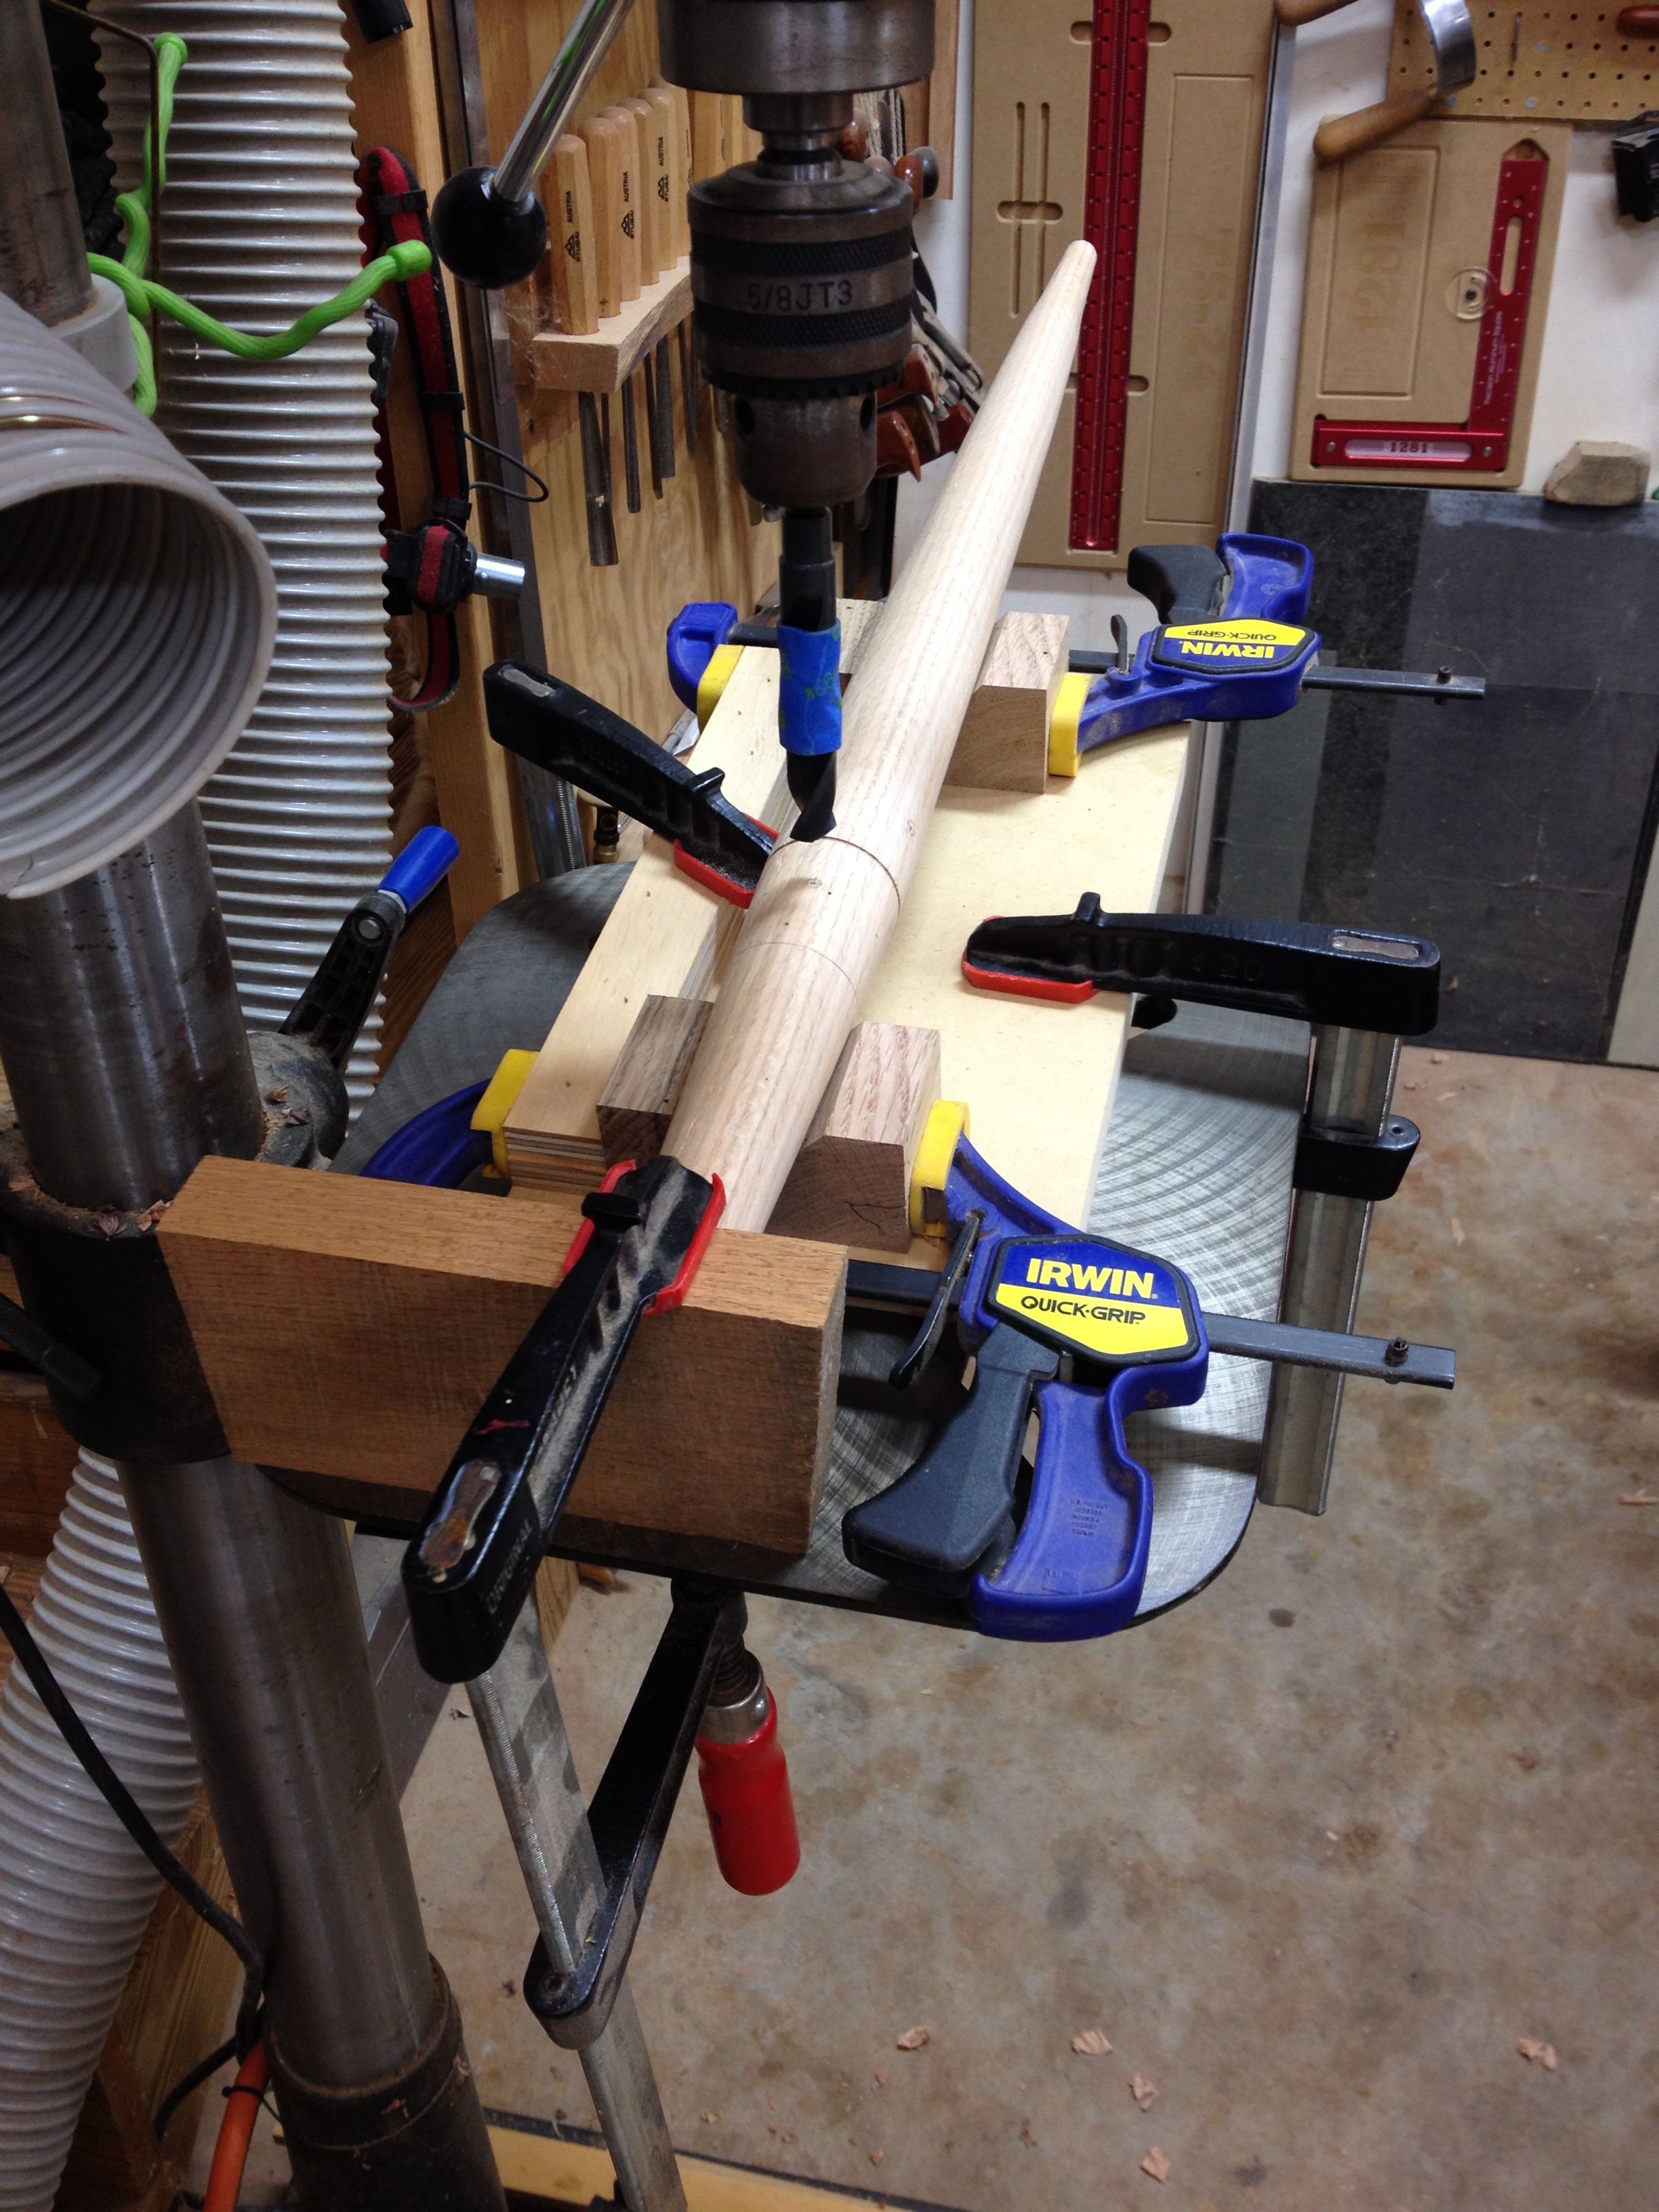
When tackling a new process or design I find it a wise investment of resources to set up trials to test and work through new processes prior to jumping ahead and setting myself up for failure. In this case I have started a new design for a set of shelves which can either be hung from a wall or freestanding from the floor. Each side of the shelving unit will be comprised of two steam bent components. Each will have 4 separate bends with a bending radius of 5 1/2″. This is an aggressive bend to say the least. To facilitate the design I will ultimately have to build a pair of bending forms, a significant investment of time and money to complete.
So prior to building the forms, I need to prepare and prove specific elements of the design thru some worst case scenario practice bends. The following video explains the details of the steam bending trial further as I recorded the work.
Looking forward to this design coming to life it should be a really cool piece. Once I have the process down and the forms made, it’s a design I hope to be able to reproduce in a very efficient and cost effective manner. Thanks again for visiting and watching, take care.
Hello again, this post will be brief as I am now supplementing my typical long winded verbiage with video clips to better explain the various woodworking techniques and methods I will continue to share.
As usual I have to add a bit of something to think upon. This following brief missive is telling about the world we live in today and a lesson from world history in times of war and unrest.
On this day in 1941, Joseph Goebbels publishes in the German magazine Das Reich that “The Jews wanted the war, and now they have it”—referring to the Nazi propaganda scheme to shift the blame for the world war onto European Jewry, thereby giving the Nazis a rationalization for the so-called Final Solution. Joseph Goebbels was a German politician and Reich Minister of Propaganda in Nazi Germany from 1933 to 1945. One of Adolf Hitler’s close associates and most devoted followers, he was known for his deep and virulent antisemitism, which led to his supporting the attempted extermination of the Jews in the Holocaust.
A similar rationalization, and lies are being told today, albeit by a different fundamentalist group. I do not believe that all fundamentalists and fundamentalist cultures are bad or evil (however you choose to see it), The Amish, are by definition fundamentalists, but I have never seen an Amish terrorist. Everyone alive in the world today knows what I am talking about.
Hitler committed suicide on April 30, 1945. In accordance with Hitler’s will, Goebbels succeeded him as Chancellor of Germany; he served only one day in this post. The following day, Goebbels and his wife committed suicide, after poisoning their six children. So what’s the point? I am saddened by the world we live in, however at the same time I have a deep and true hope for the world in knowing that good will triumph over evil.
Ok then, back to woodworking! My previous post and videos for the stool making series covered the design, construction of the main stool components, and the rough seat shaping which preceed the glue-up of the stool, final shaping details of the seat, and leveling of the stool legs.
The following video shows the final steps of the stool construction prior to the glue-up. I highlight a completed stool for comparison sake and to show the results of the methods I used in the construction of the stool from first blog post. The video also captures in detail how I shape the back side of the seat.
Once the stretchers have been trimmed to length, the leg tenons have been sawed to receive a wedge, the wedges have been made to fit each leg tenon, and the seat-back have been shaped I move on to performing the glue-up of the stool. This is a somewhat simple glue-up process if you use a clear system of marking all your components and approach it in a systematic process.
The following video shows the the entire stool glue-up process. I lightly discuss why I use hide-glue and the “worlds best hide glue pot”. I also encounter some rough waters in driving the wedges in from the top of the seat into the leg tenons which may help you learn from the process.
With the stool assembled, my last video in the stool making series captures how I trim the legs to sit level on the floor, trim the ends of the tenons/wedges, and the final shaping details for the seat.
I will not be making a video on the painting and finishing application for the stool but I did want to note the finishing method and materials I use and why. For chairs and stools, I use natural Watco Danish Oil finish which is available at your local big box store. There are a few reasons I choose this finish material. First is I like a close to the wood finish that is achieved by using an oil finish. Second and most importantly, this finish is easy to maintain. Chairs and Stools take a beating over the course of their lifespans. An oil finish does not leave a film on the surface of the wood, therefor there is no film to scratch or flake off over time. To renew or refinish all you have to do is clean the piece with light detergent, let it dry, and wipe on/off new finish and you have a like new looking piece of furniture.
I hope you have enjoyed the videos and information presented in this series. Please leave your comments and feedback on my site. Thanks again and shalom.
In 1901 Gustav Stickley had the forward thinking and insight to state “In 100 years, good oak furniture will be worth many times its first cost. For the time is coming when it will be valuable on account of its permanent worth and its scarcity.” We have arrived but I don’t think ole Gustav would have guessed the particulars behind the scarcity.
I quoted a large commission today for a potential client giving them 5 options for different species and was blown back by the per board-foot cost, and in some cases the total lack of availability of White Oak.
Here in Georgia I can now buy Walnut for nearly the same price as White Oak, and I can buy African Mahogany for half of both the previously mentioned species. I can’t figure out if that’s a good thing?
Walnut is anywhere from 9.00-15.00 per board foot depending on quality. But overall, the quality is rarely good in the South East part of the States.
In case you are not aware, 1 board foot of lumber is 12″ X 12″ X 1″ thick. Now if that same 12″ X 12″ board were 4″ thick, you would be buying 4 board feet and spending around $50-$60 with tax for either White Oak or Walnut. Unless you make turned bowls or cheese platters $100 dollars will get you almost nowhere in furniture making.
Every time I quote a project or people see the pricing of my work I’m sure they think what I used to think, it’s not worth the price.
And that’s fair, you can certainly buy 8-10 Ikea dining tables or coffee tables for the price of one Eric McKenna made piece of furniture and then throw those away when they fall apart and keep the cycle going. This is where my blood pressure kicks and it’s telling me to stop going, you get the point I hope.
The last point I will make is that it takes 100-200 years for most hardwood trees to grow to maturity, if we were smart and thought about the math a little bit, in order to maintain a stable supply of this finite material we have to design, build, buy, and keep pieces of furniture that are built well enough to last at least that long. This is easily possible.
Is bourbon consumption really worth the impact to the makers who use this finite material to build pieces of lasting value, and the cost impact to the smart consumers who cherish and own them for generations to come?
I am not saying that it’s a total waste for bourbon to be made from only new oak barrels (yes this is actually a Federal Law) because there are second and third and fourth stream uses for those one time only bourbon barrels.
What I am definitely saying is that this Bourbon making law is about as smart and effective as building furniture from particle board.
The next time I quote a potential Client, I will have to ask them to have a bourbon before we talk about price, or please go have one now (if you are not driving) before you look at the prices of my completed work.
If you think a stool is normally an object that sinks in a toilet or swimming pool this post may be somewhat confusing for you, but educational none the less. Not that anyone has noticed but it has been many moons since my last post, primarily because I have been busy bringing new ideas and designs to life in the shop. At least that is my excuse.
My visit to the emergency room this past Saturday has provided me the opportunity to write again so there is a bright side to every circumstance. I did a serious number on my left index finger with a #7 gouge while I was flushing up thru-tenons on a seat. I will say no more, but I do have cut/puncture resistant gloves on the way!
One of those projects is a set of modern windsor style stools I’m building to compliment a tall cafe table I recently completed. These stools are a great opportunity to share design and woodworking insights that can be applied to many different styles of chairs and stools. I was inspired by the work of chair maker Peter Galbert. I encourage all those interested in the art of chair making to visit all the sites I have linked to below.
My goal for this post is to really step up my game on the education side of building furniture. To that end, I produced some video content that is integral to this post. I plan to continue this level of effort for future posts to enhance the quality of my content. So let’s jump in the pool and get down to business.
Stool Design-
Great furniture design should always result in a piece that is beautiful, useful, durable beyond expectation, and of course comfortable. The primary difference between this stool and most others is the shaping and sitting angle of the seat. As mentioned above the inspiration for this pair of stools came from Peter Galbert’s posts on his “Perch” stool design. My design does differ in a few areas which I will point out as I go along. I will also share photos of my patterns for the seat and legs below in the construction section for the purpose of your guidance.
The Legs –
I am not particularly fond of faithful Windsor design elements, especially the ornate details often found in the turnings of the legs and stretchers. So I began with legs and stretchers that have straight tapers, often these legs are referred to as “cigar” style legs. The legs are also about 4″ longer than an average stool leg to compliment the height of the table they are being paired with. I also like my legs to be a little thicker, about 2″ at the widest point. This adds weight to the undercarriage and lowers the center of gravity preventing the stool from being tippy.
The front legs of my stools are 1/2″ shorter than the back legs which tilts the seat forward slightly once it is all assembled. The result is that your pelvis is encouraged to roll forward and places the spine in a natural and comfortable position when sitting. On the first stool I made I thought to myself “the more forward pitch, the better”….I was wrong and really recommend keeping it very slight!
If you plan to build a stool with a forward tilting seat, your feet must be able to either rest on the ground or some part of the chair or stool itself. Without a place to land the feet, you will want to slide forward. To illustrate how seating angles affect the body, try sitting on something that is pitched backwards with no back rest, it is extremely uncomfortable because your core muscles will fight to stay upright. If you sit on something flat for any extended period of time we tend to haunch over.
The Stretchers –
For these stools I know that unless a client is 6′-6” tall or better, they will need a place to rest their feet other than the ground due to the height of the seat. Taking the overall seat height into account I decided to also raise the height of the stretchers from the ground far above what would be considered standard so that when sitting, an average height person can comfortably rest their feet on the stretchers. In order to accommodate a place for the feet, there are stretchers that run between each leg. In it’s basic form, this type of stool is made up of 4 triangles, which is very strong when joined using traditional techniques.
The Seat –
As far as the seat I was faithful to tradition in the shaping and deep relief of the seat itself. These carved seats are beautiful and comfortable with no pressure points on the bum. There is already a lot of great information out there on Windsor seat shaping so I will not go into detail on it here other than to say be aware in your choice of wood as there is a direct correlation between the type of wood you select for the seat and the expletives that will come out of your mouth while shaping it with hand tools. Unless of course you want to take the easy road and use some type of grinding tool to shape the seat. I cant say too much because I have shaped seats by hand and using a Kutzall wheel. Both get the job done, and both have pros and cons. Hand shaping on softer wood is a very pleasant experience if you have the the right tools and they are sharp. Power grinding is loud, messy, and IMHO is a method that takes more practice to control.
Stool Construction-
Chairs and stools can be quite the mental challenge when you have never tackled one before. However, when you break them down and apply a systematic approach to the construction it can be surprisingly simple with a few tips and tricks. My goal here is to break down the steps so anyone can understand the process of building a stool. There are some specialty tools involved in the process and I will do my best to point those out and make recommendations for alternatives. Build a couple of stools and you will be ready for more challenging chair work I promise.
Wood Selection –
My stool design is made from 7 pieces of wood, a seat, 3 legs, and 3 stretchers. The type and quality of wood you select is very important, you need a good hardwood for the legs and stretchers. Straight grain Maple is the best wood for turned chair parts in terms of holding detail and ease of turning. I used white oak and there are a couple of properties you need to be aware of when turning ring-porous woods like oak and hickory that I touch on below.
When selecting wood for the seat, almost any sound wood can be used so factor in what your aesthetic objective is. Traditionally, a softwood species is used for the seat and then the piece is painted to cover the contrasting colors of different wood species. Softwood is used simply for the ease of shaping but be aware that softwood seats can also be dented easily by keys in pockets and general banging around. The stools in this post are made entirely from white oak. In fact I used the same board for the stool seats as the table top for the purpose of continuity and a custom touch.
For those who don’t have access to good quality chair materials, here are a couple of resources worth looking into. You can purchase maple or oak chair components from Dan Monsees. You can also purchase softwood seat blanks and other chair components from Hancock Forest Products.
There are two major schools of thought when it comes to selecting and processing materials for chair construction. I have used both methods and each has its pros and cons. For the sake of my time I have embedded links below to chair makers who cover each methodology in greater detail than I could accomplish here.
First, there are those who rive or split rough stock out of green/wet logs, using the science of wood shrinkage and expansion to achieve superior strength joinery. Riven stock can be incredible strong and flexible. You can learn all you want to know about the pros and cons of using green wood by reviewing Curtis Buchanan’s YouTube videos or Peter Galbert’s blog posts and videos, both of which are free!
Second, there are those who use air dried lumber, selecting appropriate grain orientation for each part. You can learn all you want to know about the pros and cons of using air dried lumber by reviewing the fantastic information presented in Jeff Lefkowitz’s blog posts on building the Brian Boggs ladder back chair.
Before I move on to how I process the materials I use, I want to point out that I typically use air dried lumber that I saw myself from whole logs. This gives me total control of color consistency (assuming I’m not painting the project), grain orientation, and grain run-out.
I begin the construction process for my stools by roughing out the stretcher and leg blanks and super drying the stretchers in my light bulb kiln. I want to get the stretcher blanks in the kiln as soon as possible in the process and I find that about 1 week in the kiln is sufficient to get the blanks bone dry. I aim to produce a square blank with absolutely no grain run-out. The grain orientation for these blanks is not important because they will be turned round on the lathe. The rough dimensions I shoot for on my stretchers is 1-5/8″ X 1-5/8″ X 16″ long. This size of stretcher stock will work for nearly any stool.
Once the stretcher blanks are in the kiln and the leg blanks are milled up I turn my attention to the seat. Before I move on to the seat please note that I am letting the leg blanks rest and and move around before I continue processing them. For most stools a leg blank with the rough dimensions of 2″ X 2″ X 31″ long is sufficient.
So at this point I have the stretcher blanks drying and the leg blanks resting. I now turn my attention to processing the seat material. The overall dimensions, leg locations, and drilling angles of the stool seats I use is based on Peter Galbert’s Perch seat pattern. The thickness of the seat can vary depending on the wood you use. General rule of thumb is the harder the wood, the thinner the seat can be. I shoot to start with a 2″ thick blank no matter what kind of wood I’m using which allows the seat to be relieved deeply and results in greater comfort. Below are detailed photos of my seat pattern.
Stool Seat Pattern
The above photos and links should get you to the point where you can produce your own pattern.
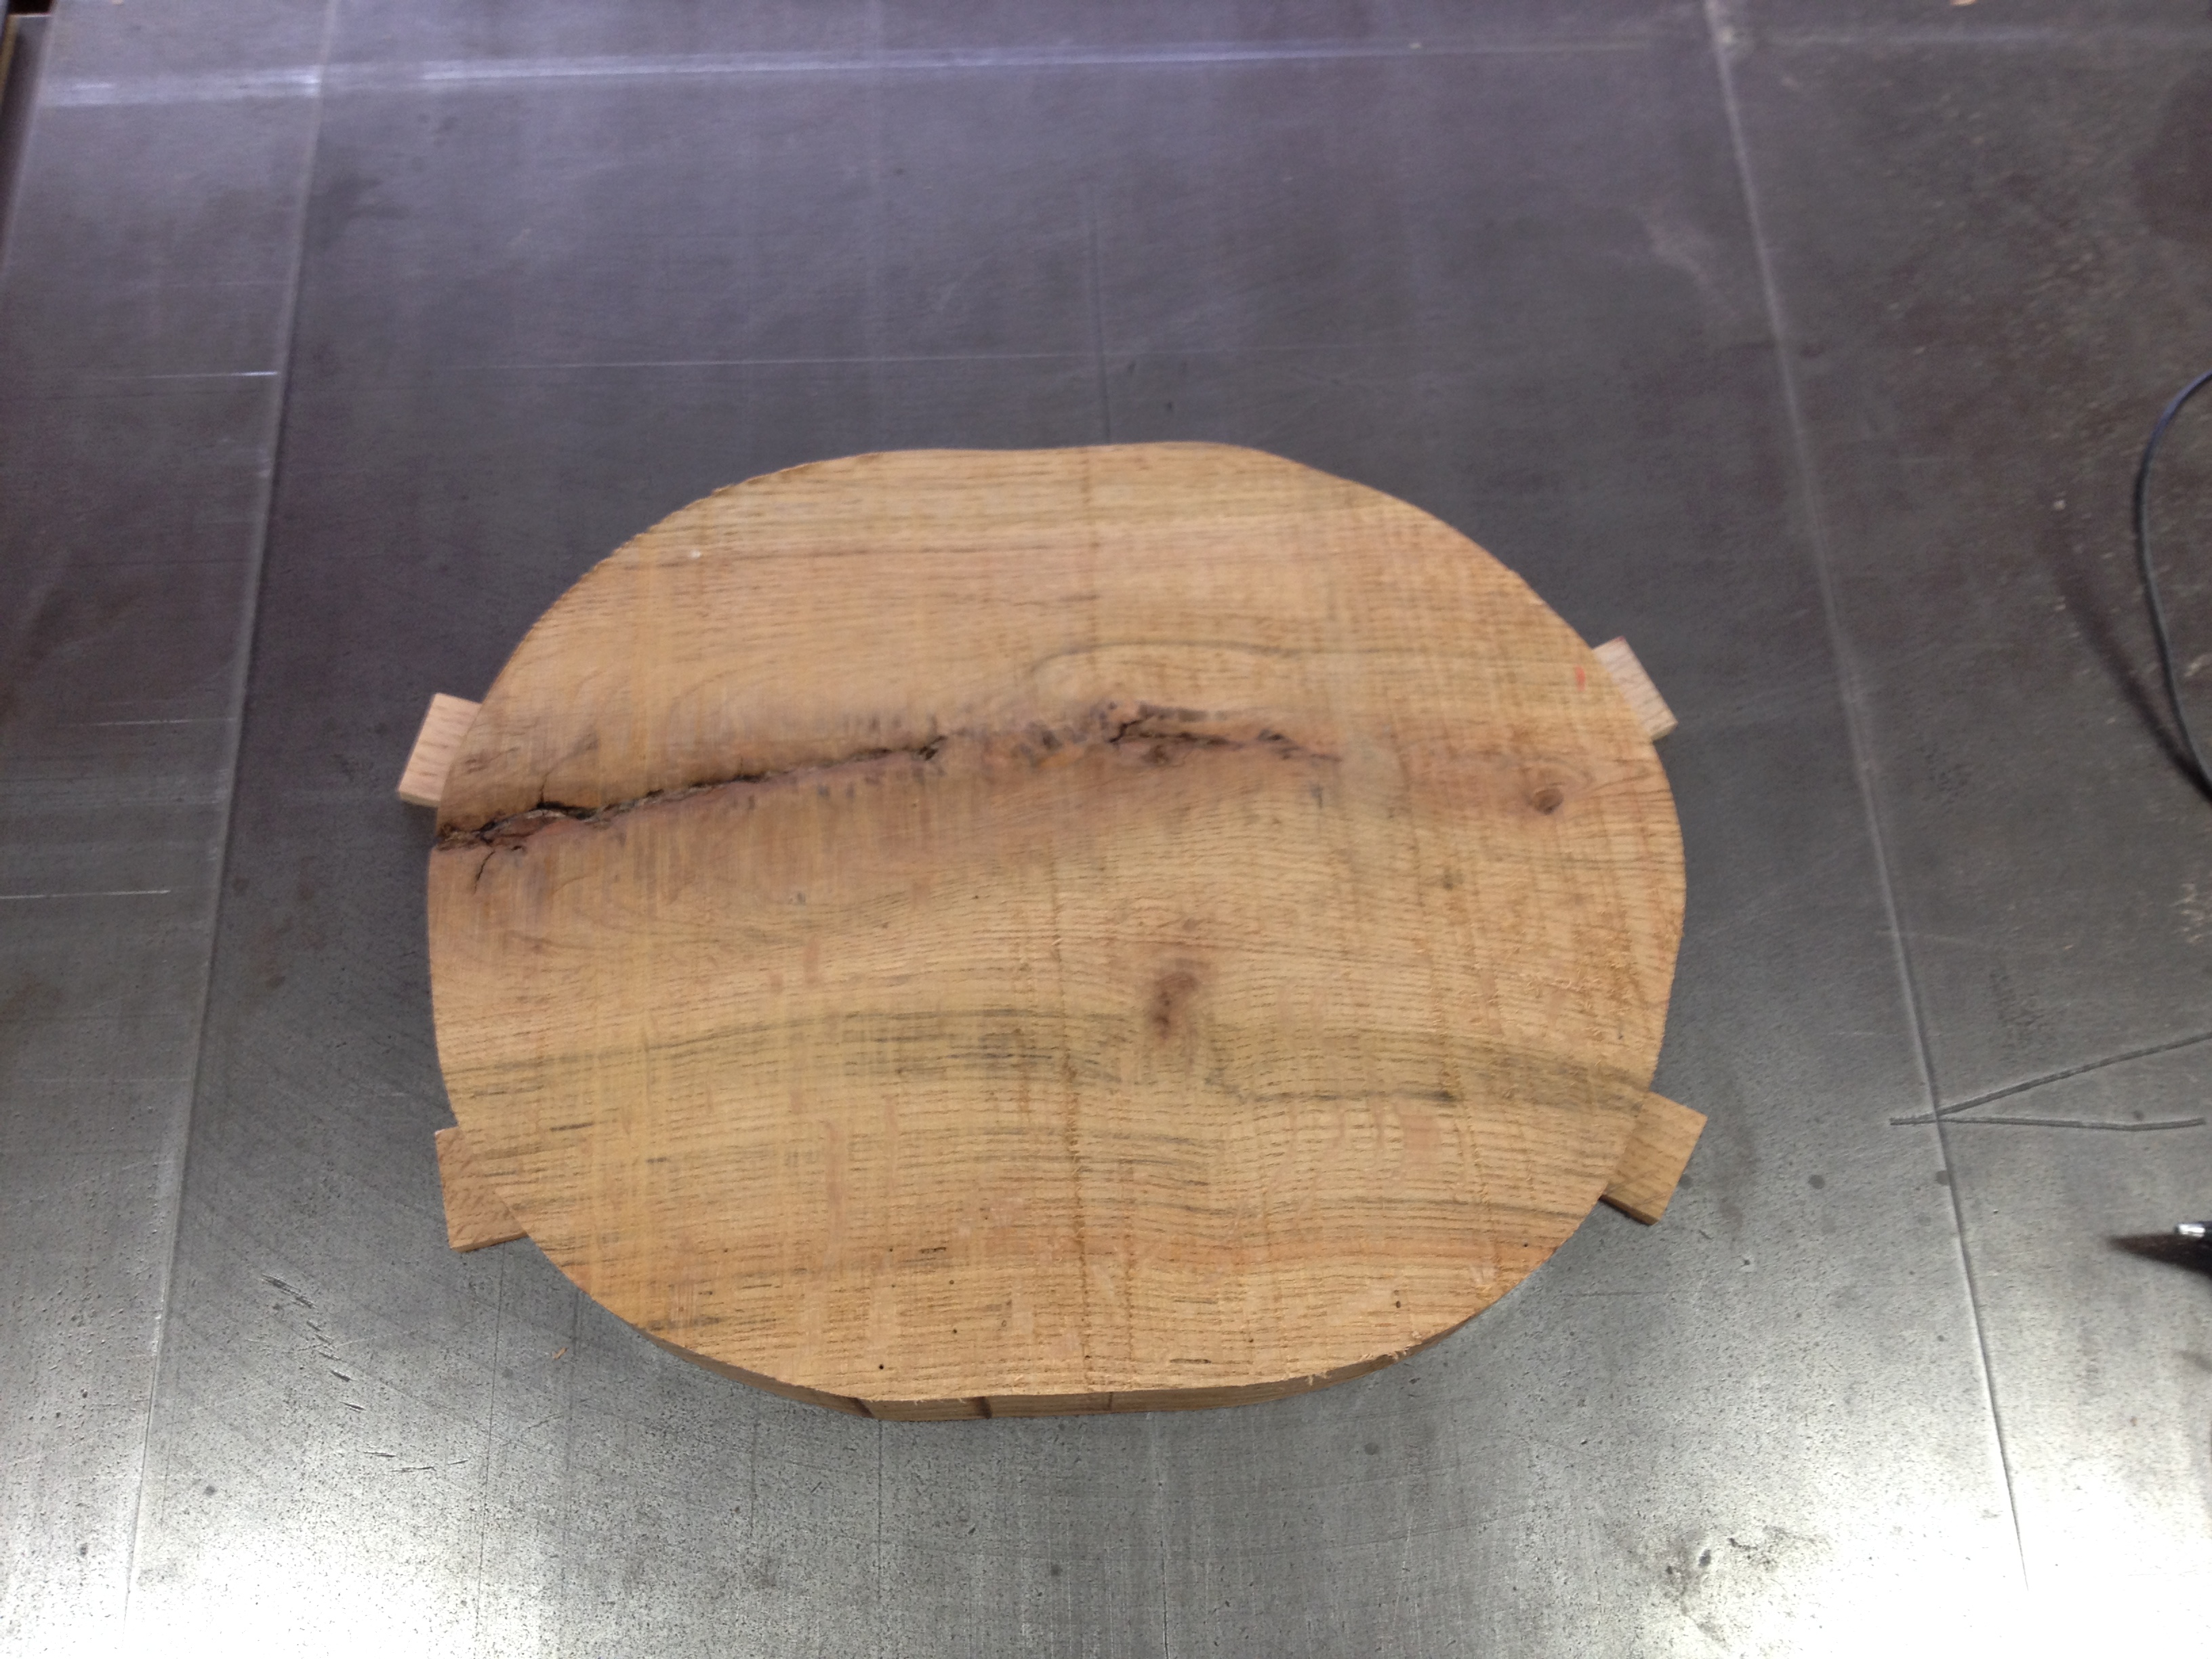
The first step in the process of creating the seat is to cut out the seat from a +2″ thick blank and flatten the seat blank to a final thickness of +/-2″. I cut out the seat blank on my bandsaw following the line I traced on the blank from my pattern as close as possible. This does not have to be perfect but needs to be close. Don’t get hung up on cutting the perimeter exactly!
I am fortunate to have a 12″ jointer and a 13″ planer. The seat is 12″ deep, even for my jointer it’s a stretch. Most folks don’t have a 12″ jointer but most do have a 12″ or larger planer. With that in mind I want to show you an easy process to flatten seat blanks using only a planer. You can also flatten your seat blank with a jointer plane by hand which is also a fine method.
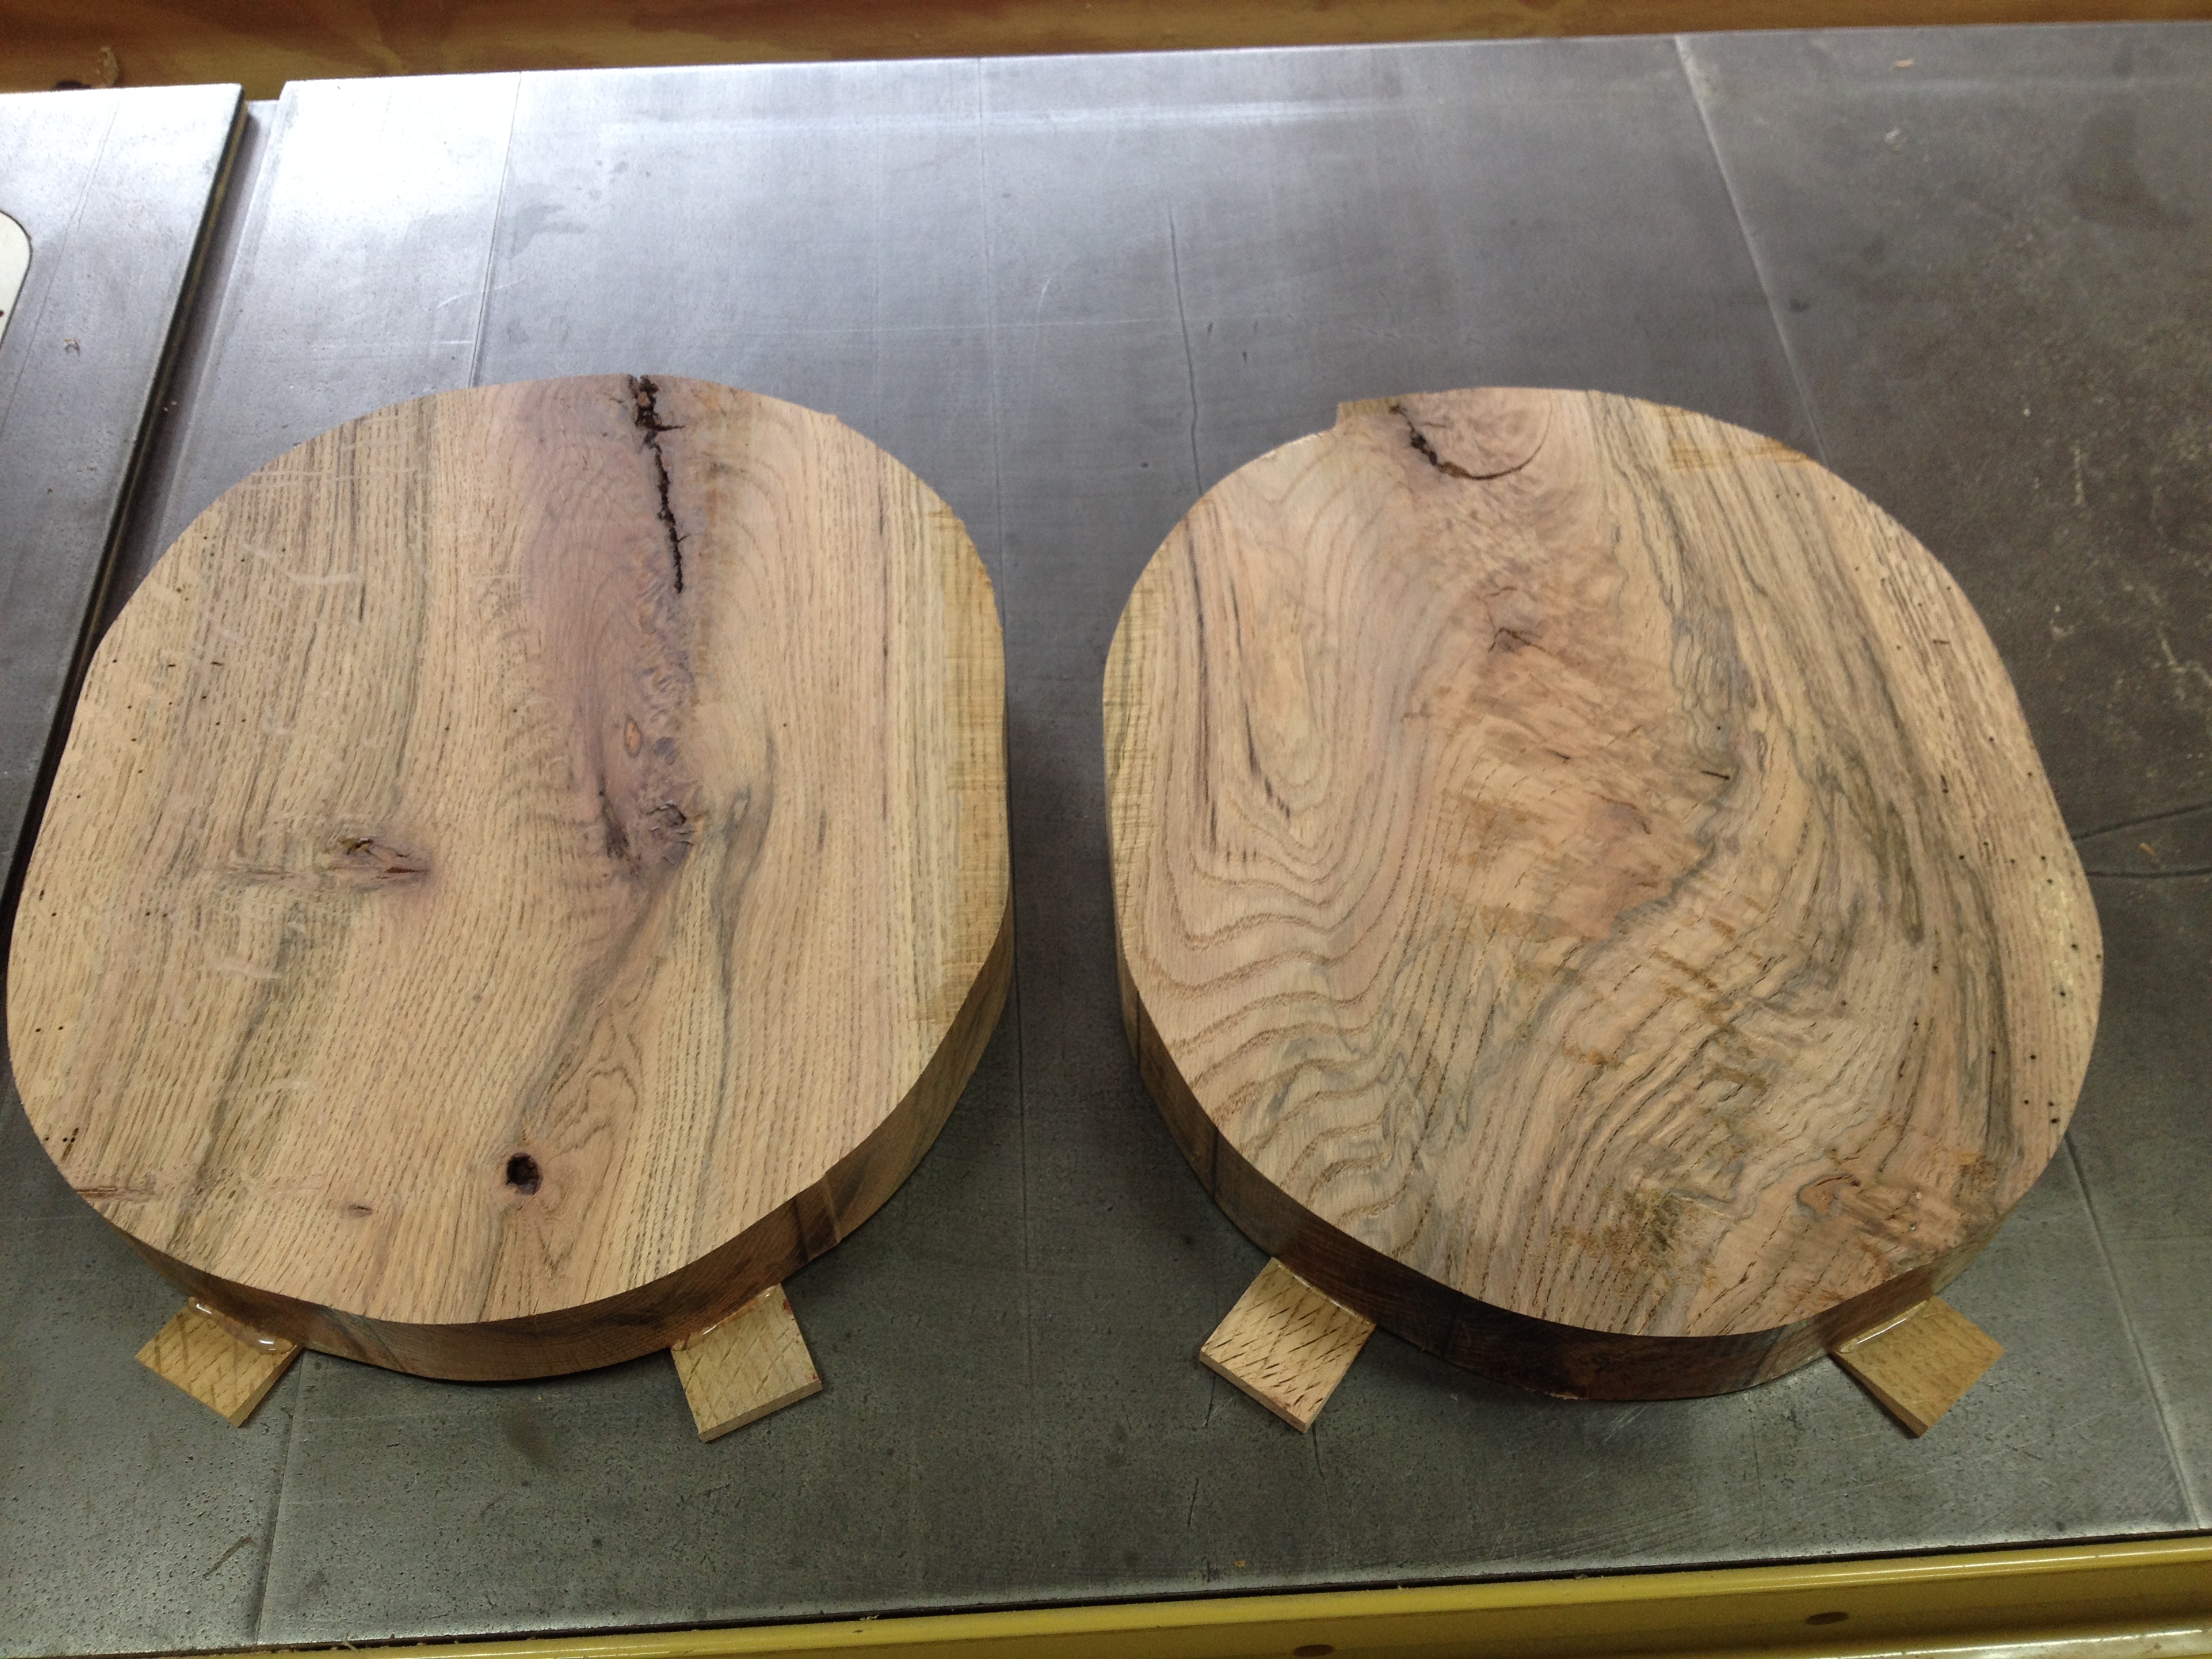
To flatten the seat blanks with the planer I begin by placing the blanks on a flat surface with the concave face of the board down. I then use short wooden shims to remove any rocking and secure them with hot glue. I hot glue the shims on the top and bottom to ensure they do not move when traveling through the planer. The photos below illustrate this process. You could use a planer sled but it is not necessary if the wood you are planing is long enough to contact both rollers when going through the machine.
Here are the seat blanks after passing them through the planer several times. If you have some unplaned areas in the middle of the blank that is fine because the middle of the seat will be cut away during the shaping process. Once you have one face flat, the shims will pull off fairly easily and you can pass the opposite face through the planer.
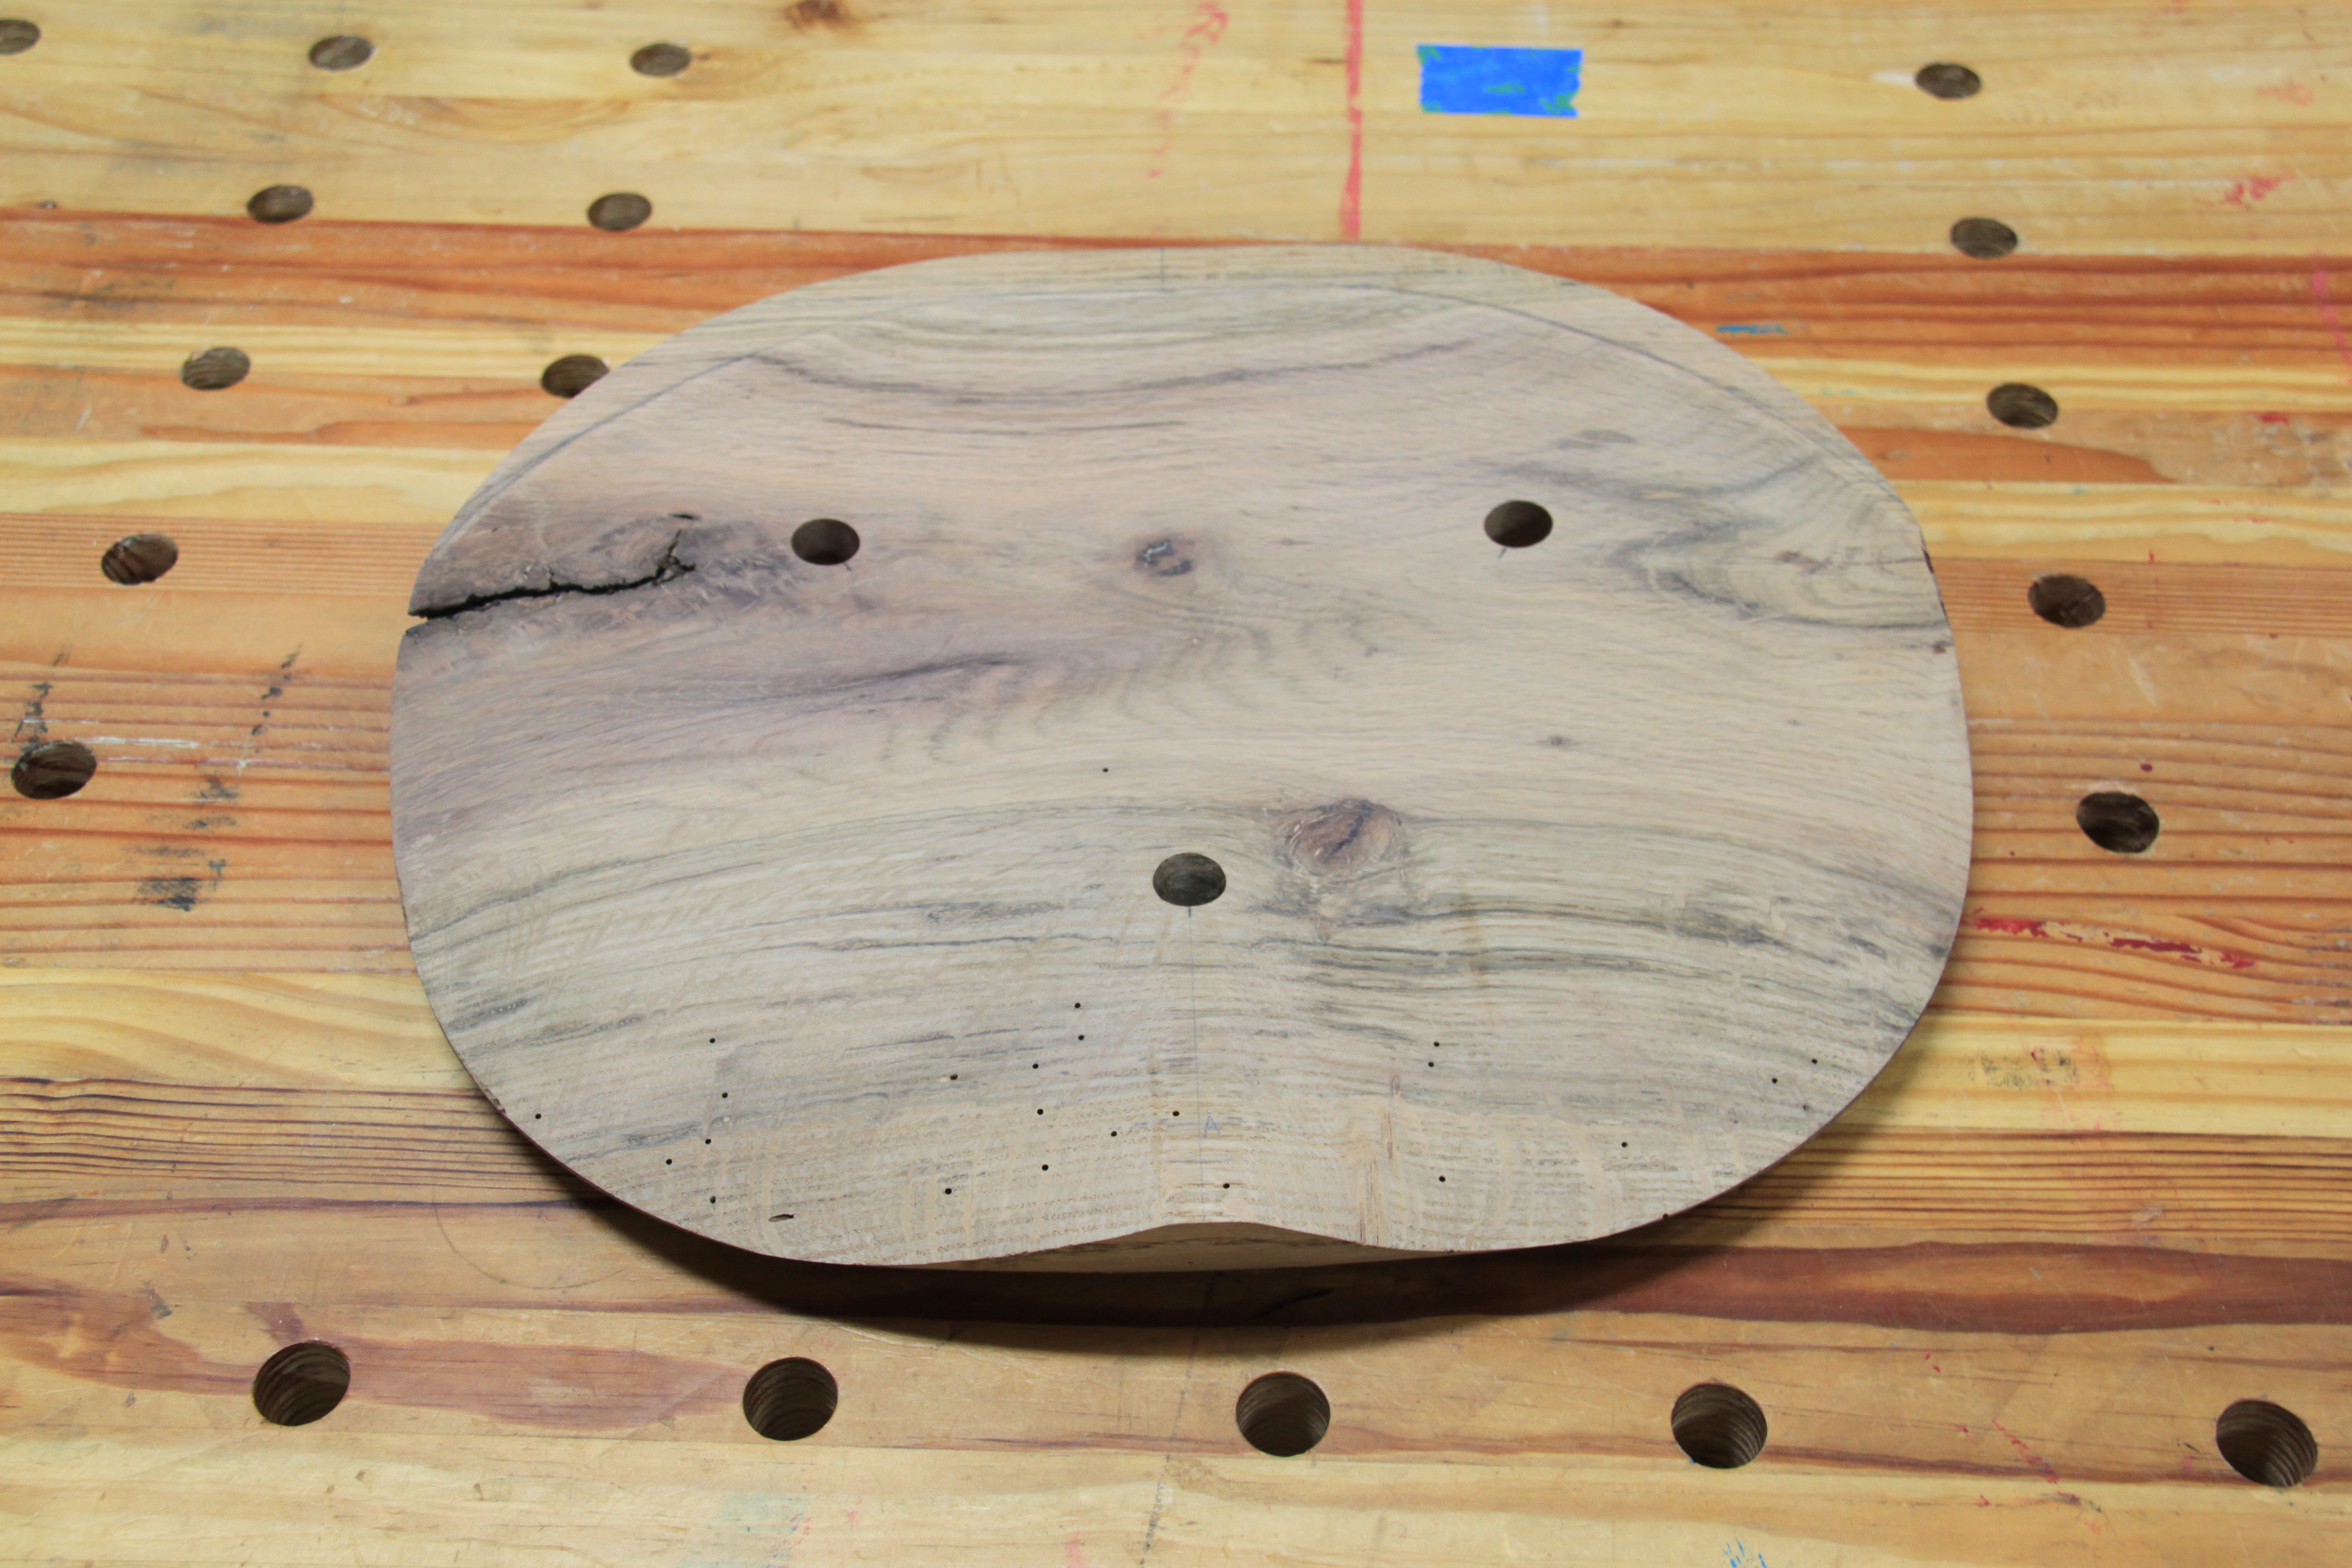
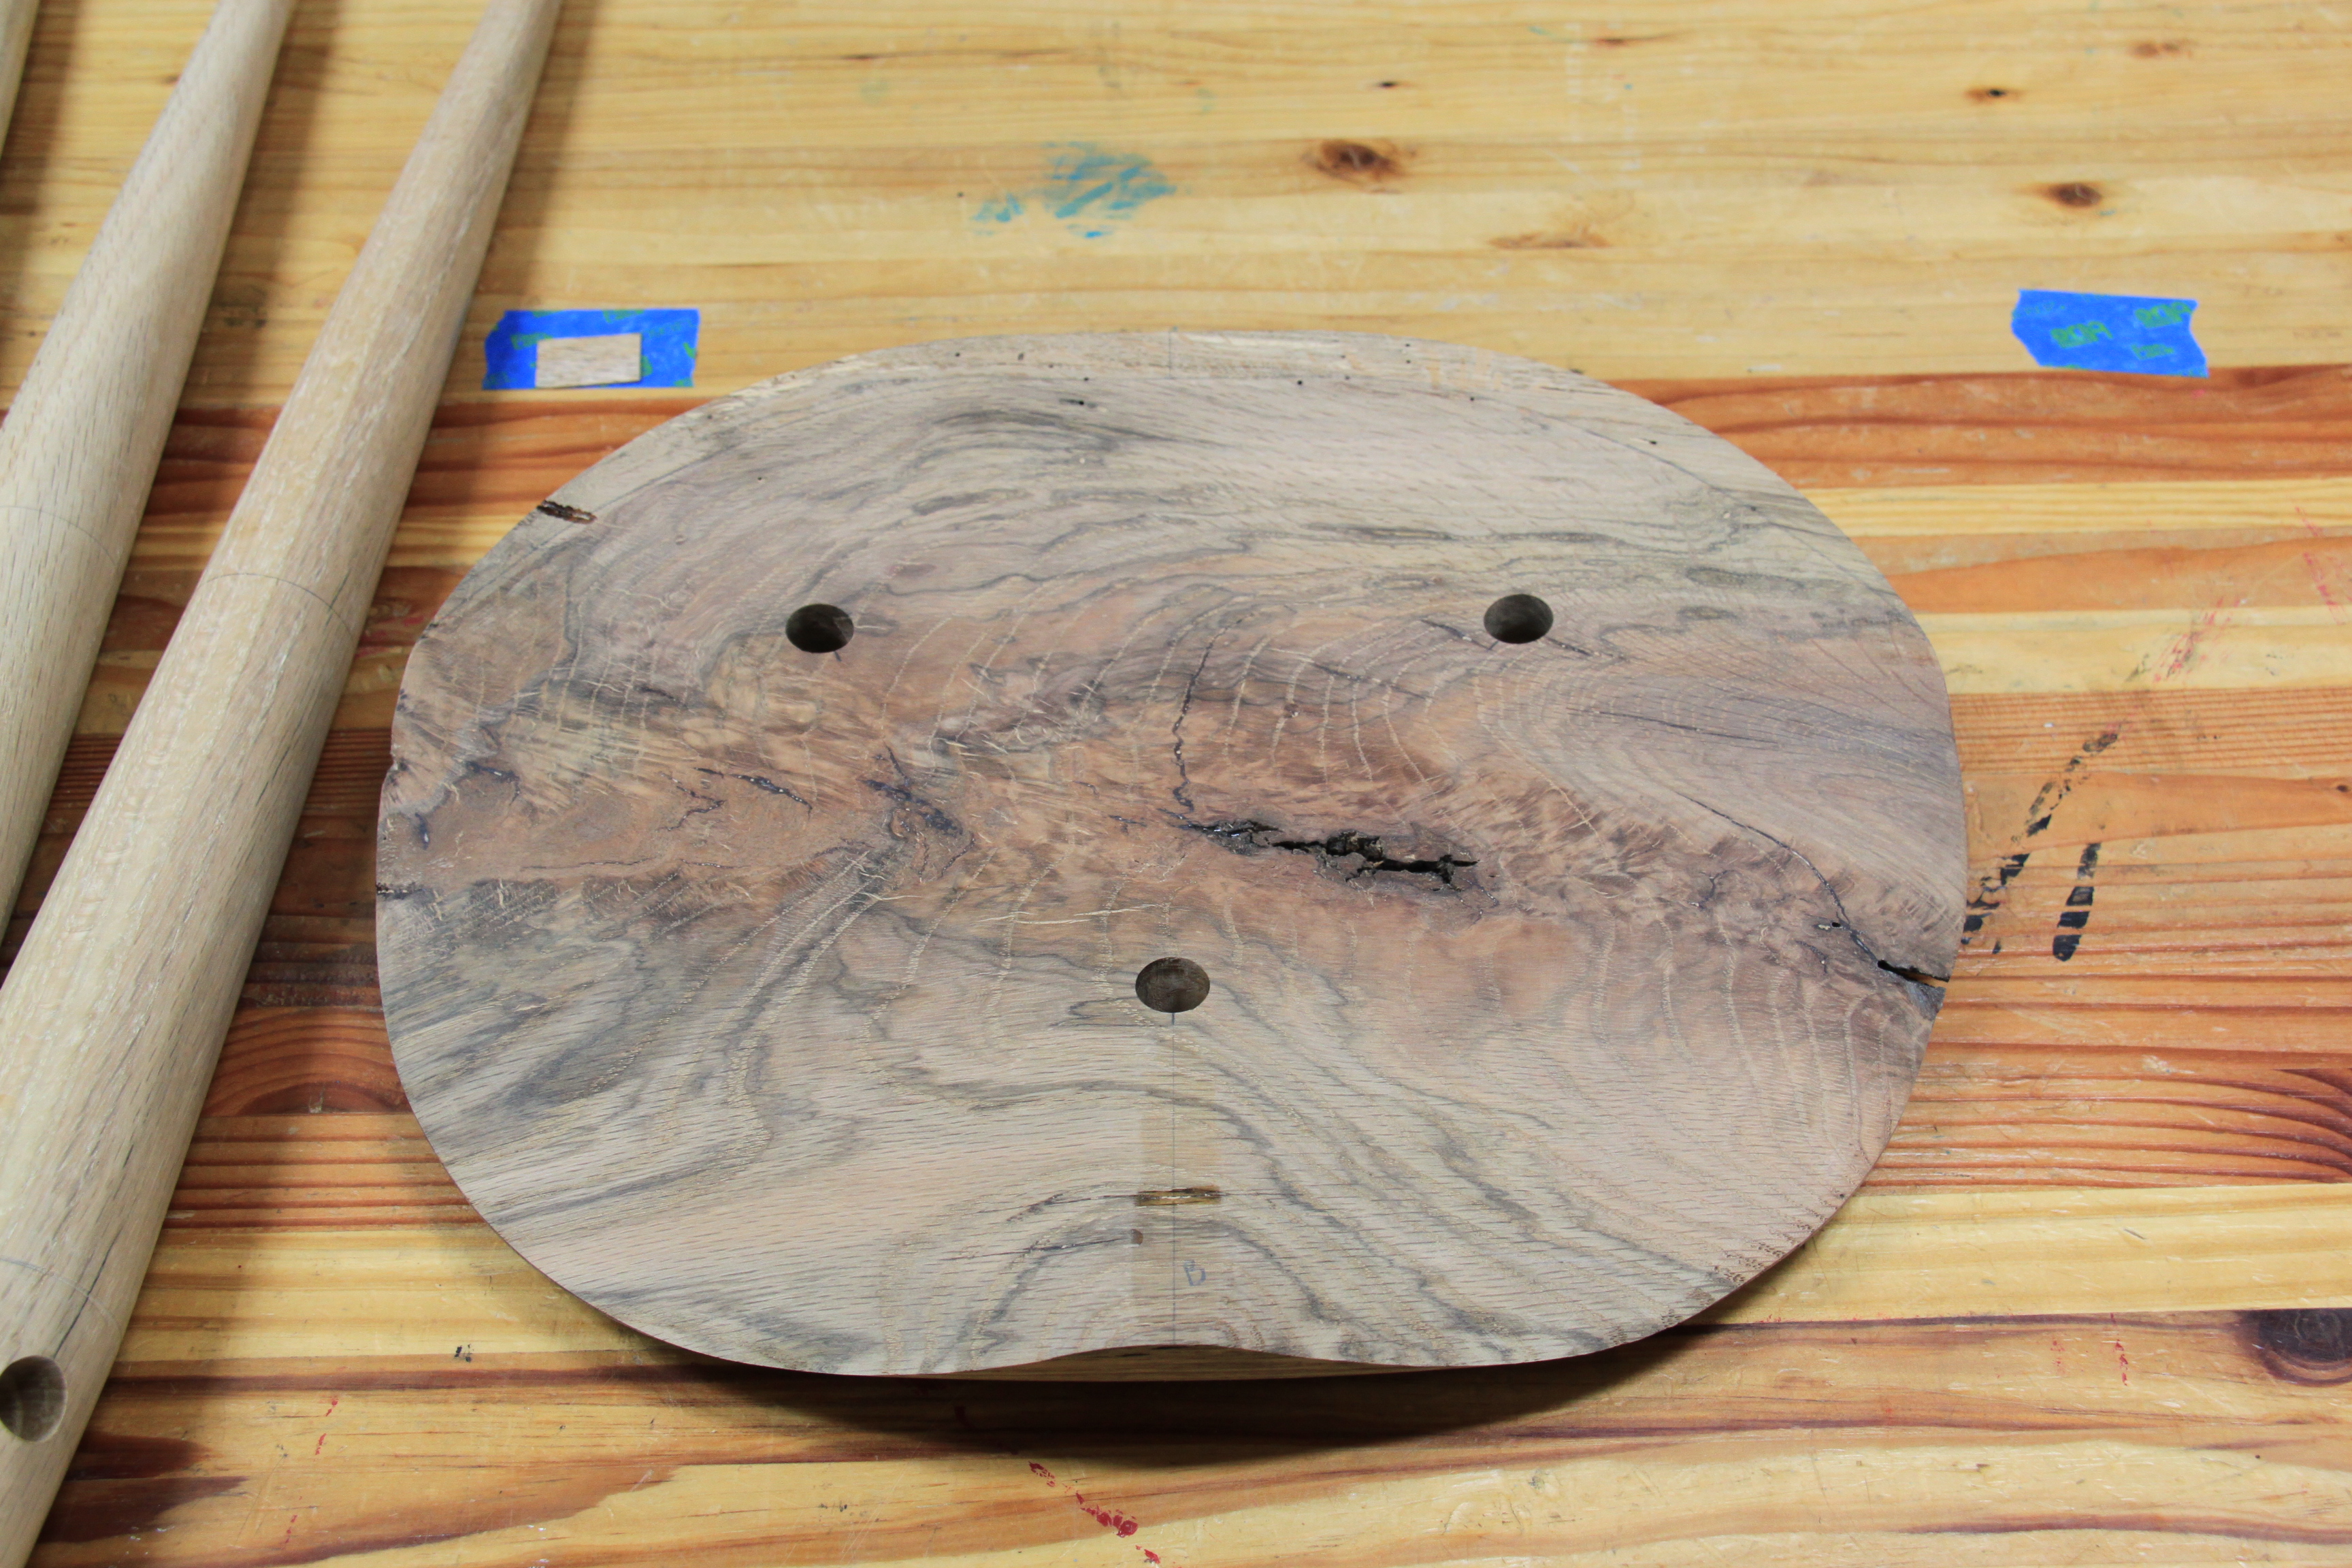
Now that I have a flat seat blank, I draw the sight lines across the face and carry those marks squarely down the sides of the seat blank (I will explain why I carry the sight lines down the sides of the seat blank below). I also mark the center points for the 3 legs from the seat pattern.
You can transfer this information from the seat pattern on the top or bottom surface of the seat depending on your preference and method of drilling. However, it is very important to note that the leg center points on my pattern are laid out for the top of the seat. If you drill the holes from the bottom of the seat through to the top of the seat, these center points will need to be offset along the sight lines at the drilling angle. For example, the front leg center point is located 2-3/4″ inches from the front edge of the seat on the top surface and centered on the width of the seat. The drilling angle for the front leg is 22 degrees, so on the bottom surface of a 2″ thick seat blank the front leg’s center point will be about 1/2″ closer to the front edge.
With the layout information transferred, it is now time to drill the 5/8″ diameter compound angle holes for the 3 legs. There are many ways to accomplish this from hand drilling with a brace, an electric drill, or on a drill press. Many people are hesitant when it comes to drilling compound angles so I have taken what I’ve learned and adopted a process that is dirt simple and accurate.
For explanations sake, when you look at a chair or stool from the front which has legs that sit at a compound angle, the front legs are pitched toward you, this is referred to as rake. And commonly the legs will also pitch out to the sides, this is referred to as splay. The combination of these two angles is called the resultant angle. Now matter how you accomplish it or what you call it, you are always shooting to drill the resultant angle.
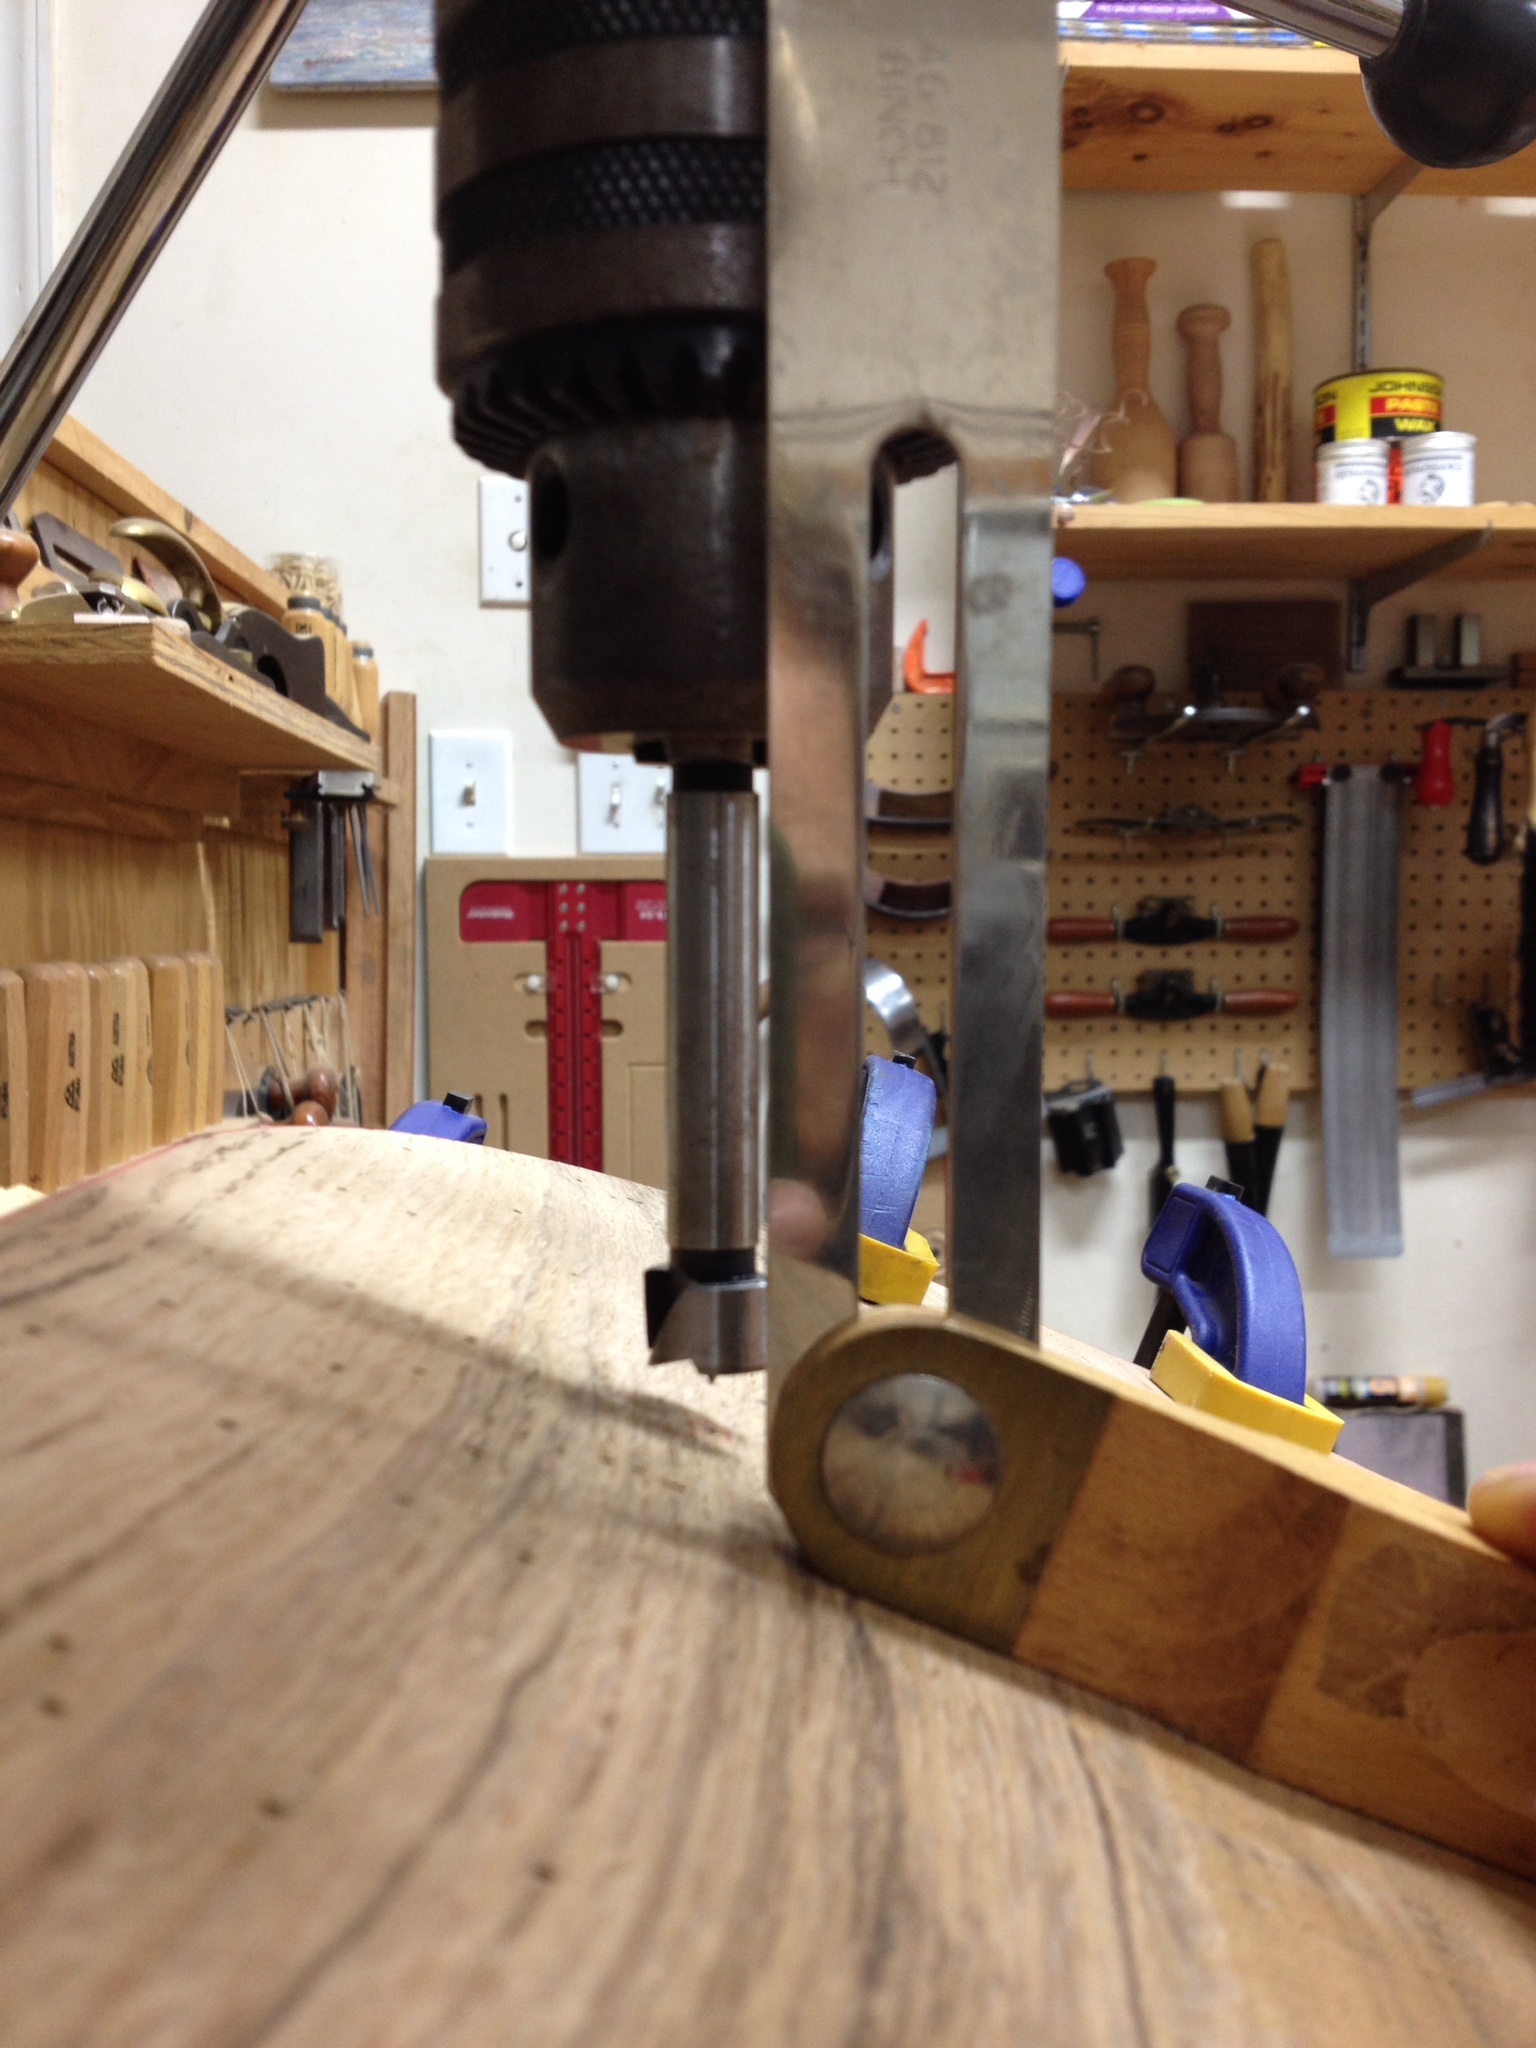
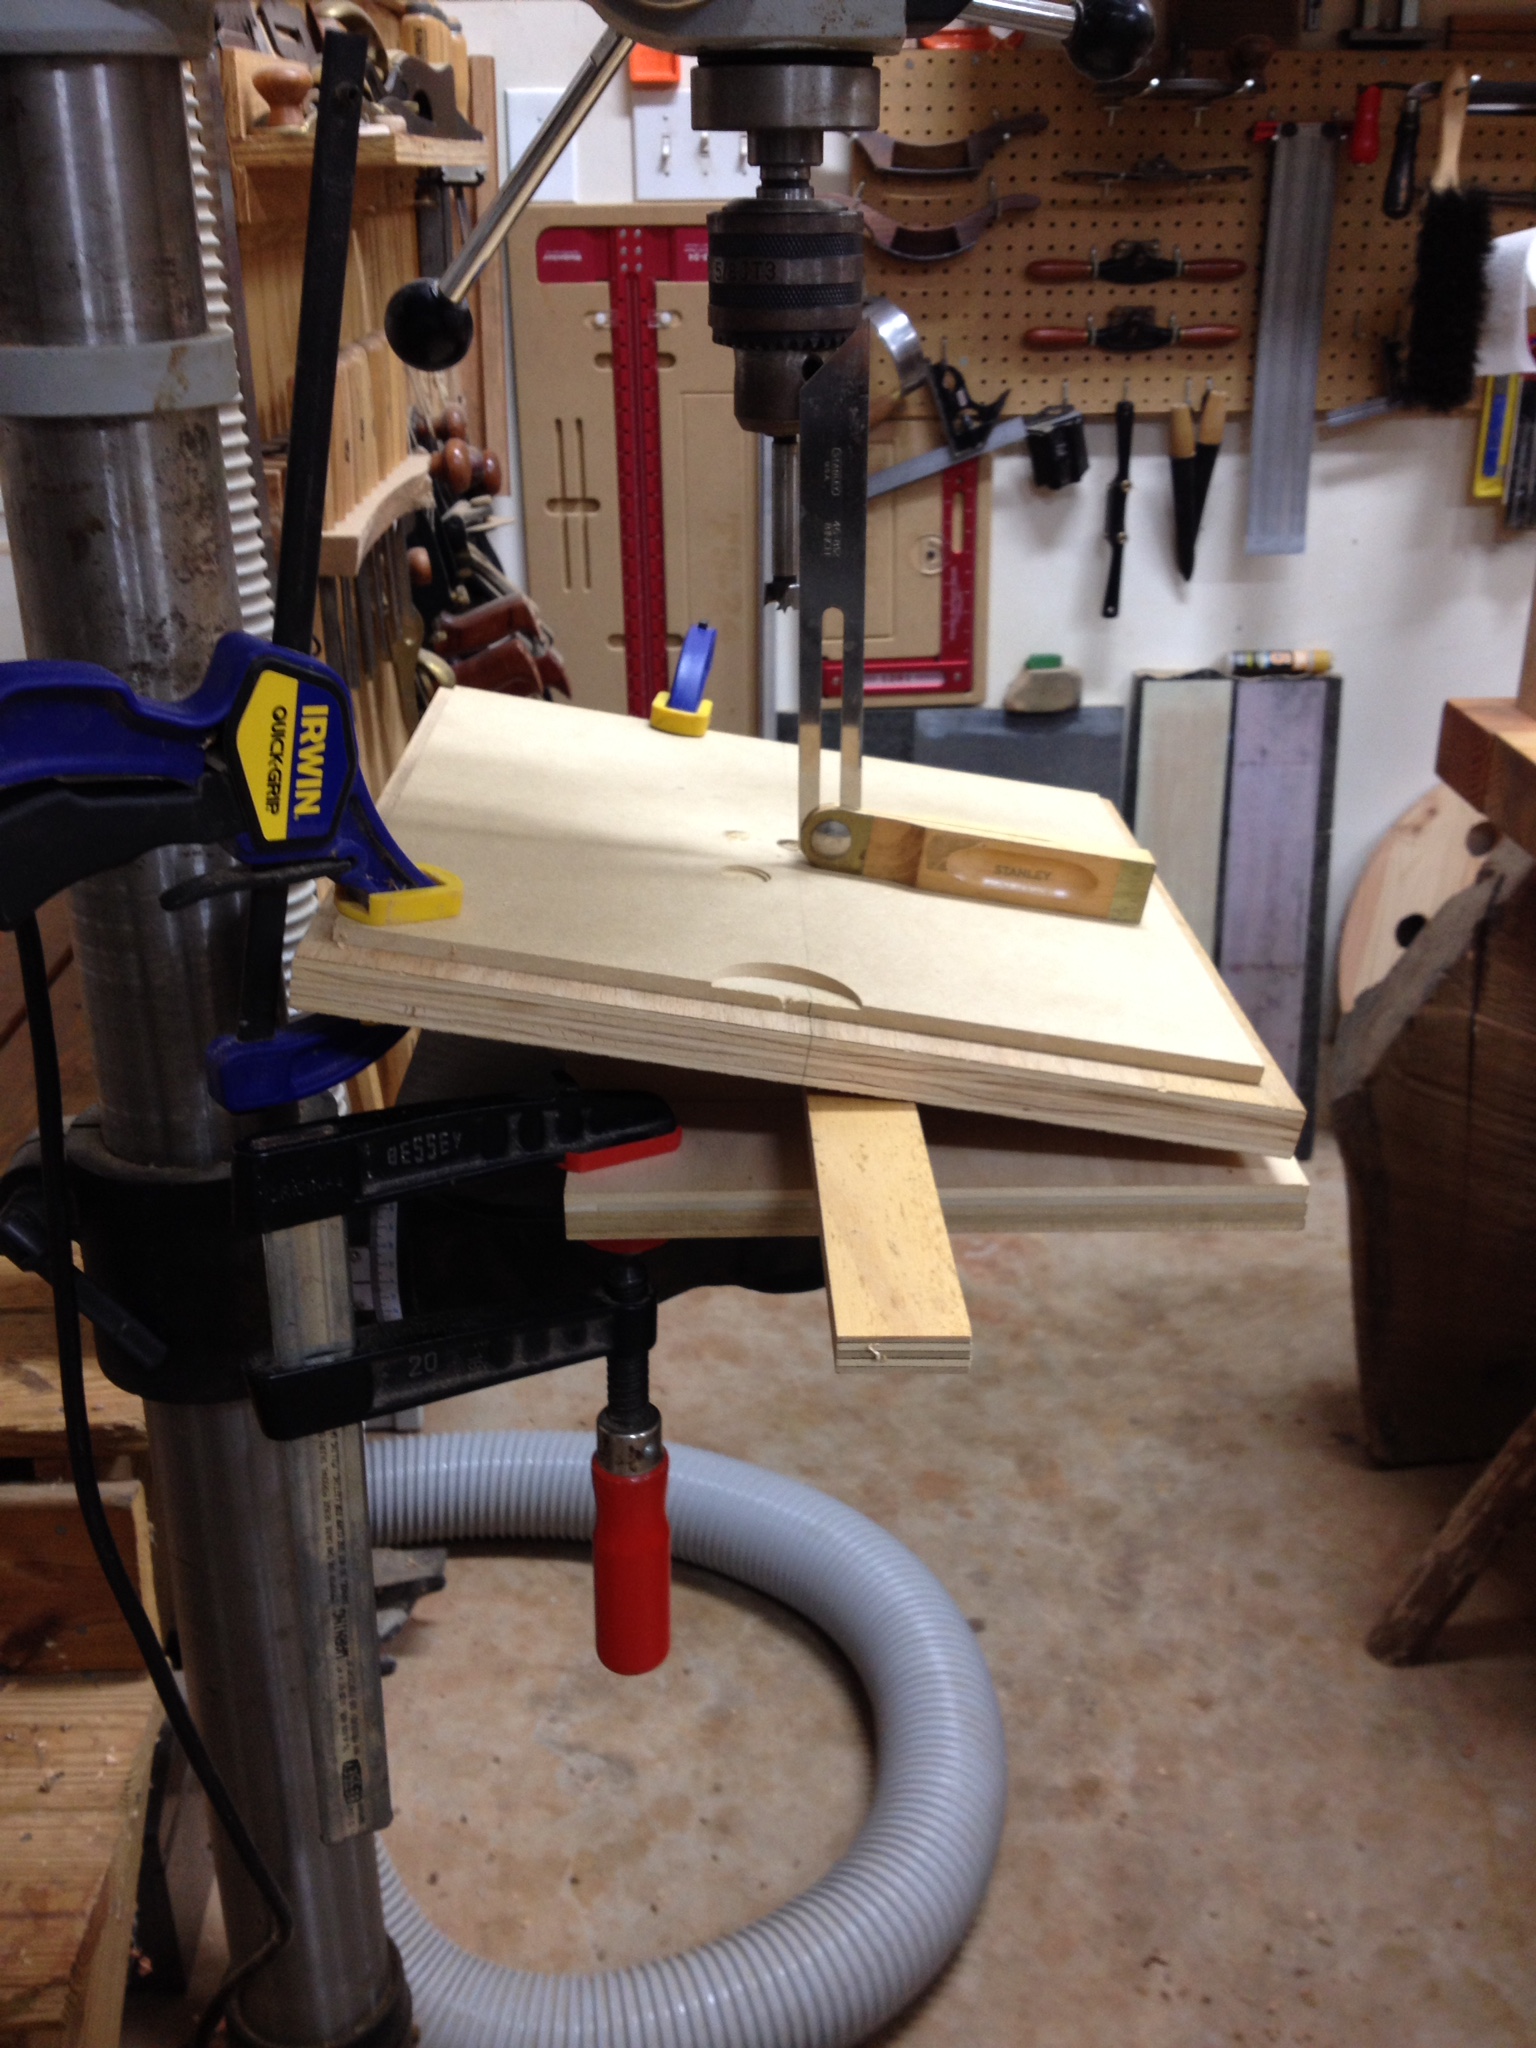
I prefer to use a drill press and forstner bit for this task. Using the drill press and a simple platform jig allows me to drill compound angles with great accuracy without tilting the drill press table. The jig is made from two pieces of plywood and two cheap hinges. The plywood is sized to fit my drill press table so it can be clamped to the table securely. The bottom piece of plywood for my jig is 14″ wide by 10″ deep, the top piece is 14″ wide and 13″ deep.
The key to using the jig is drawing a straight line across the top surface of the jig roughly centered on the piece of plywood and aligning the sight lines drawn on the work piece to the line on the face of the jig. It is important to align and clamp the jig so the center line is perpendicular to the drill press column. I just eyeball it. This jig allows you to set any drilling angle by tilting the top surface. I hold the top surface in place by shimming between the top and base with whatever scraps I have laying around. To align the work piece on the jig to account for the compound angle I align the sight line on the seat blank to the center line drawn on the face of the jig. I draw the sight lines squarely down the sides of the seat blank to make it easy to align the sight lines to the line on the jig.
I marked the two drilling angles on my seat pattern to reference during this step. The front leg has a drilling angle of 22 degrees and the two back legs have a drilling angle of 10 degrees. I set my bevel gauge to the drilling angle of 22 degrees for the front leg first. The front leg is the easiest to align because this leg has no splay.
With the bevel gauge set, I transfer the angle to the drill press setup by aligning the gauge to the shaft on my drill bit. It takes a little back and forth to get the drilling angle set and the sight line aligned but after using this method a few times it becomes easier and easier.
Here is the seat blank all ready to drill for the front leg.
I drill out both front leg mortises on the same setup for efficiency sake.
I follow the same procedure for drilling the back legs at the 10 degree drilling angle.
Here is one of the seat blanks aligned for drilling the rear leg holes with the jig set for a 10 degree drilling angle. This does not have to be perfect but I aim to be as accurate as possible. Any slight discrepancy in the drilled holes will be accounted for when reaming the holes, and when marking and measuring for the stretchers later.
.
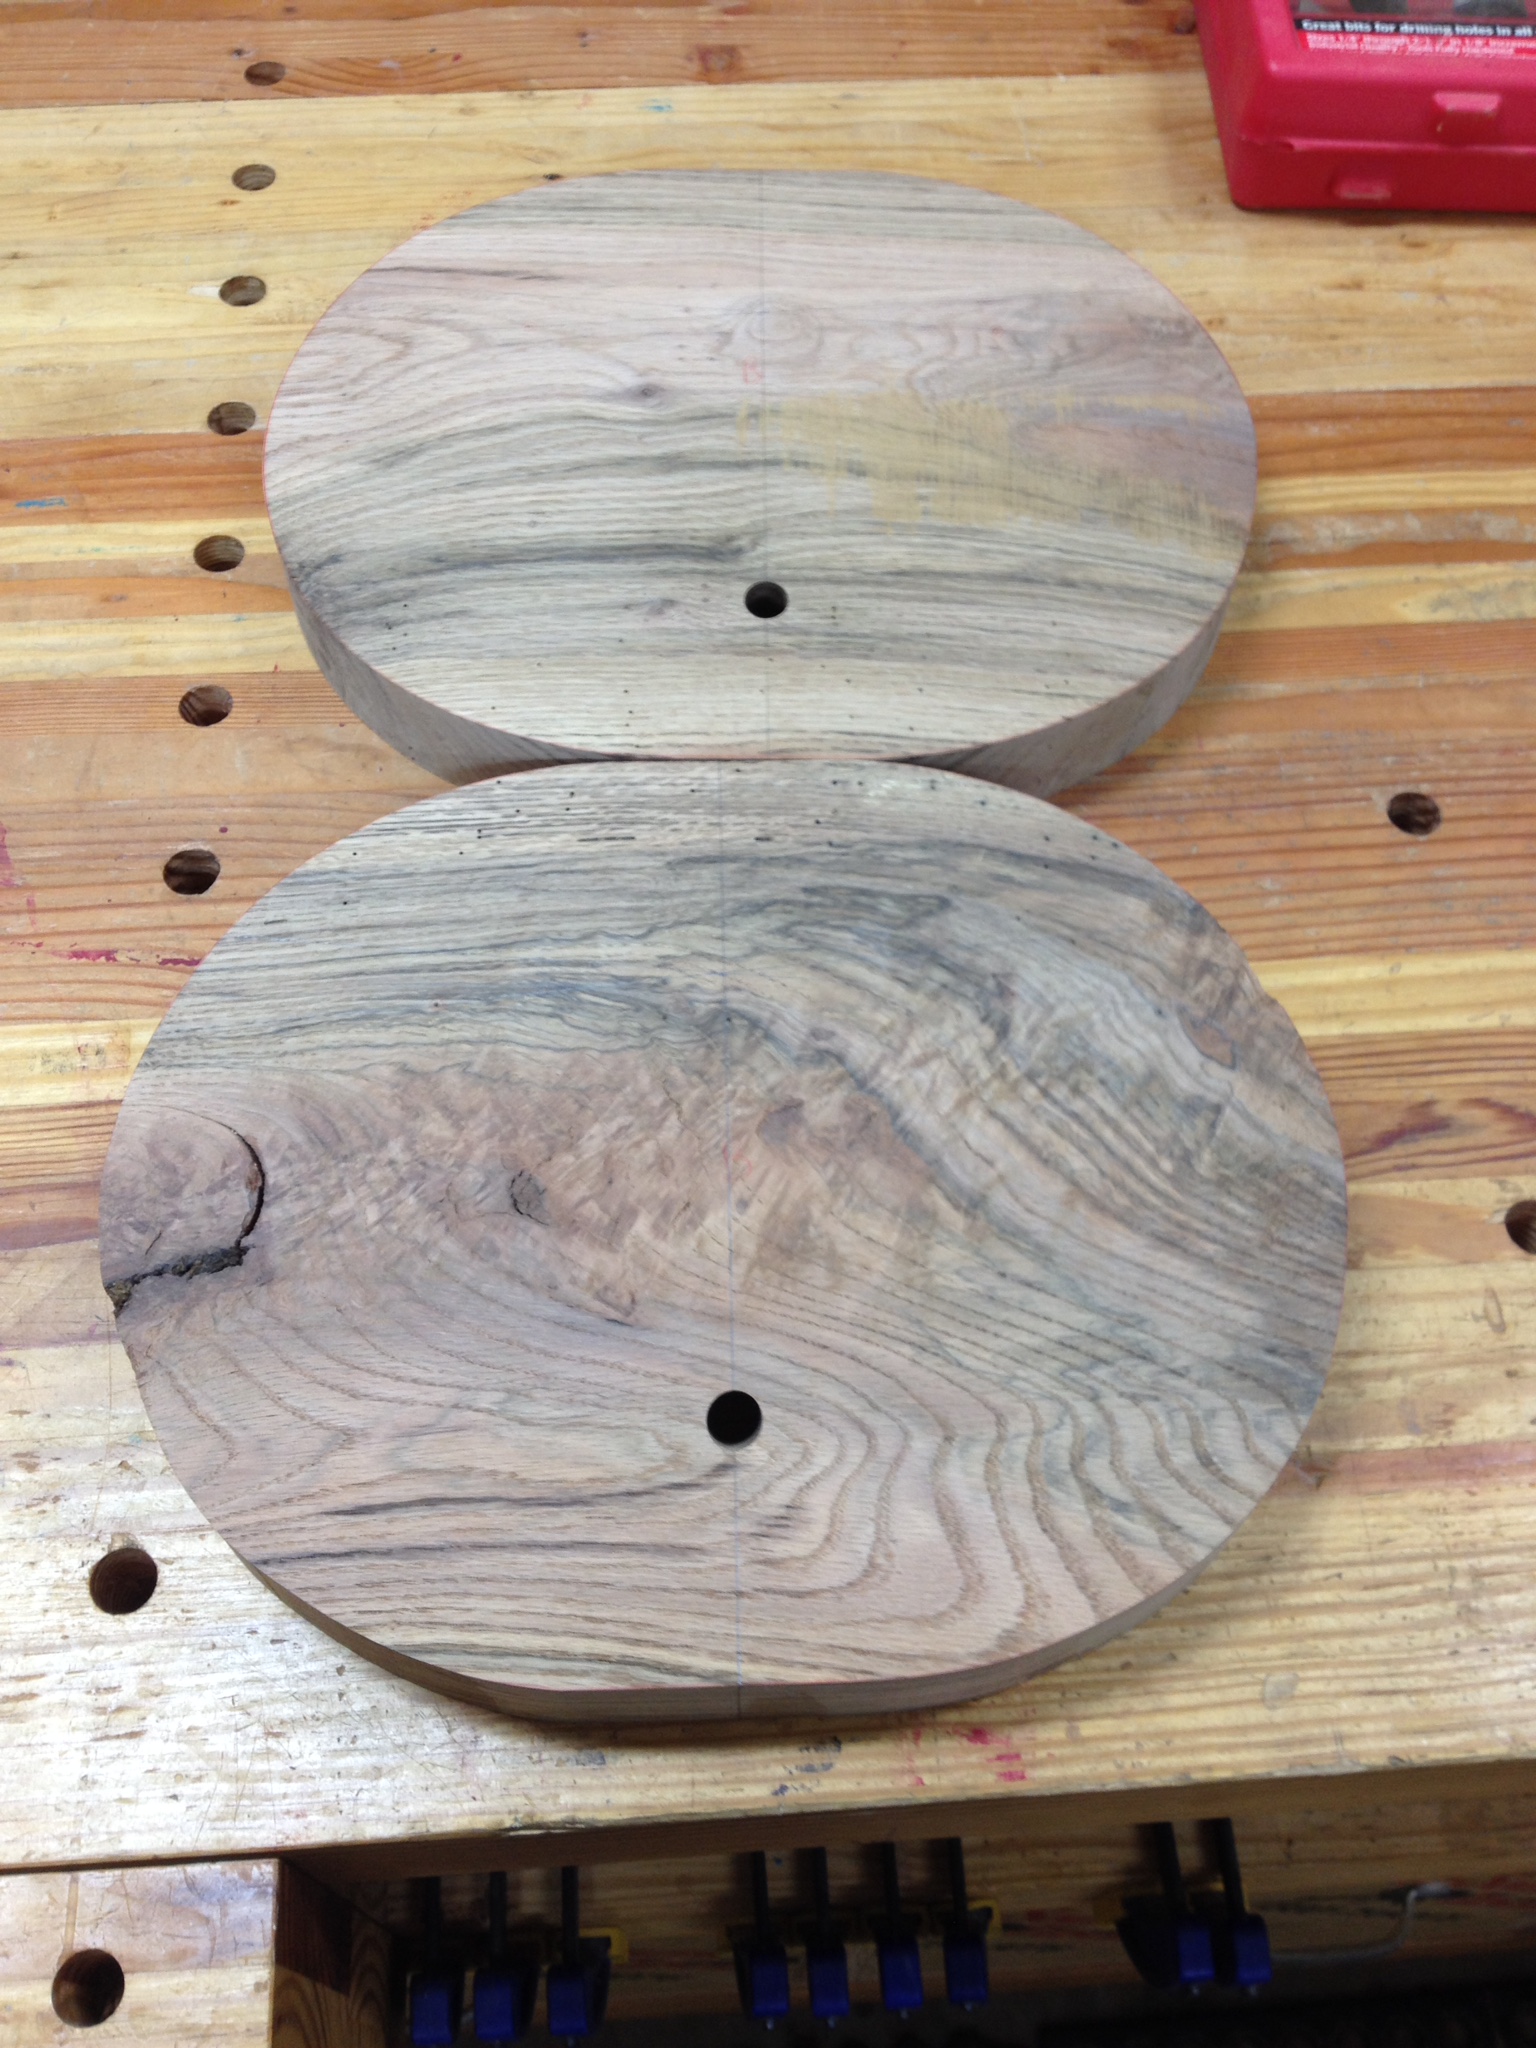
Assuming the holes have now all been drilled using the procedure outlined above, it’s time to go through the joinery for the leg connections to the seat. The traditional and in my opinion best method is using a tapered tenon on the end of each leg and reaming out the holes in the seat to accept the tapered tenon on the leg. From a structural perspective, this is simply the best method to connect legs to a seat.
This process requires a specialty tool called a reamer. I purchased a 6 degree reamer from Tim Manney. You can watch the entire process of reaming the seat holes using a tapered reamer here, so I will not go through it. Below are photos I took of the process for your reference.
With the holes drilled and reamed, it is now time to rough shape or relieve the seat. Since there is no point in reinventing the wheel you can watch the entire process and the hand tools used documented by Peter Galbert here. In the video Pete is shaping a pine seat which is very soft and cuts like butter with sharp tools.
The white oak I used for my stool seats is very hard and in some areas highly figured so I admit that I shaped a majority of my seats using a medium grit Kutzall disk and a grinder. Even though I used a different set of tools, I followed the same process of cutting out the bowl and working the shapes together in the same manner. I have to be efficient in order to make a living! Here are photos of my seats after rough shaping and some sanding.
So at this point in the construction process I turn my attention to the legs. First thing I do is check to make sure that my leg blanks have not twisted or warped too much. I normally have no issues with this due to the nature of my air-dried and straight grained stock. If I do get excessive movement, I will machine the blanks to square again using my jointer and planer.
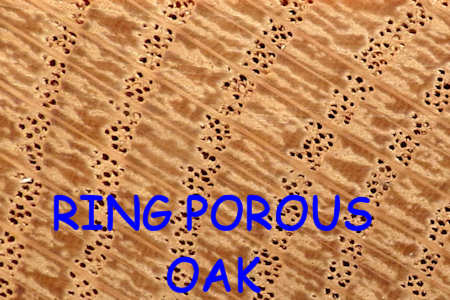
I mentioned above that I would point out some properties of turning ring porous woods like oak. The primary issue of turning these species is the potential for severe tear out when initially turning the square blank into round. In a tree each growth season produces early growth and late growth wood. In ring porous species, the early growth wood of each season produces a very porous material that is prone to fracturing when hogging away the square edges. The photos below illustrate the difference.
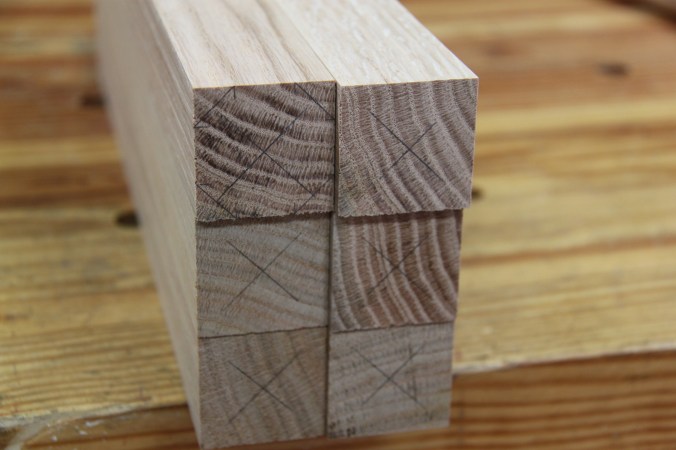
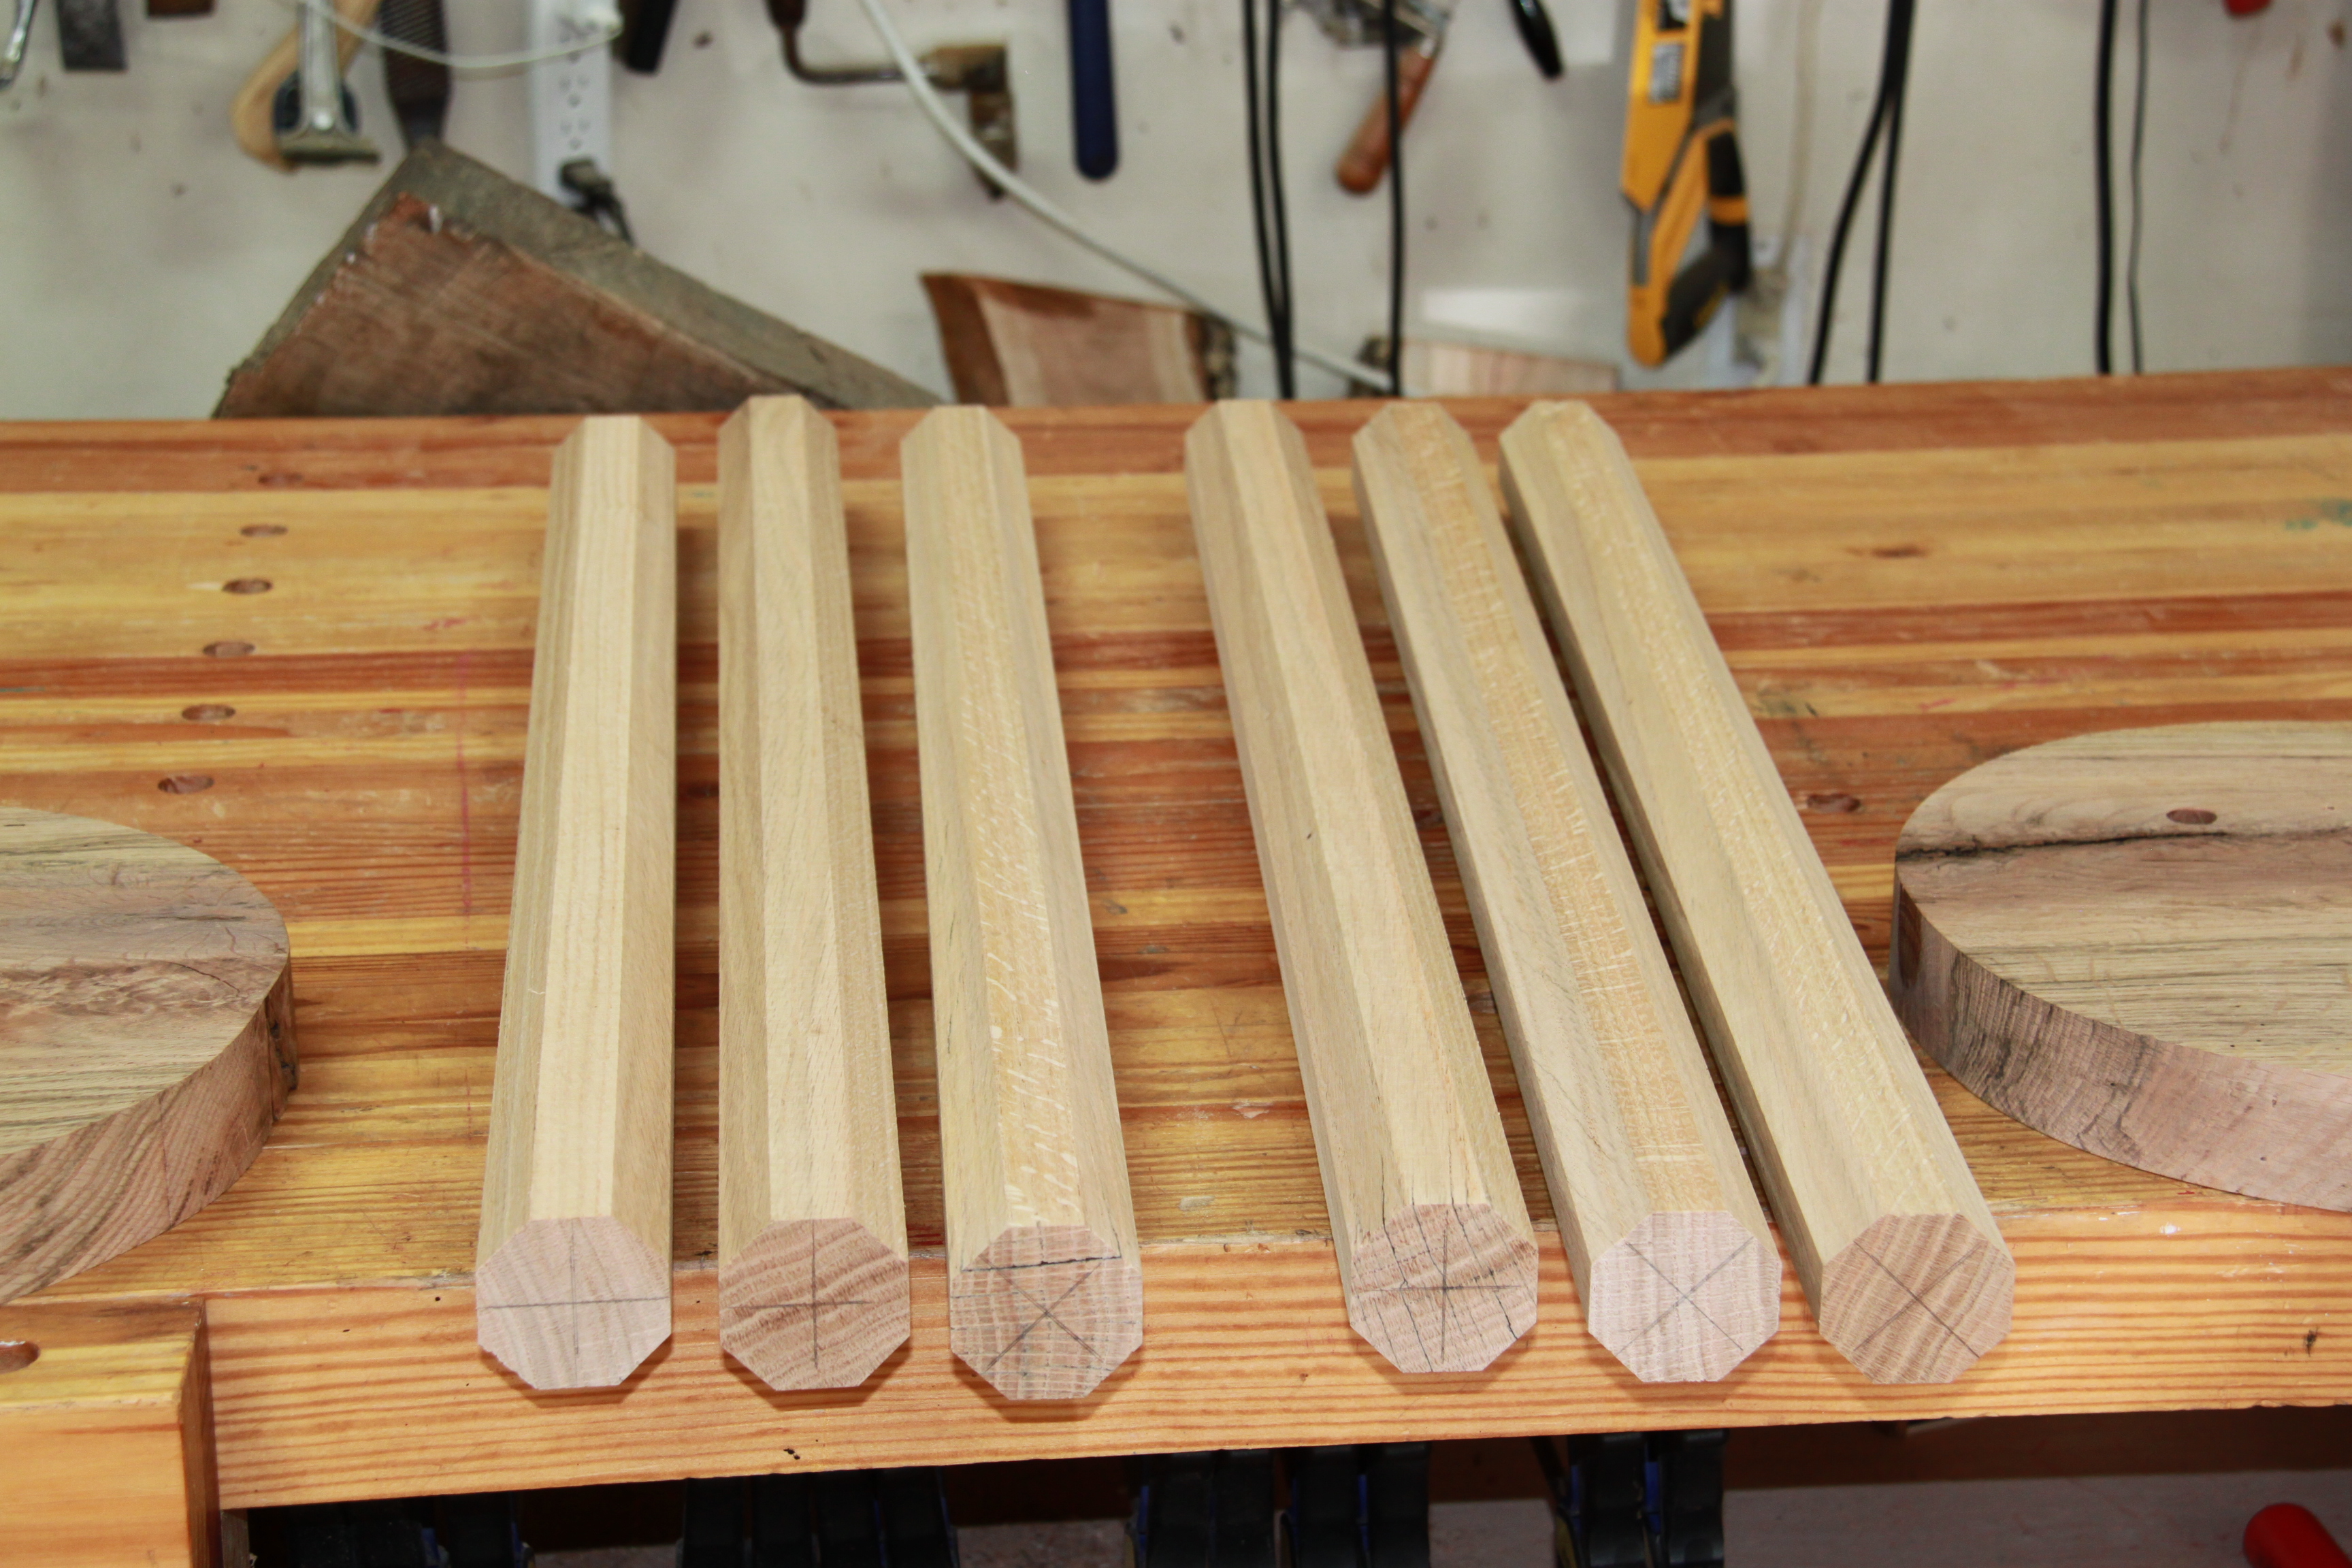
To alleviate tear out during the initial rounding of the legs and stretchers, I use a simple jig on the bandsaw to turn the square blanks into octagons. The jig is a block of wood with a stop on one end and a 90 degree v-notch that cradles the square blanks while cutting off the 4 outside corners. I draw out an octagon on one of the blanks and mark the centers on both ends of each blank before cutting off the 4 corners.
Square Blanks with centers marked. Note the octagon laid out on the top left blank
Below is the jig setup on the bandsaw, I align the jig so that my bandsaw blade just kissing the edges of the octagon, set a magnetic feather board to keep the jig against the fence and cut the edges off the blanks.h
Here are the blanks cut into octagons with the centers marked.
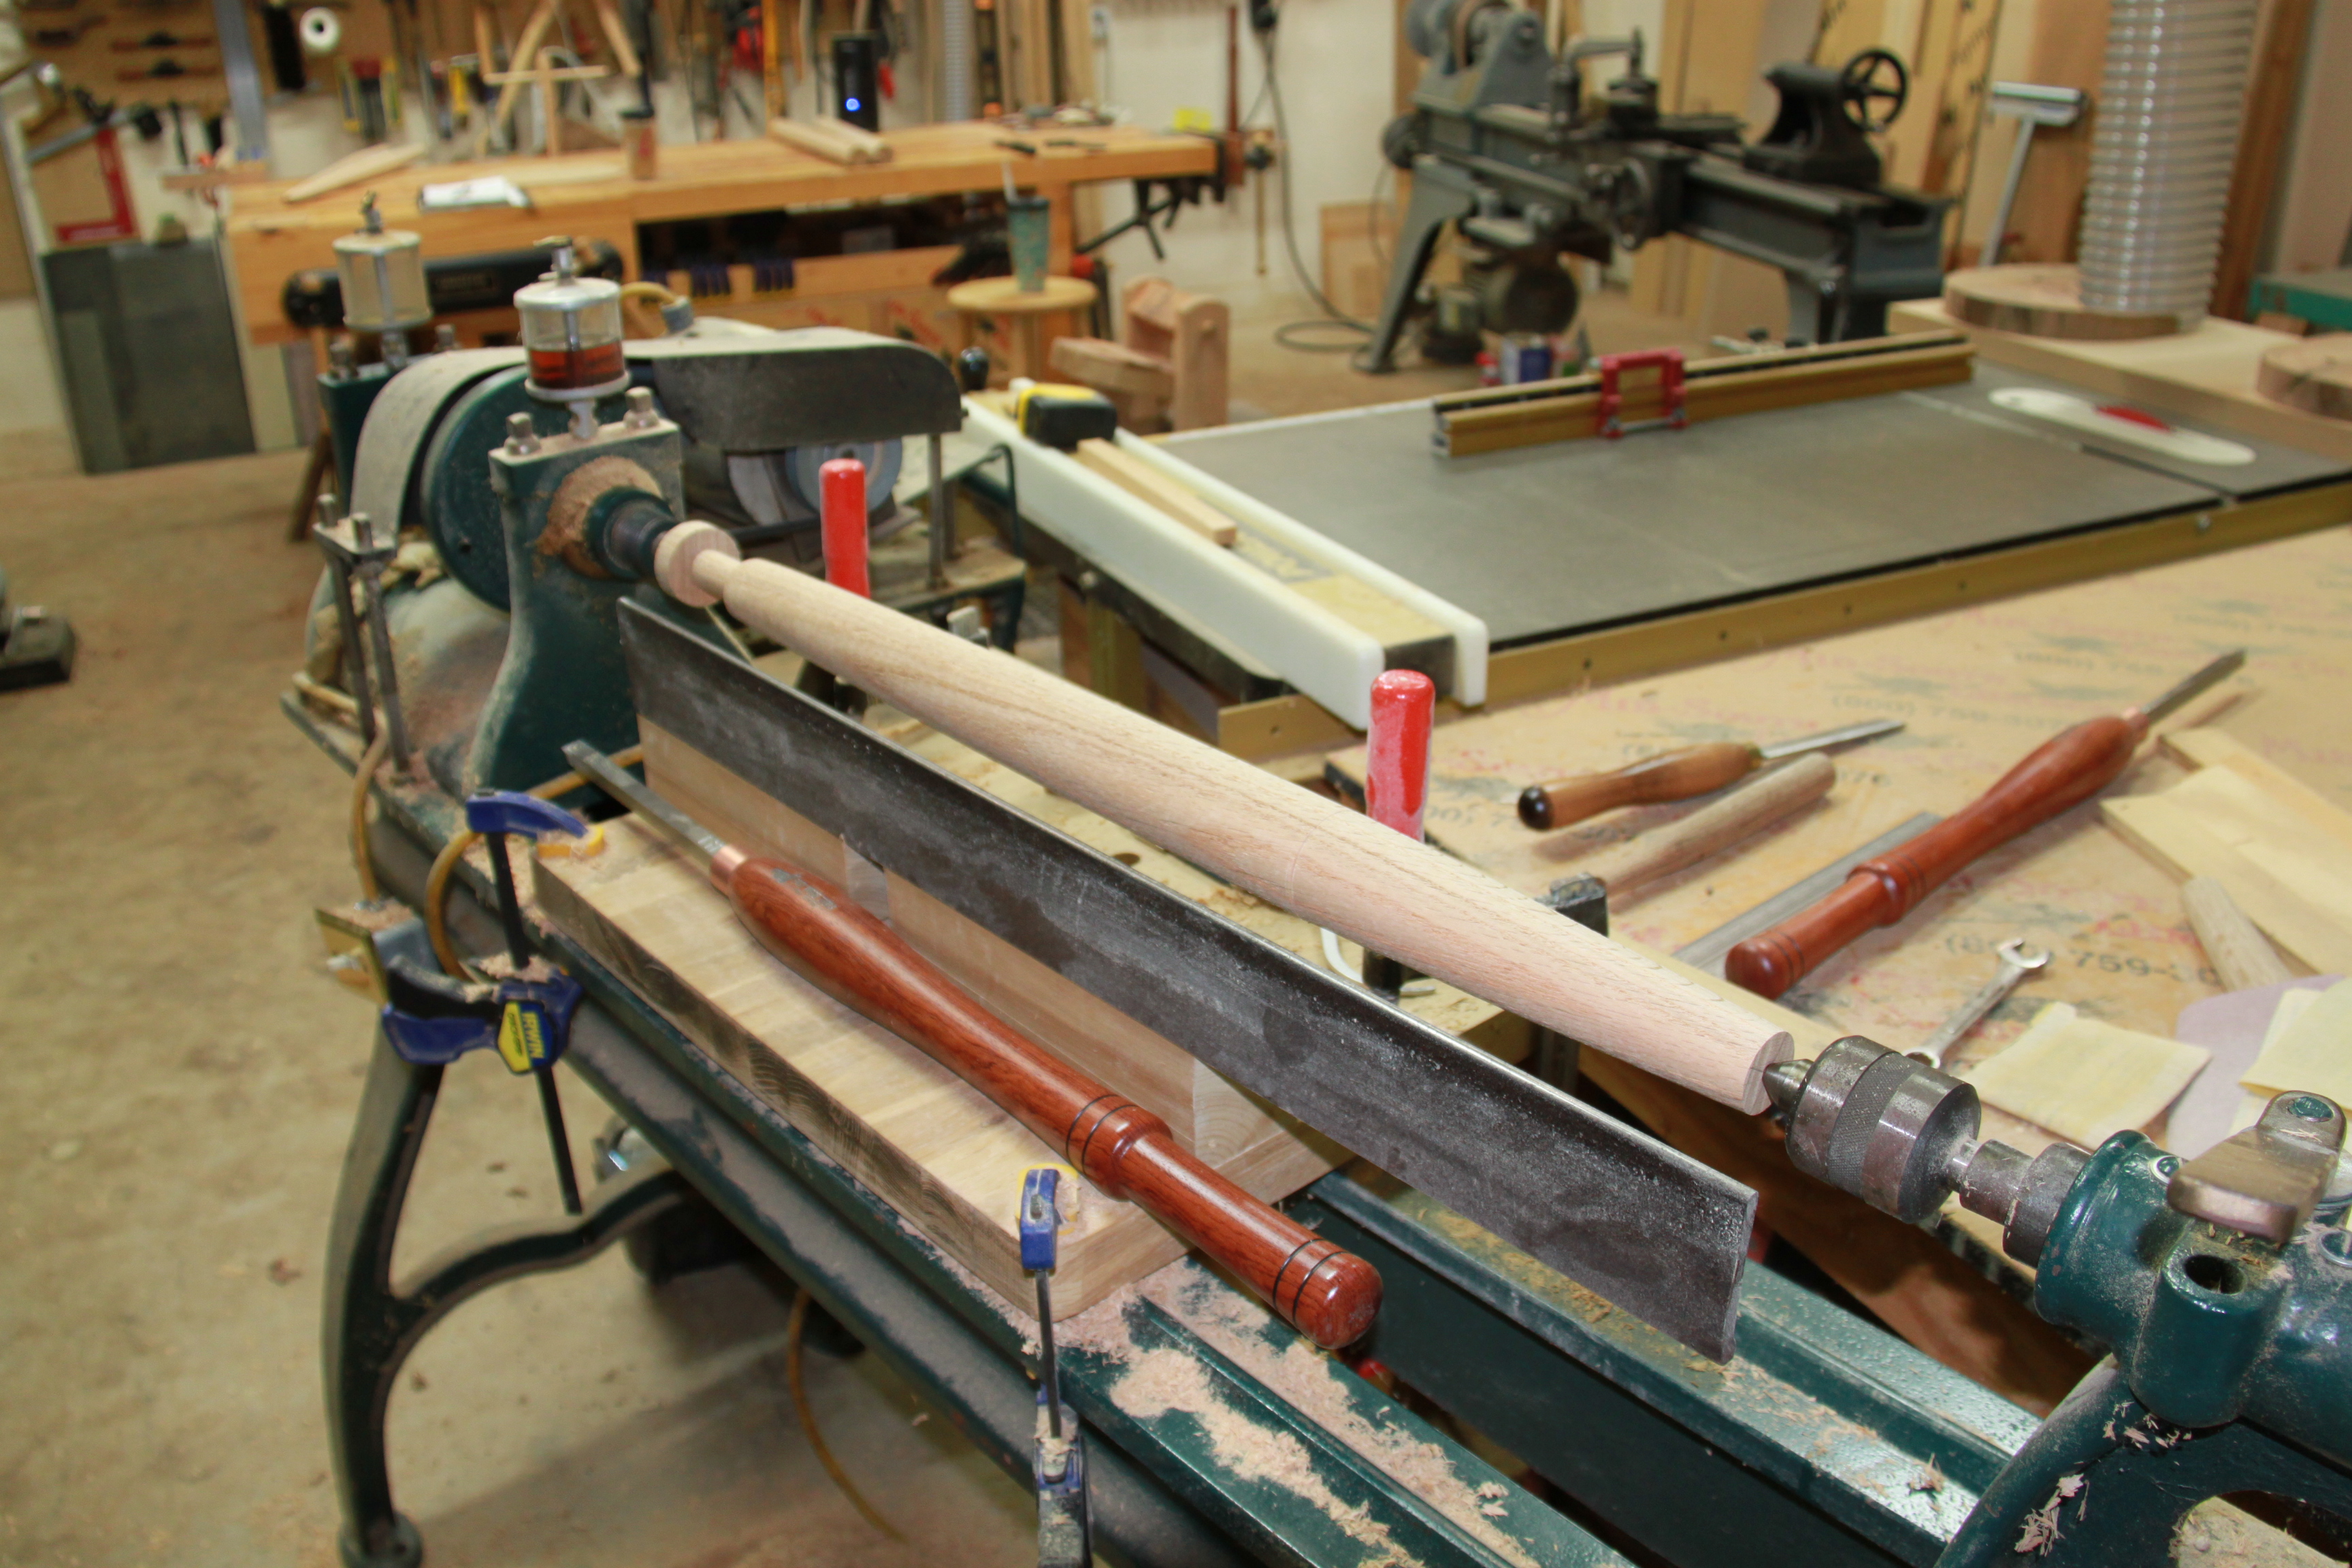
At this point I mount the blanks in the lathe and turn the octagon into a cylinder of the desired diameter. For these tall stools I was shooting for a 2″ diameter cylinder. Once I have the blank round, I use my leg pattern to mark the top (also the end of the finished tenon), the bottom of the tenon is 2″ from the top, the bottom of the leg, and transition point where the leg is at the widest point. This transition is 8-1/2″ from the bottom of the leg and I turn a small bead at this location to later locate the rear stretcher and for decorative purposes.
I first turn the bottom of each leg down to 1-1/4″ and taper from the transition to the bottom. I then rough turn the tenon down to about 15/16″, then using a sharp skew I knife a small line at the bottom or “shoulder” of the tenon. You can see in the photo below the bottom taper has been turned and the tenon has been rough shaped.
At this point I turn my attention to refining and dialing in the final tenon to a 6 degree taper to match the 6 degree reamed holes in the seat. You could turn the tenon on the lathe but there is an easier and more accurate way to do it. I finish the tenon shaping on a simple jig that I built from instruction provided by Tim Manney. Here are photos of the jig I built. It works brilliantly and gives you a perfect tenon every time. I turn the leg clockwise in the jig until I work my way up to the knife line I marked with the skew on the lathe.
With the legs finished I then insert them in the seat and begin the layout and measuring procedure for the 3 stretchers. Since it would be difficult to describe the process for laying out, marking, and measuring the length of the stretchers in writing, I produced the following video that will walk you through the entire process step by step.
If you have any questions about the information presented in the video please contact me via email and I would be happy to clarify any information for you.
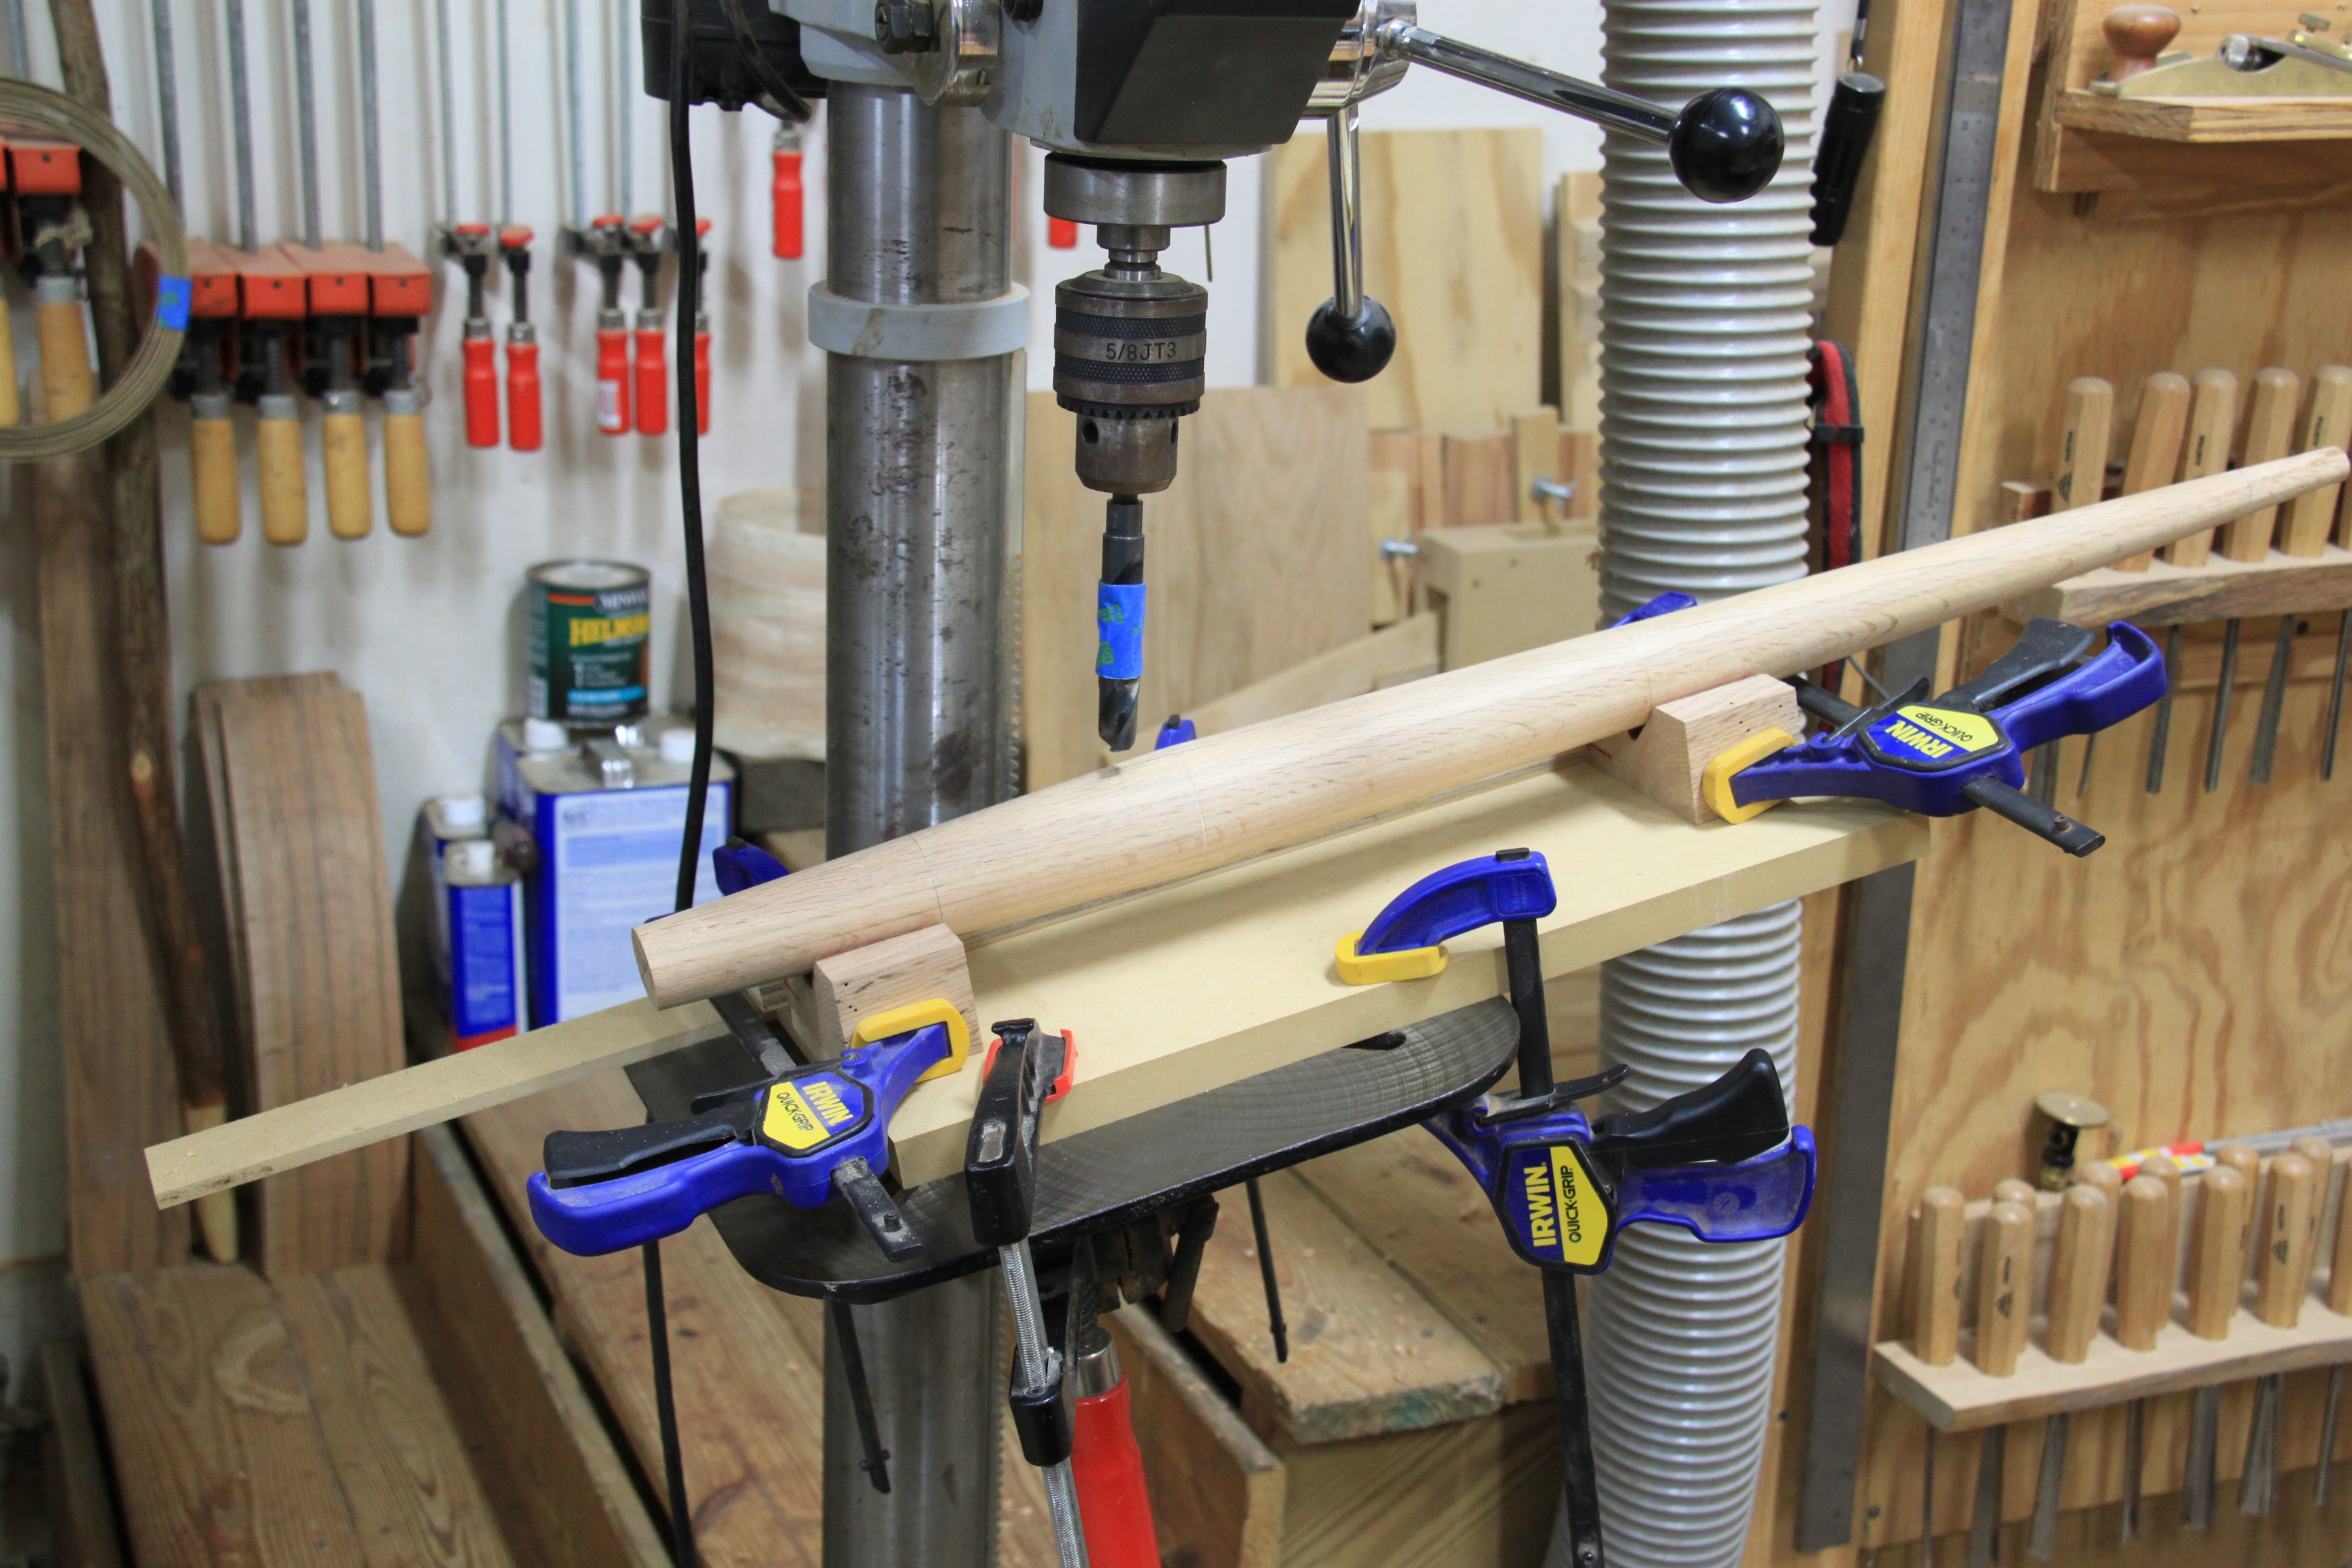
With the stretcher center points now laid out I can turn my attention to drilling the 5/8″ diameter mortises into the legs. Again, this can be accomplished in a number of ways. I use a simple jig and the drill press to hold and drill the mortises cleanly and accurately. The following video covers the jig.
If you have any questions about the information presented in the video please contact me via email and I would be happy to clarify any information for you.
Here are photos of the legs in the jig, mounted on the drill press. Since the average drilling angle for the stretcher mortises was the same for both stools I can tilt my drill press table to 11.5 degrees and go to town on all 12 holes. Note that I use tape on the drill bit in order to drill each mortise to a depth of 1-1/8″. I also use a small fence behind the jig to register the jig each time I move the assembly to drill each hole.
With all the mortises drilled and the final lengths of each stretcher already determined, I turn the stretchers blanks that have already been drying for at least a week. The process is similar to the legs but I will go over each step.
I first cut the square blanks into octagons using the bandsaw jig the same way I processed the leg blanks. I then mount each blank on the lathe and turn them round to +/-1-1/2″ diameter. Once round, I mark the center line of the stretcher, the ends of the stretcher tenons, and the shoulder lines of the tenons using a pencil. Each tenon is 1-1/8″ long.
octagon shaped blank mounted in the lathe
The following photo shows a stretcher blank mounted in the lathe. Note the washers I have place over the live center on the tailstock. These washers prevent the live center’s cone from splitting the wood. You could buy a special live center to do this but the washers work just as well.
I then start the final turning of each stretcher by cutting the tenons on each end first. The key to getting the optimum strength from a round tenon and mortise is the fit of the joint. To obtain an absolutely perfect fit I took a 9/16″ wrench that I filed to an exact width of .625″ or 5/8″, which I verified by using my dial calipers. This diameter matches my drill bit precisely.
I carefully turn the tenons down until this wrench slips over the tenon, slightly compressing the wood fibers on the tenon. Once the diameter of the tenon is dialed in, I use a skew to precisely mark the ends and shoulders of the tenons. Keep in mind that the stretcher blanks are bone dry. When I insert the stretcher tenons into the leg mortises with glue the tenons will swell several thousandths of an inch, locking themselves into the mortises and creating a very strong connection. The final turning step is to taper each side of the stretcher from the center down to the shoulder of the tenon.
rounded stretcher blank with the centerline and tenons carefully marked out
The friction fit of the wrench on the tenon. The fit should be tight enough to hold the wrench upright without falling off
This photo captures the knife line I marked with the skew. I use this line for two purposes. One is to feather in the taper from the center of the stretcher to the tenon and second to visually check that each tenon is completely inserted to the mortise when I assemble the stool
With the stretchers turned, the stool is ready final assembly!!! I will be posting a future video on the assembly and final shaping of the seat soon.
Thanks for hanging in there on this detailed post. Looking forward to completing this novel very soon.
“An inconvenience, is only an adventure wrongly considered; an adventure, is an inconvenience rightly considered.”
In our lives simplification of nearly anything is always sensational, with this in mind I edited together a rudimentary 3 minute video this morning highlighting the entire post and rung chair I’m now making. Starting with the raw materials, bending forms, jigs, shaping of the parts, some assembly, seat weaving, and completed chair. Pretty cool snapshots of everything but the full scale drawings. It’s cool for me anyway!
I have not made the time to start writing any detail about how I make the post and rung/ladderback chair, which is not an original design but based on Brian Boggs 30 years of chair making experience with my own adjustments to the seat, angles of the rear legs, and some other reverse engineering. It’s a very light but strong, visually catching, and supremely comfortable chair. Hope you enjoy.
I feel the irony in the timing of this post, coinciding with much higher than normal press on the awareness of our planet. To put the icing on the cake, the photos below were taken on Arbor Day.
Richard Nixon assigned the last Friday of every April as our Nations official Arbor Day in 1970. It is an American tradition to plant a tree on Arbor Day. It’s said the best time to plant a tree is 100 years ago, the next best time is now.
I’m not a tree murderer, but I’m certainly not a tree hugger either. I see what I and many others do in building high quality products from locally sourced wood as a very responsible outcome and honorable use of this finite material. It’s a second life for the tree when you create something beautiful from it and build it to last at least long enough for the next generation. Or as Uncle Eddie would say about the Jelly of the month club “It’s the gift that keeps on giving Clarke.”
In a self serving, oh look at me kind of way, I would like to point out that all of my furniture pieces to date have been built with solid wood from trees I cut myself that were dead standing or dying, storm damaged, or taken down to expand the infrastructure that makes our lives more convenient.
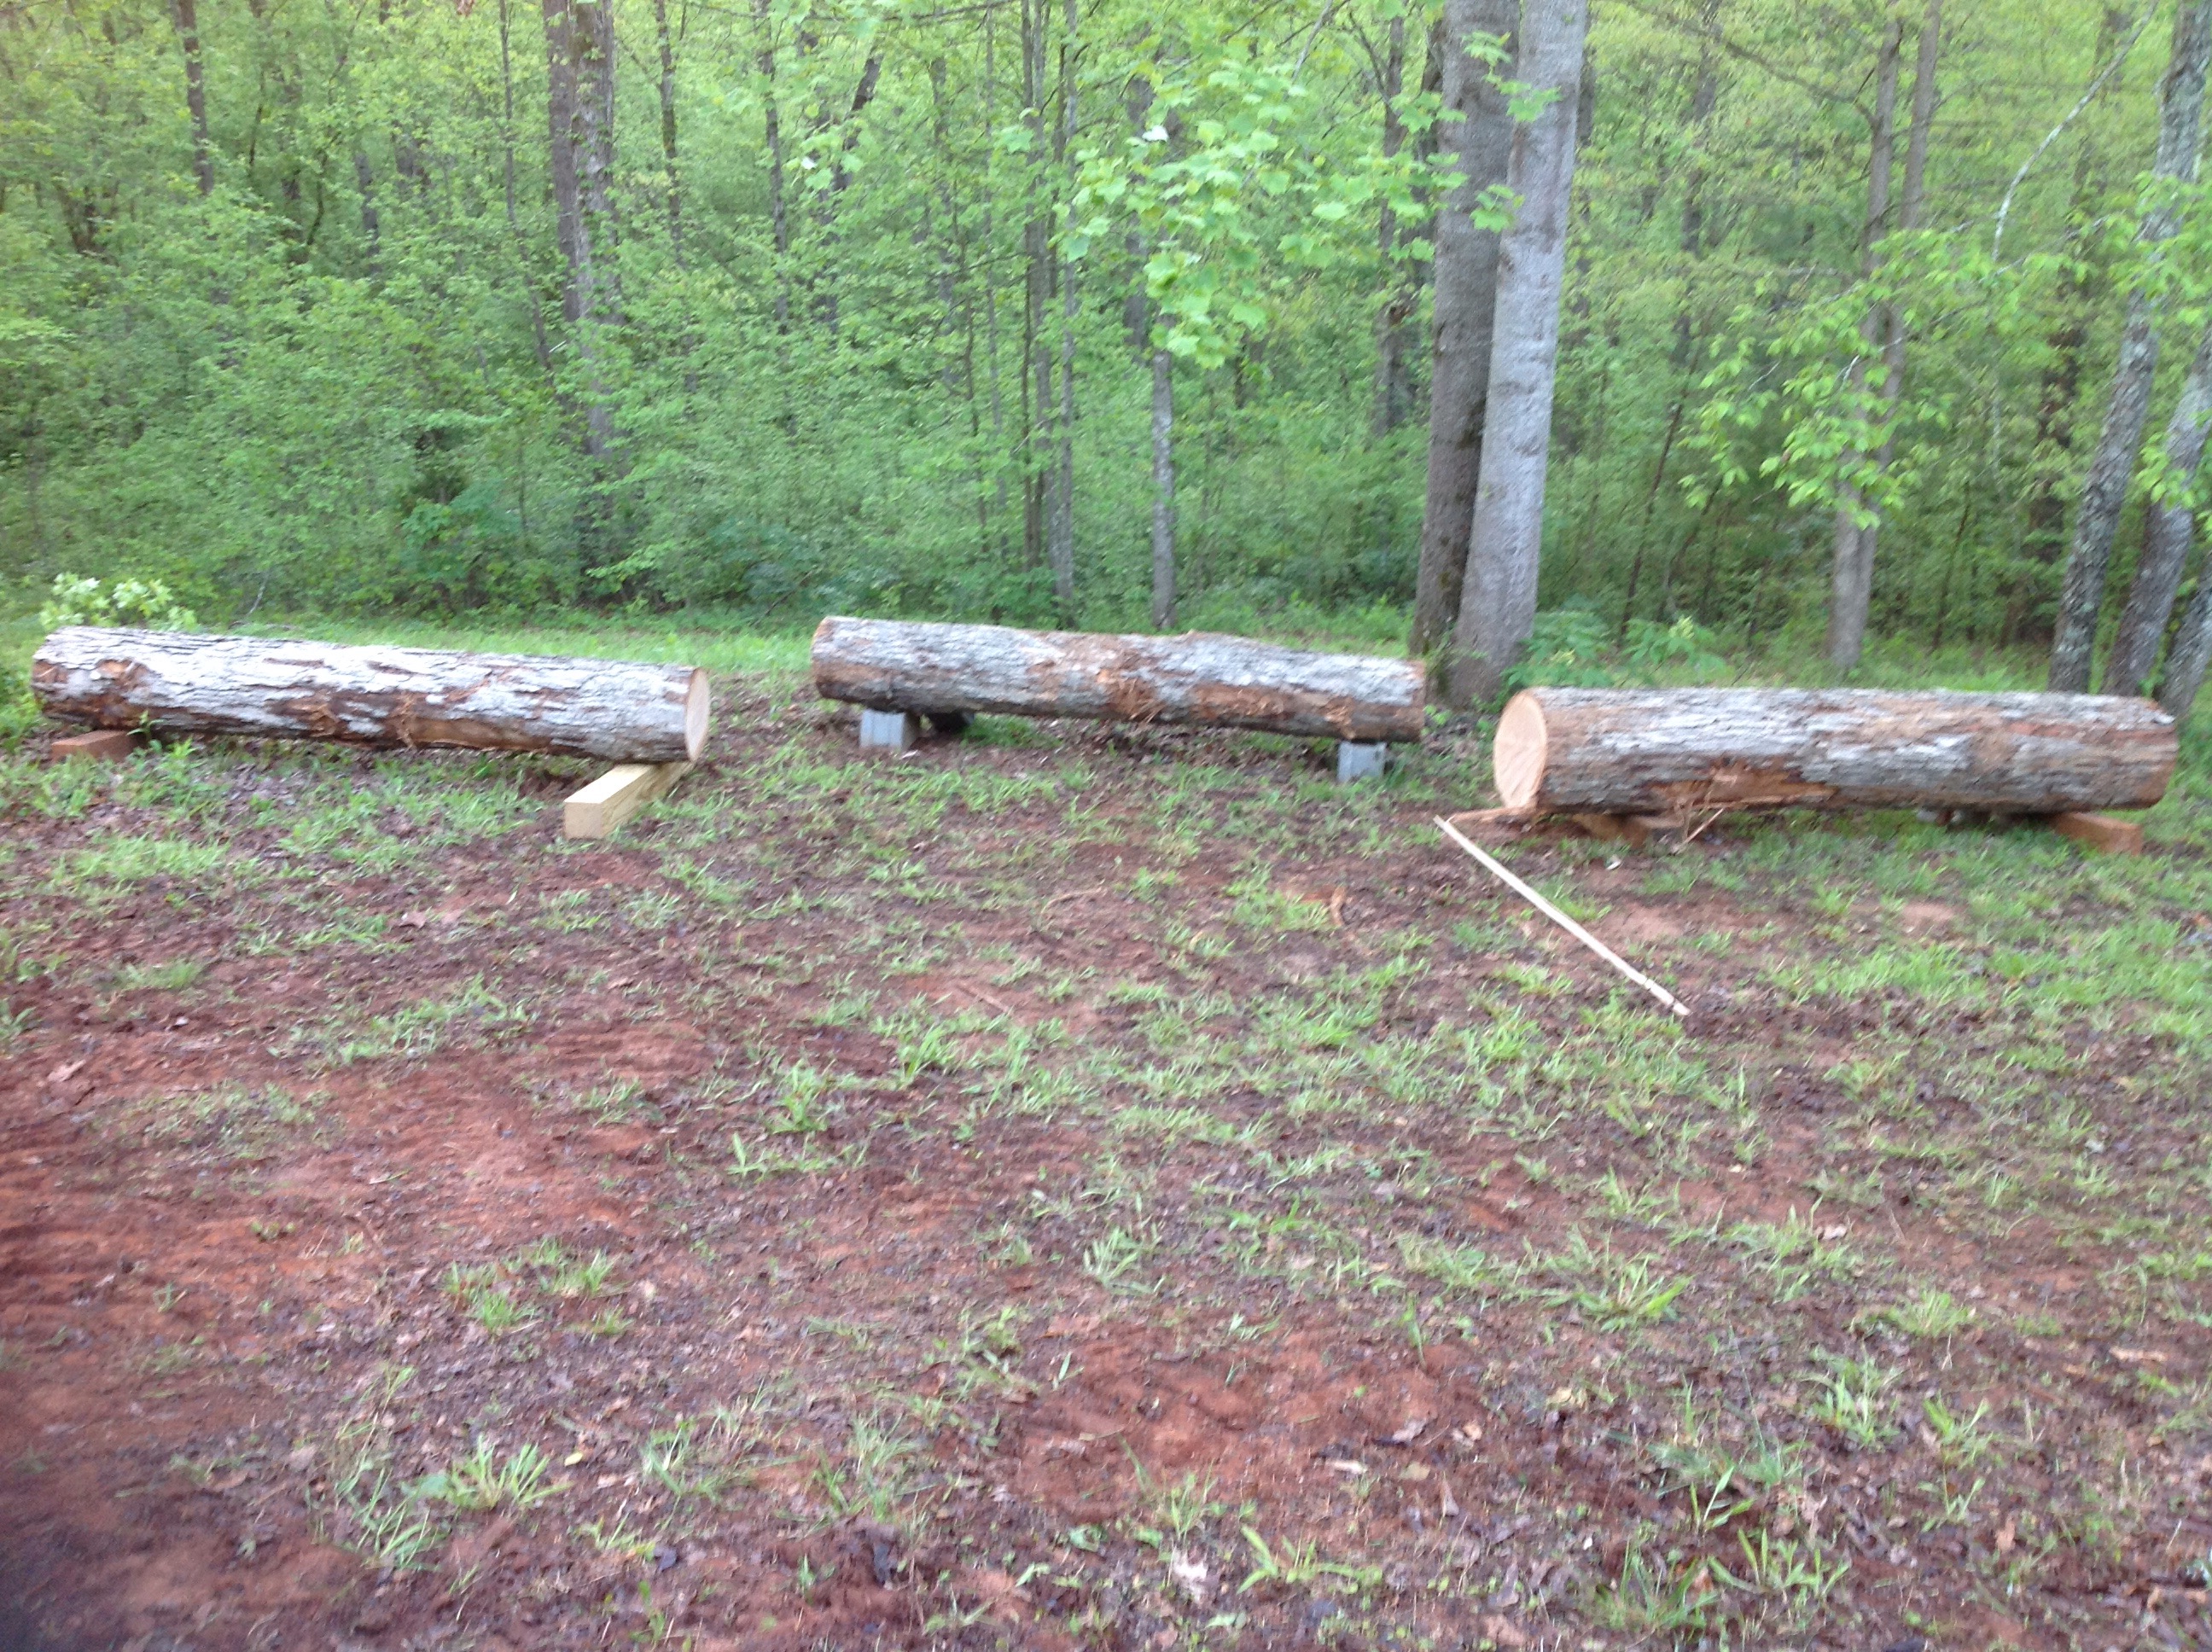
These trees were cut by a logging company under the supervision of the GA Dept. Of Forestry from a 20 acre property only about 1 mile away from my house. I stopped in on the operation on Monday and I learned the 100+ year old home and land covered by 100 year old trees is owned by 3 elderly sisters who need money and decided to cut and sell the more mature trees. It’s unfortunate that most of the trees will end up going to paper mills and no I’m not kidding.
I had to rescue what I could afford and have space to store and dry the material. The logging company agreed to sell me 5 log sections, 9 feet long each which turned out to be very nice. It’s not that I cut my own lumber to prove a point or because it’s just so super cool. It’s because this is what I have already made an investment in and it works well. The biggest downside is that it’s a lot of work so I am feeling it today for sure. But I am really excited to have come across such beautiful material.
In fact if anyone is interested in joining me for some back breaking labor… I mean a really cool experience by all means let me know. Maybe we could work out deal for my services once the material is ready, in trade for your assistance?
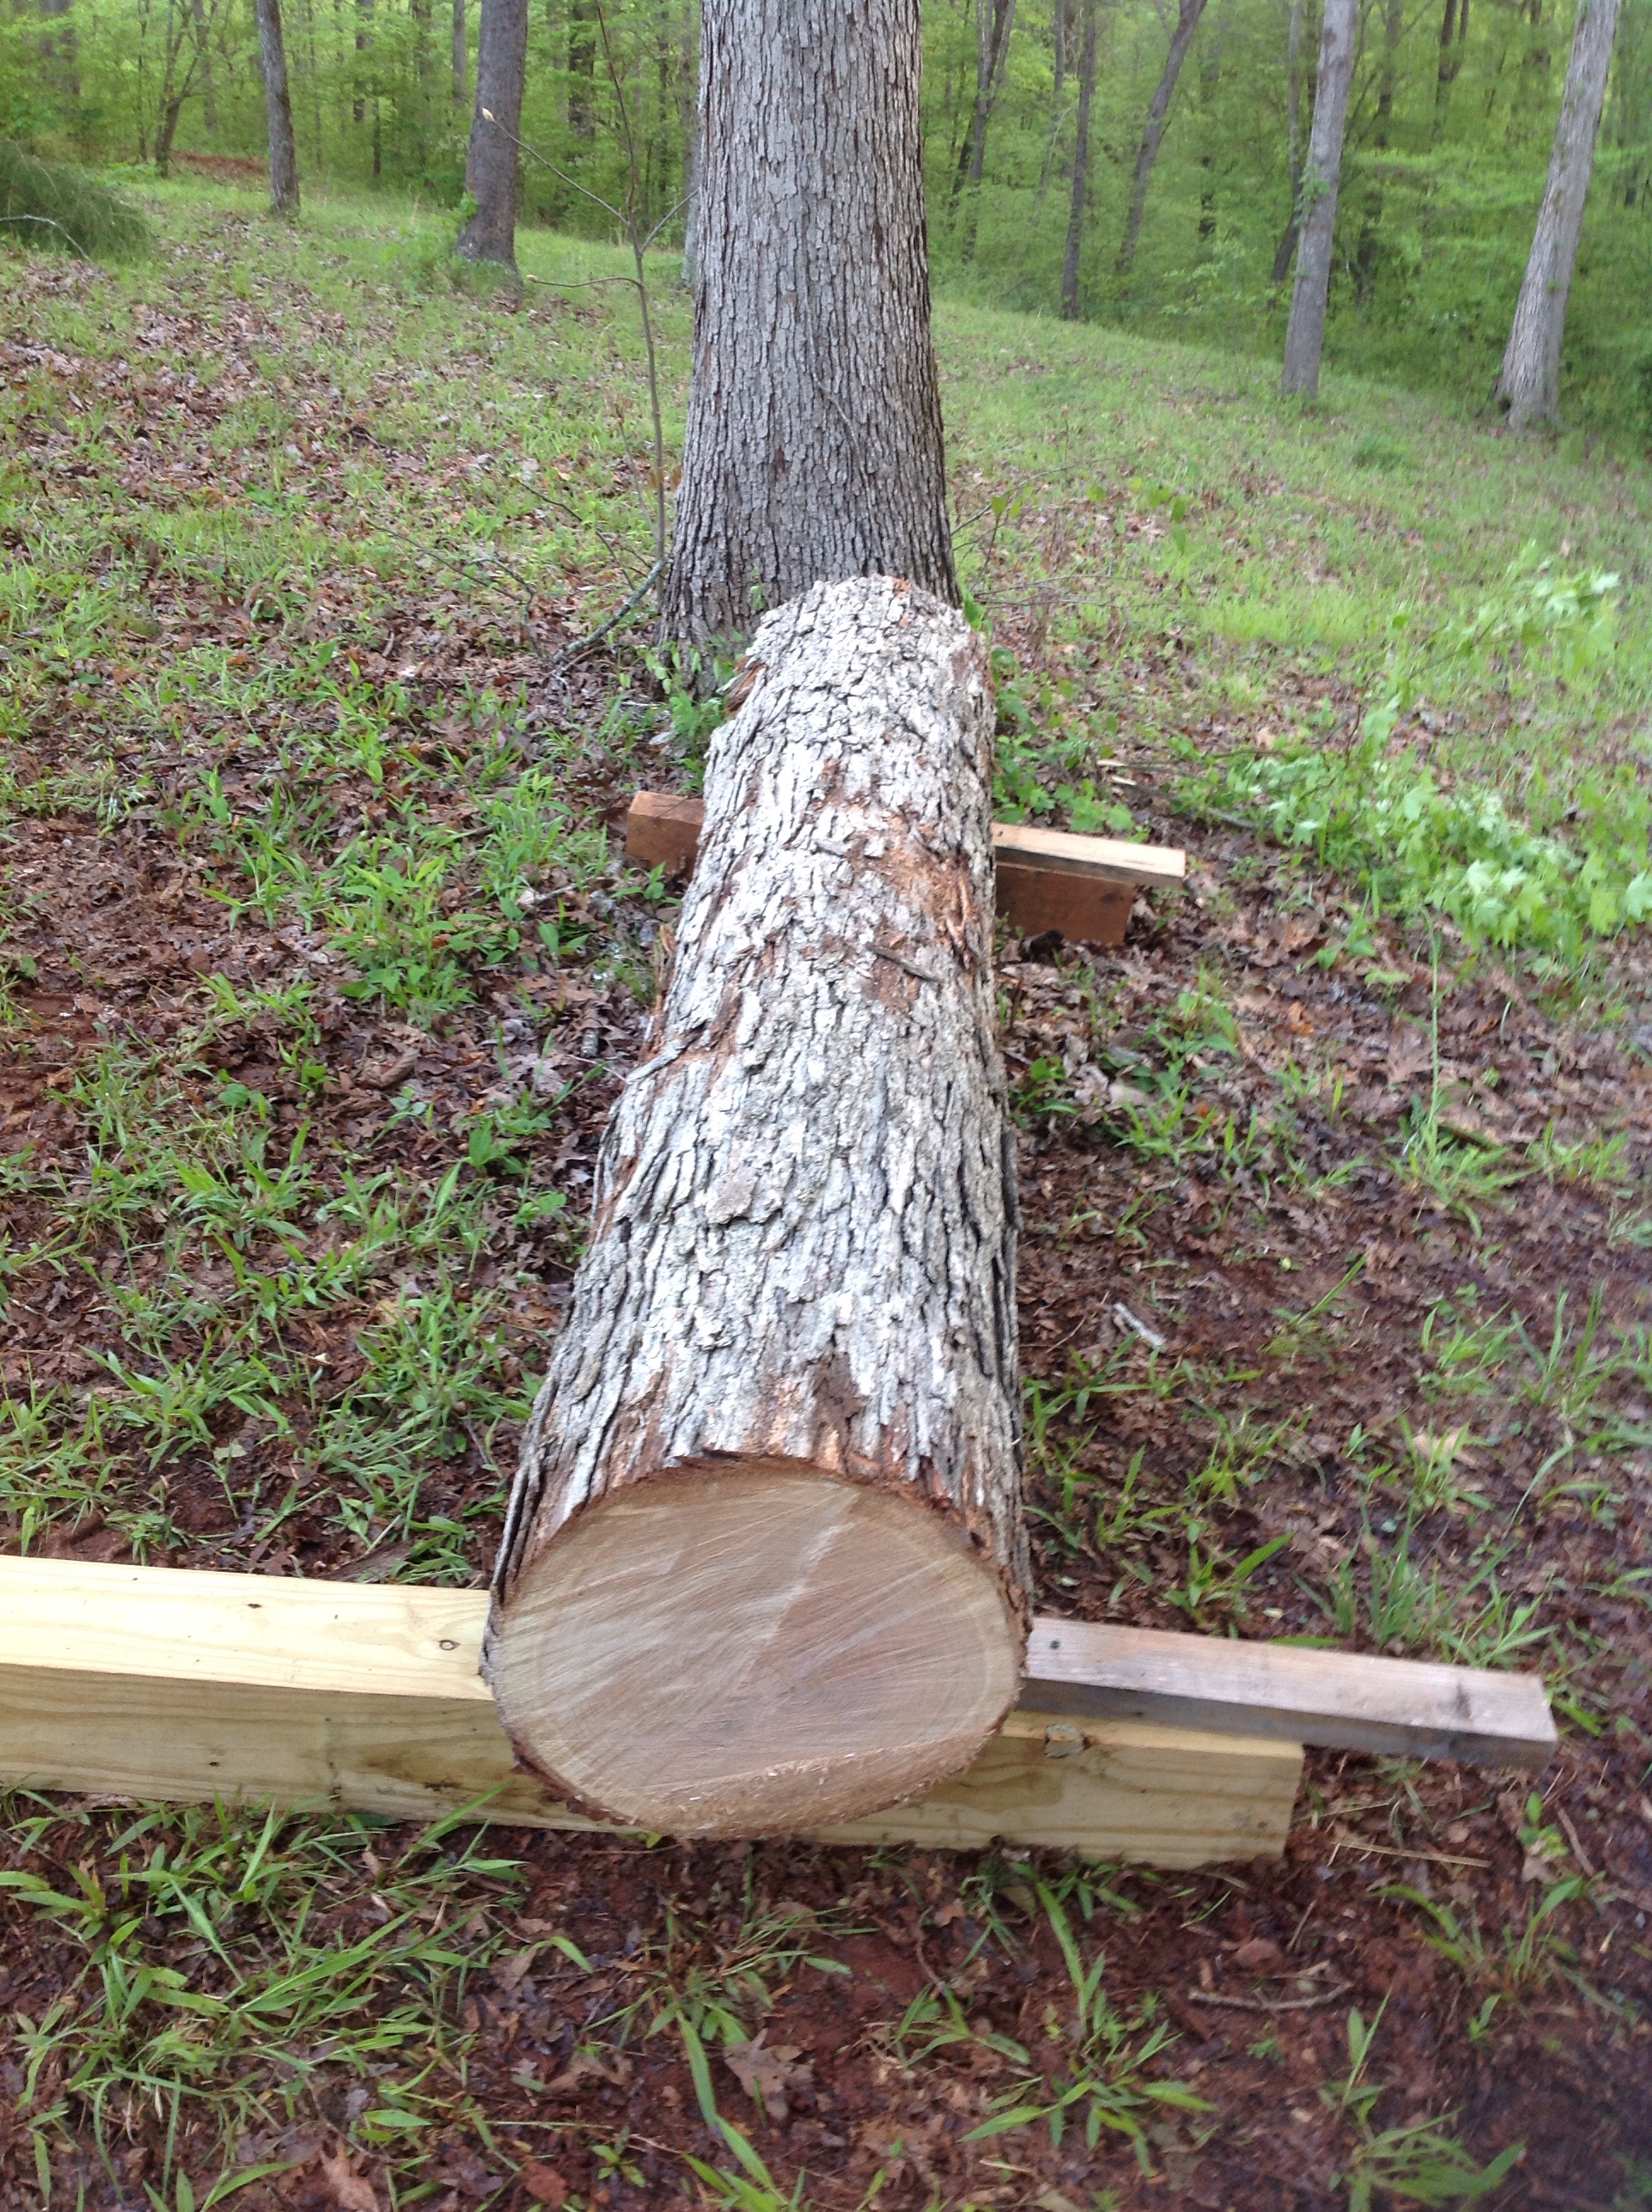
This tree is just over 100 years old and just over two feet in diameter at the biggest end.
These are 80 years old or so, really straight and no limbs.
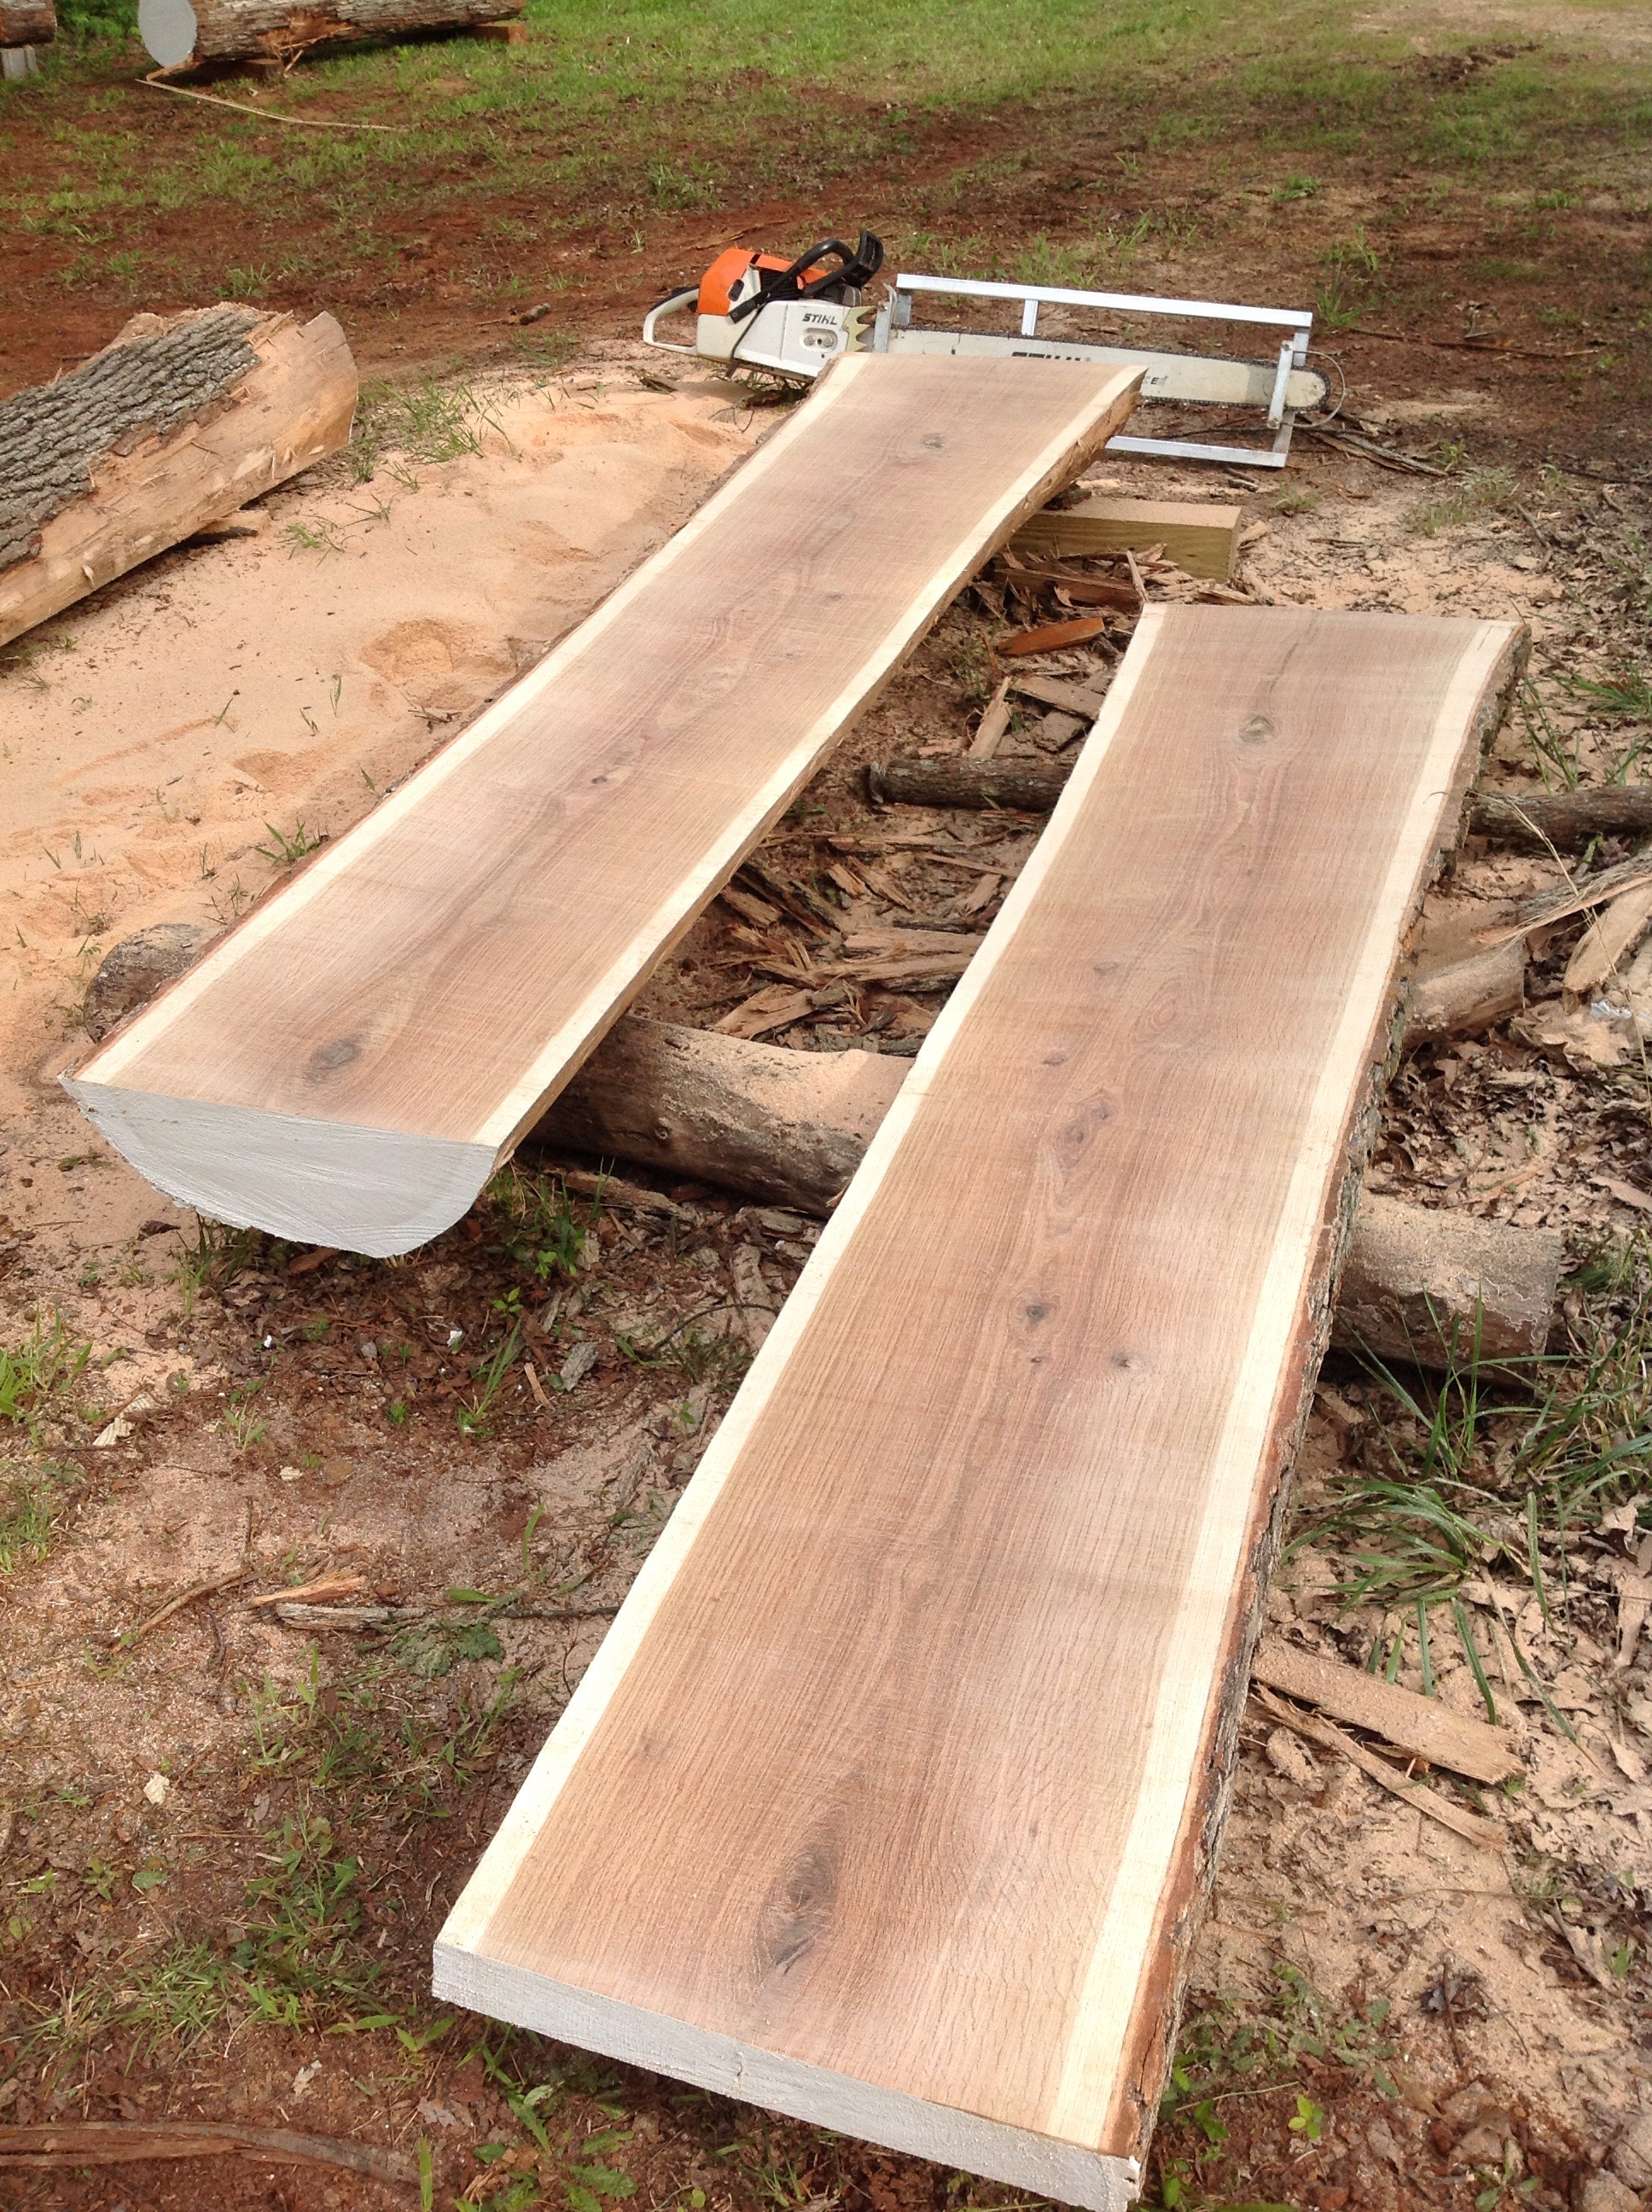
This is the setup for the initial cut. Who doesn’t love a big chainsaw. It’s a Granberg chainsaw mill and a Stihl MS 880 saw. The initial cut is made with the aluminum frame riding on top of the 2X12 as a guide. I just set the cut for center of the log making sure that I cut parallel with the center all the way through.
This oak has really nice color and grain.
Here is a 2-1/2″ thick slab. I would say it weighs around 175 pounds with all the water in the wood. This piece of wood will take about 3 years to fully dry and be suitable for building furniture😥.
Everything that is… is changing. You and I will never step in the same river twice. Marinate on that.
I’ve had experiences and been places that I wish I could return to, and on the other hand, had experiences and been places that you could not pay me to return to. I have learned to value the past, good and bad. All people should share this sentiment.
I spent this past weekend volunteering in a kitchen along side men who were willing to share their experiences in life and I found tremendous value in their stories and life experiences. Some of these gentlemen are in their eighties and I was blown away and inspired by what they offered. One common thread beneath these stories and life experiences was that change happens and its up to you and I to decide how to handle it (there’s the cliche).
It has been immensely helpful to me to remind myself everyday that change and my natural resistance to it, makes me better or, perhaps put another way, stronger. It’s ok in my opinion to resist, to question, to doubt, to challenge. It’s through this (most often) painful process that we grow, grow up, or grow into the next season of our lives.
The ideal kind of change is the change we manifest out of a desire to improve what is within us and around us. Be it a relationship, a job skill, or fill in the blank as it fits your current life situation.
Ladder back chair in progress
So in this spirit of self manifested change and the desire to expand my own skill set I have spent the last 4 weeks taking on a very difficult chair build. I am currently about to finally assemble the chair but have held off on writing about it, because to be honest I was pretty certain it would end up in the fireplace out of failure in execution or frustration.
In the end, it looks like it will actually come together nicely and it’s a very satisfying feeling to have pursued this challenging project. I hope these thoughts will inspire initiative for at least one person to pursue a challenge facing them regardless of the perceived difficulty. The process, NOT the end result, is more than worth it.
I will be sharing details on the chair build in the near future.
I listened to a pod cast by Rob Bell (The Robcast – Episode 9) where he shares a Native American piece of wisdom that I just cant stop thinking about. The jist of said wisdom is in order to begin to understand why things are the way they are (with all the global conflict, suffering, social challenges, and on and on), you must make space within yourself to begin to understand the unexplainable. Truth is like the sun, we can’t look directly at it, but without it, nothing could be seen.
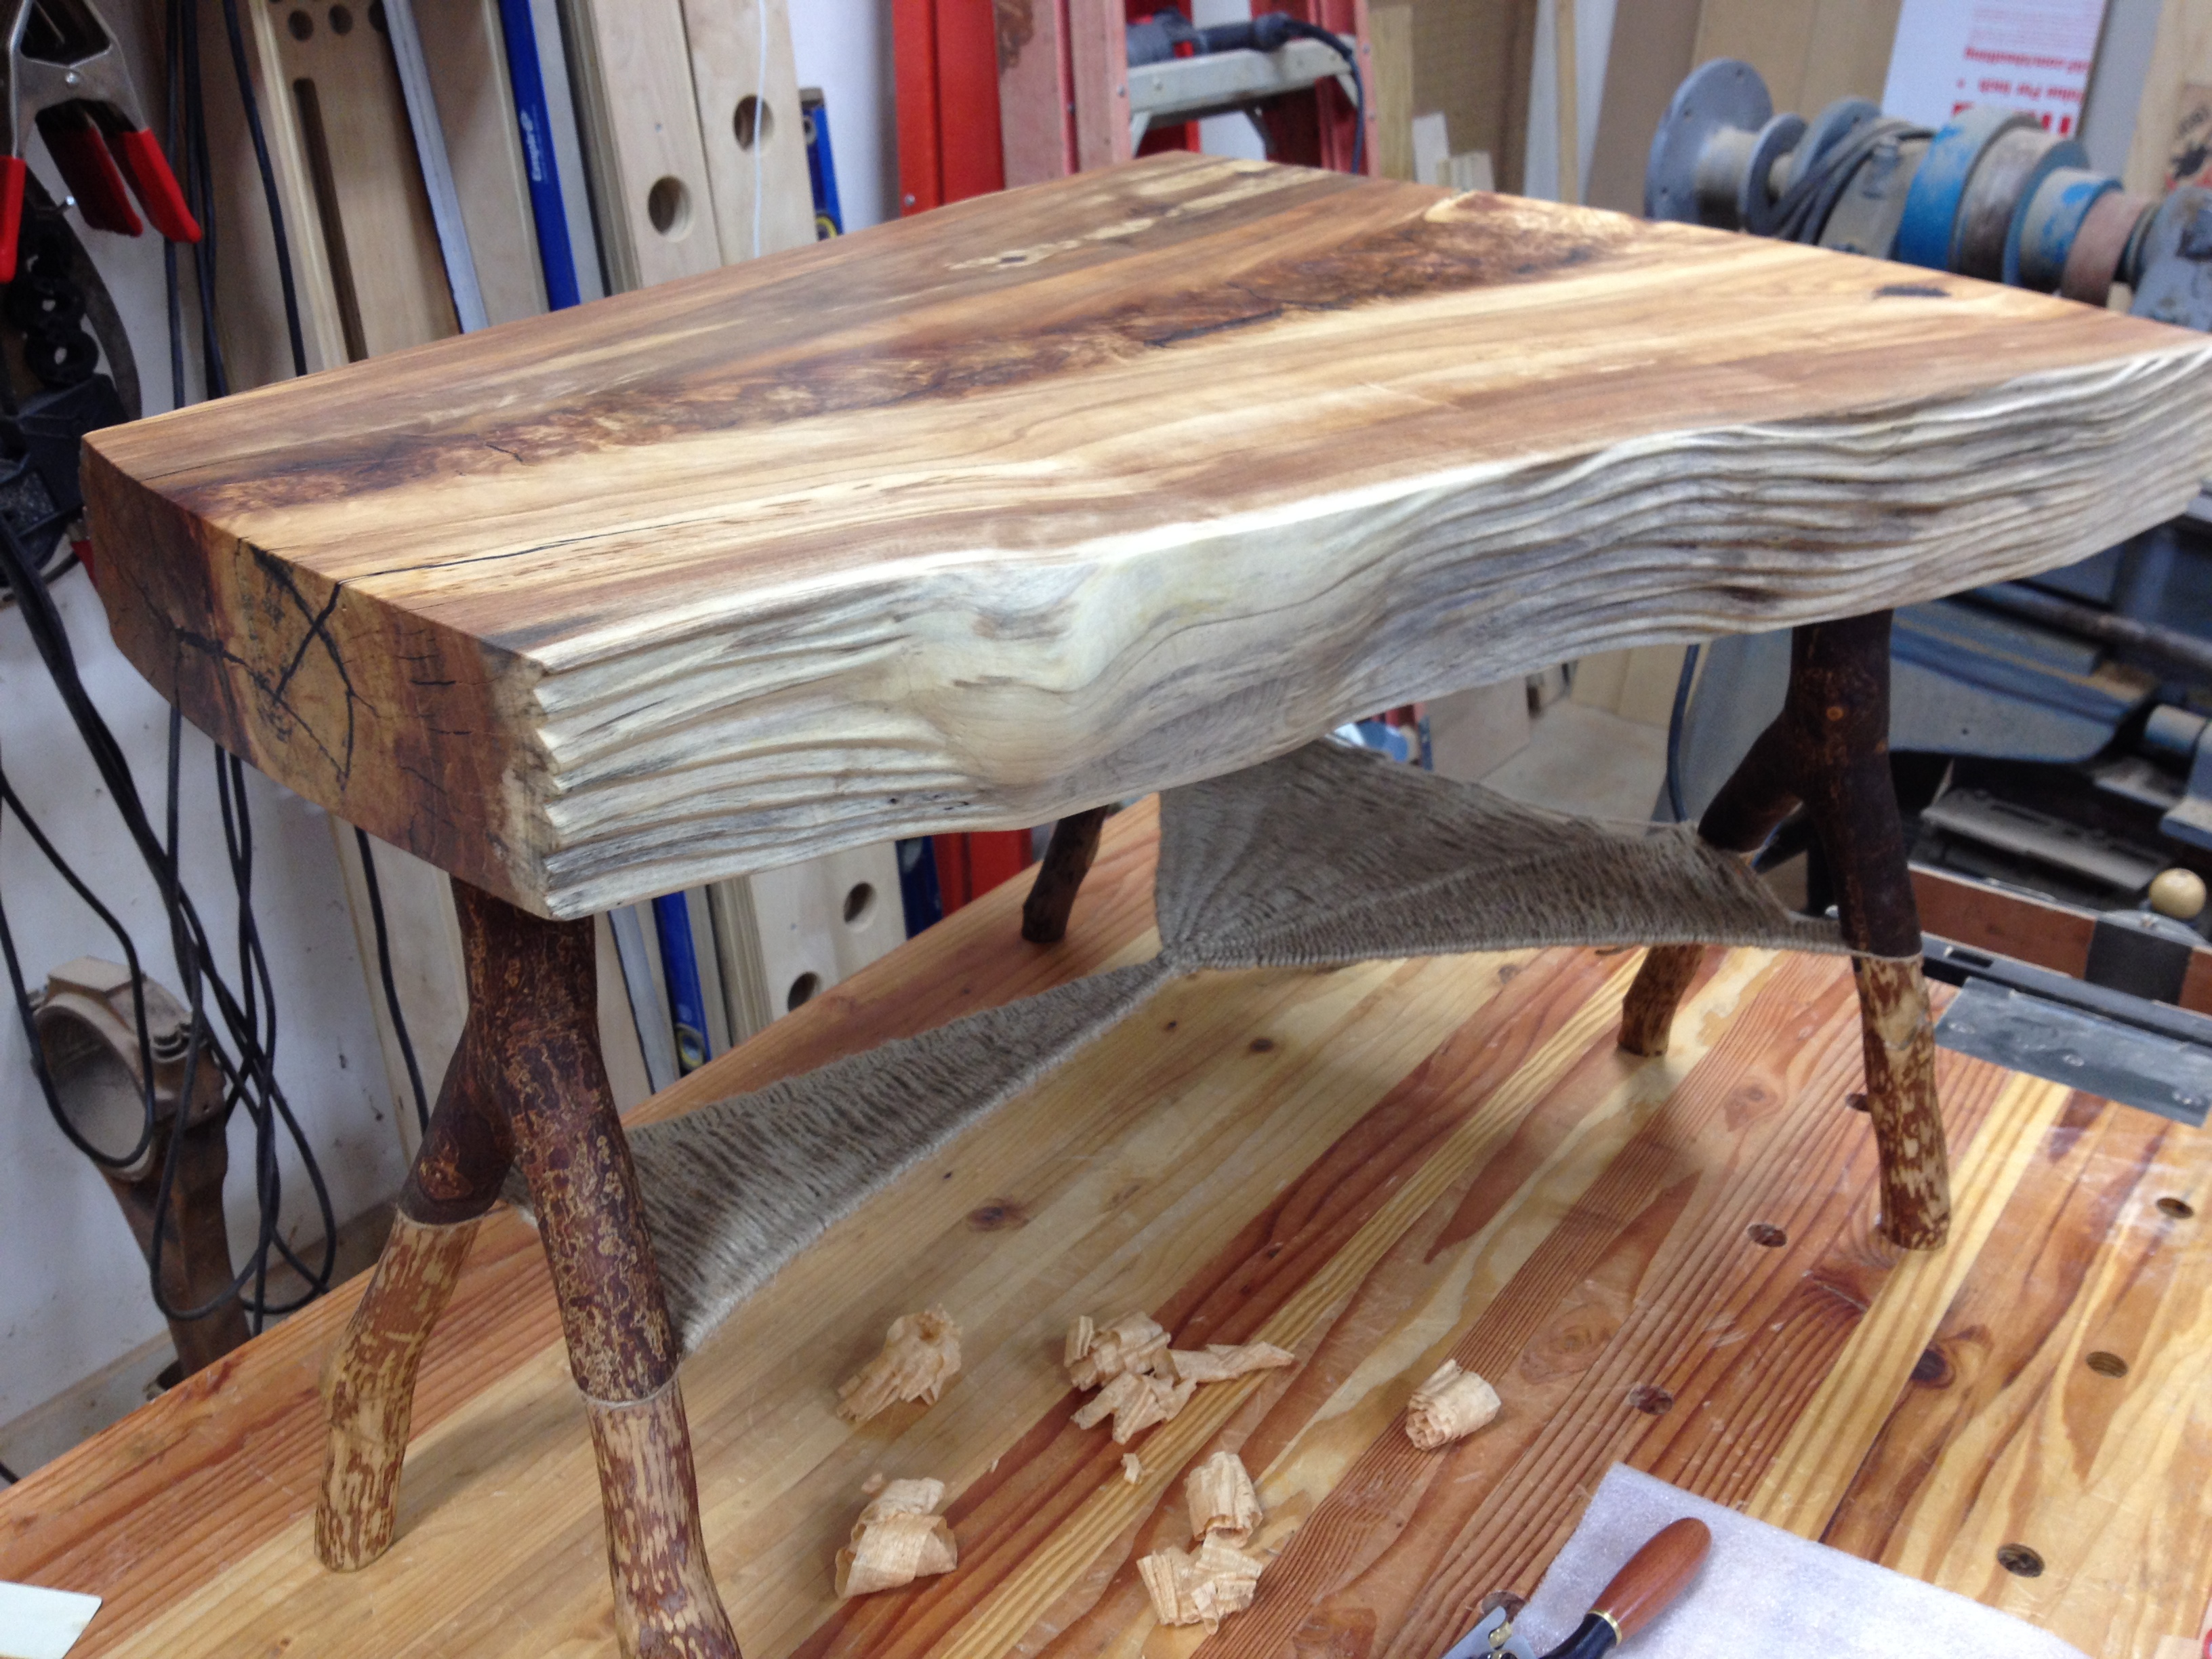
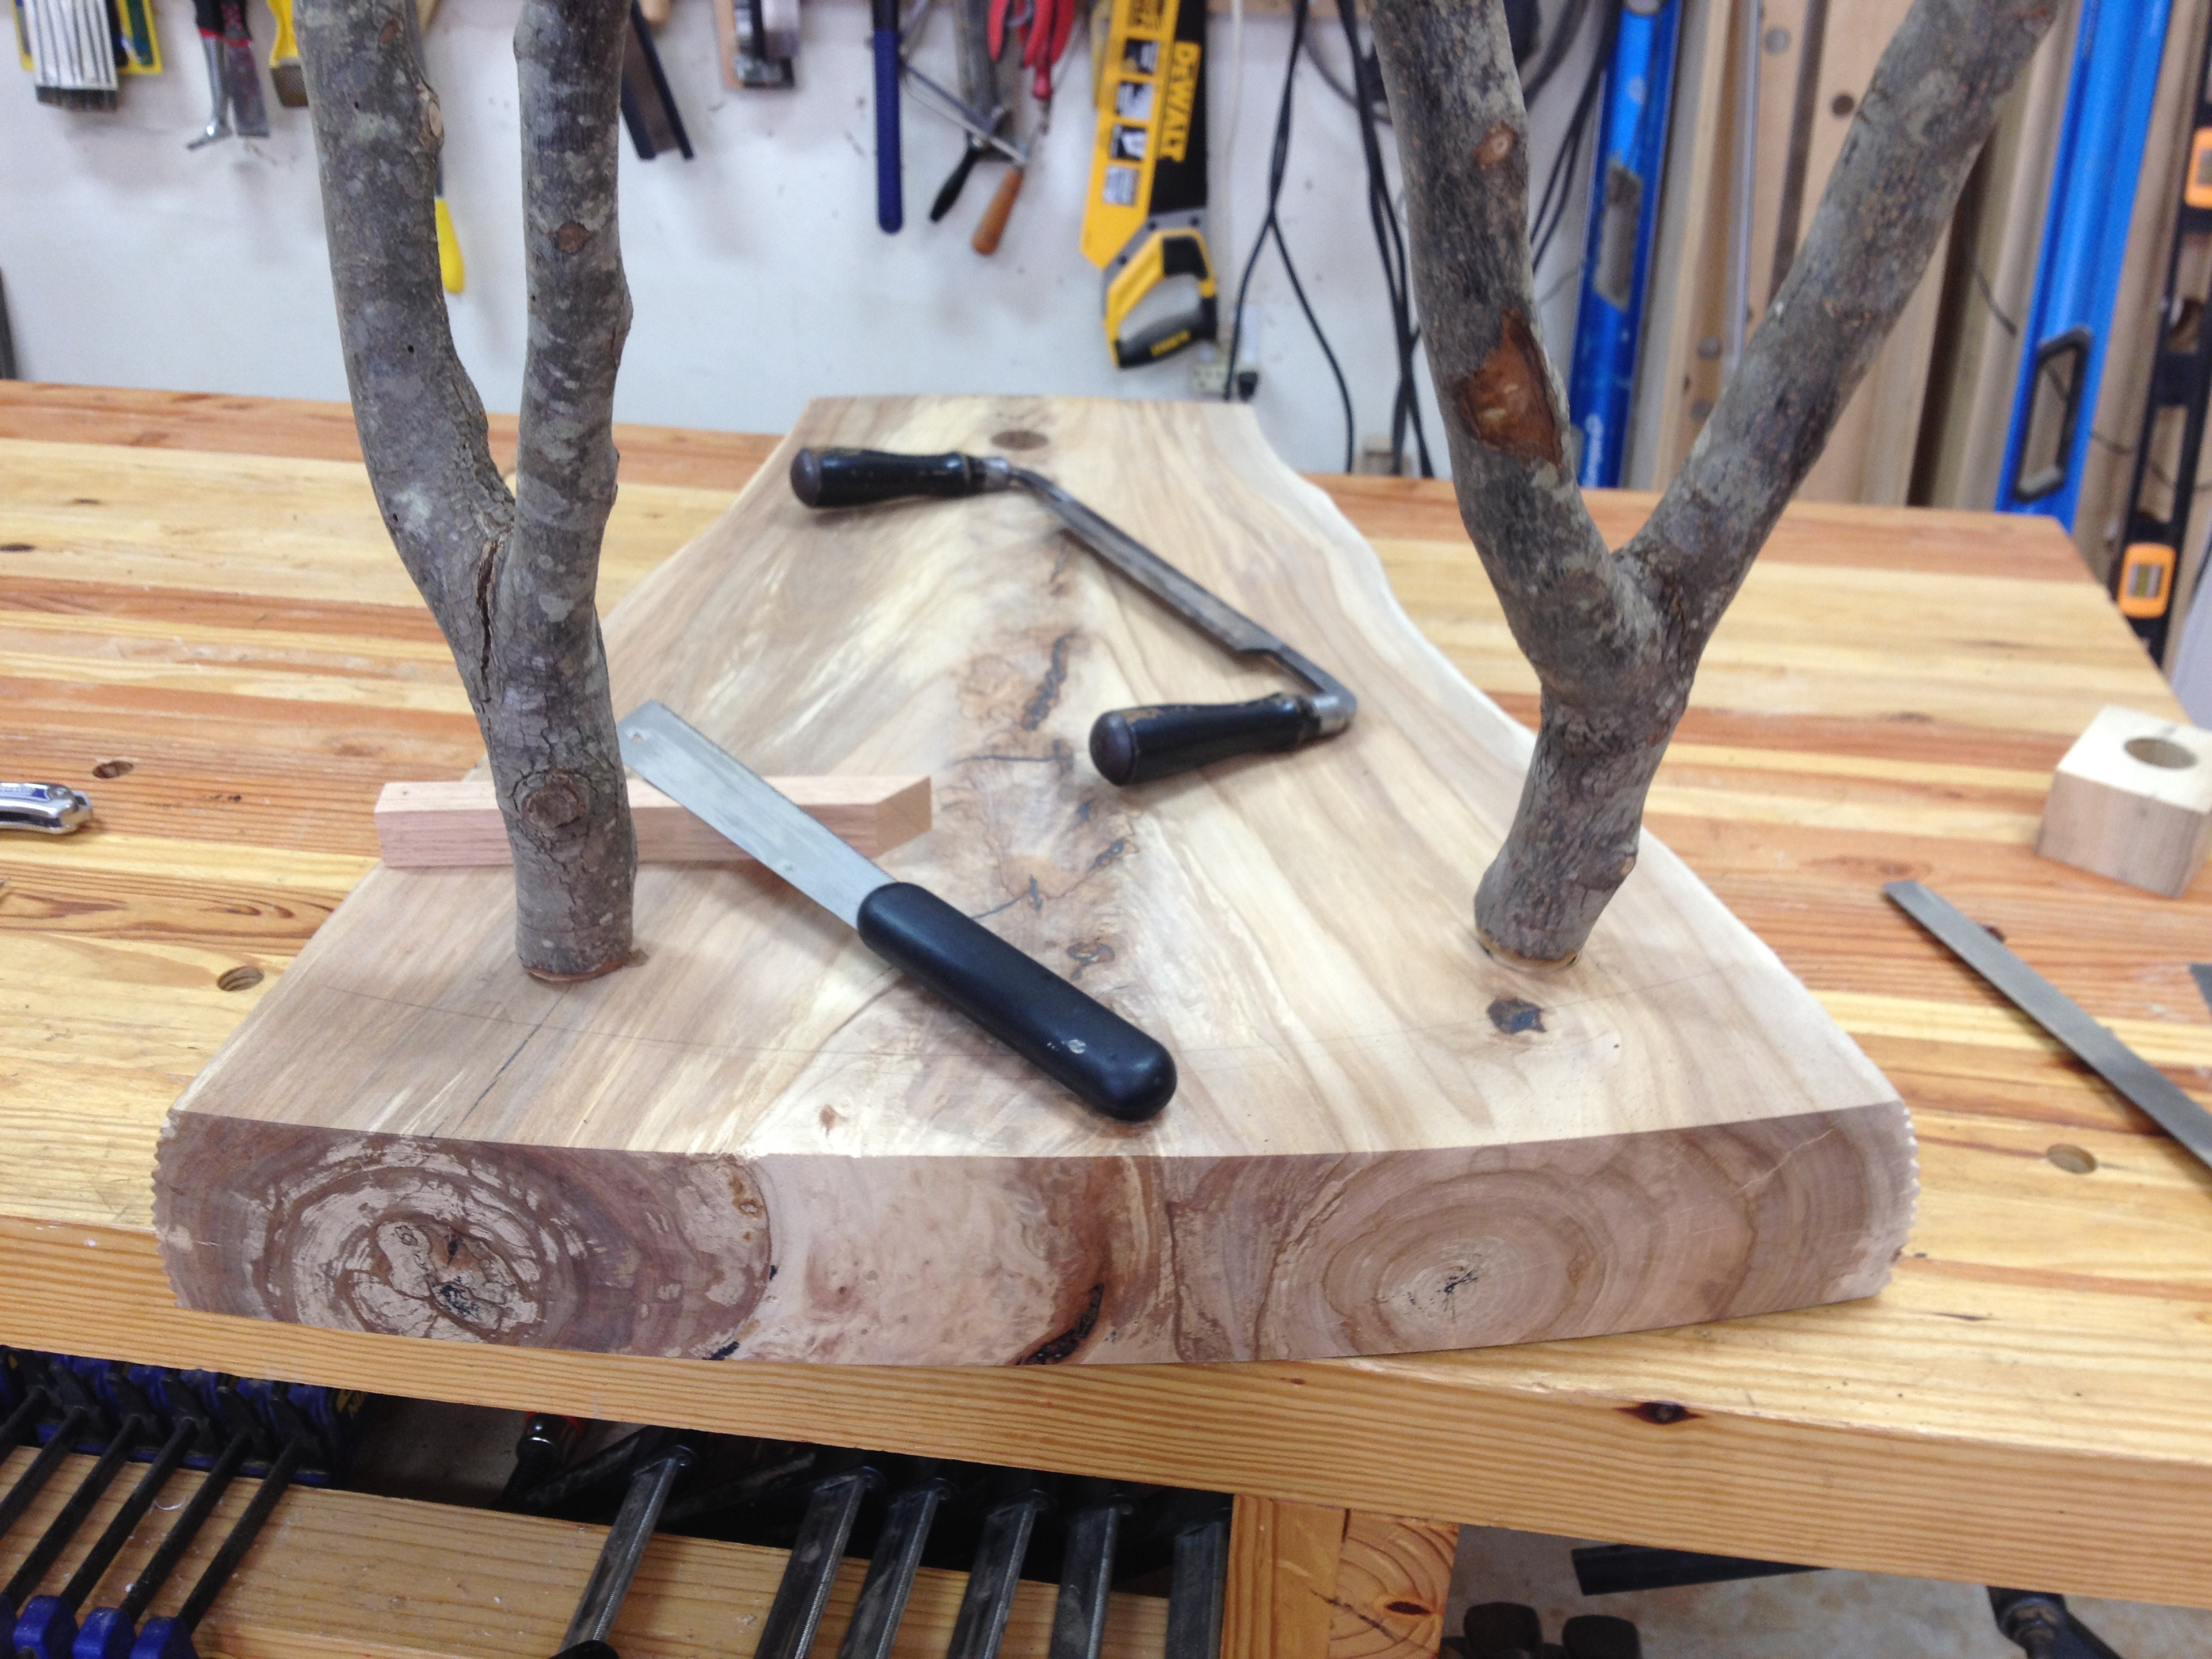
This post will highlight the natural leg coffee table finishing touches including the woven shelf and finishing process I applied to the piece. A huge thank you to Lisa McKenna for editing the video for this piece and putting it up on the blog, I love you.
The original design did not include a shelf but looking at the piece after the legs were installed I felt strongly that it needed a shelf of some kind for balance of the piece and functionality. I am a fan of danish cord used in modern pieces so I decided to go that route, sort of. I was able to find natural heavy duty jute cord at my local big box store and after some research selected this material for the shelf as a good choice for durability. So all told I wove about 400′ of jute cord in the suspended shelf taking about 20 hours!
The pattern of the weave was really just dictated by the final location of the legs resembling a spider web. I intentionally placed the height of the shelf just below the natural split in each leg, while still allowing enough height underneath for cleaning, it’s right at 6-3/4″ off the floor.
I knew I wanted the weave to converge at a center point below the top. So first I took a nail, heated it up and bent it in a circle. That nail was used as the center point in the weave where I connected all the supporting cords. I ran a continuous cord around each leg and back through the center ring (nail) until each leg had two runs of cord around it. This initial pattern is shown below.
Once the basic framework that supports the weaving was done, I broke this framework into four segments not wanting the weave to be round. I also added an additional two cords from the center ring outward within each segment for additional support. So each of the four segments has 4 supporting cords which the weave cord goes under and over. Once all these additional support cords were tied in and tightened, I began weaving one segment at a time using a continuous piece of cord for each segment. The weave is basic, just back and forth across the supporting cords going up and over, or down and over across each supporting cord. Rinse and repeat. I left the end of the cord for each of the four weave segments long and did not permanently tie them off until all four segments were done. I then went back and tightened up the four segments and tied off all the ends.
Prior to applying finish to any project, I look over the entire piece in detail for any surface flaws, machine marks, etc. I take this opportunity to address these surface flaws now. Any undesirable flaws will be magnified by surface coatings, stains, etc. This is also the last opportunity to smooth any sharp corners and final scrape or sand all the surfaces. I stronly prefer scraping to sanding because it results in a deeper reflection of the wood grain when finish is applied (this could be another post altogether). I place as much attention to detail in the finish surfaces and textures as I do in the actual building of the piece. Many times the finishing process can take longer that actually building the piece. Here is a photo of the top after surface preparation, it almost looks like it already has finish on it.
The finishing process for this piece involved a few simple steps using products available at any big box store. This is a finishing process that anyone can use and is almost foolproof, assuming we have the patience to allow each application of finish to cure properly. I used Watco Danish oil (natural color) and Minwax satin-sheen polyurethane. Both of these products can be wiped on with a lint free cloth.
The danish oil is flooded onto the surface and then wiped off 30 minutes after you apply it. Oil finishes penetrate the wood and leave no built up film. Oils do not provide great protection from moisture but they are great products when you are trying to achieve a “close to the wood” finish. The downside of oil based finishing products is the drying time of 72 hours between coats. I applied two oil based coats to this piece, allowing each to dry for 3 days.
Since this piece will serve as a coffee table, additional protection on top of the oil finish is needed to prevent water stains. I use polyurethane because it builds a good finish quickly, is compatible with oil based finishes, and is very durable. The process is simple, I apply two thin coats of satin sheen poly using a lint free piece of cloth. The key to getting a nice smooth finish with polyurethane is to put the finish on thin and quickly, never going back over any areas that get tacky. Going over an area after the surface has begun to dry even the slightest will result in two problems, the first is lines in the finish and the second is the surface will have a different sheen to it under certain angles of light. Between coats I very lightly sand using 400 grit sandpaper to knock down any debris that gets into the finish.
This finishing process has a quick learning curve and great results can be achieved without a lot of finishing experience.
It was on this day in 1992 that white South Africans voted for constitutional reforms that would give legal equality to black South Africans. 1992…Come on man! Its a great day to be an American.
As promised I’m continuing the natural leg coffee table build post. This post will focus on how I set up the drill press to bore the holes in the top for the legs, and sizing/fitting the legs. There are a couple of tricks I have picked up along the way that really help with the accuracy of the joinery that I want to share.
The featured image for this post represents where I left off. All the layout we need to proceed has been marked on the bottom of the top piece and the legs, Also, the legs have been cut to about 1″ longer than their final length.
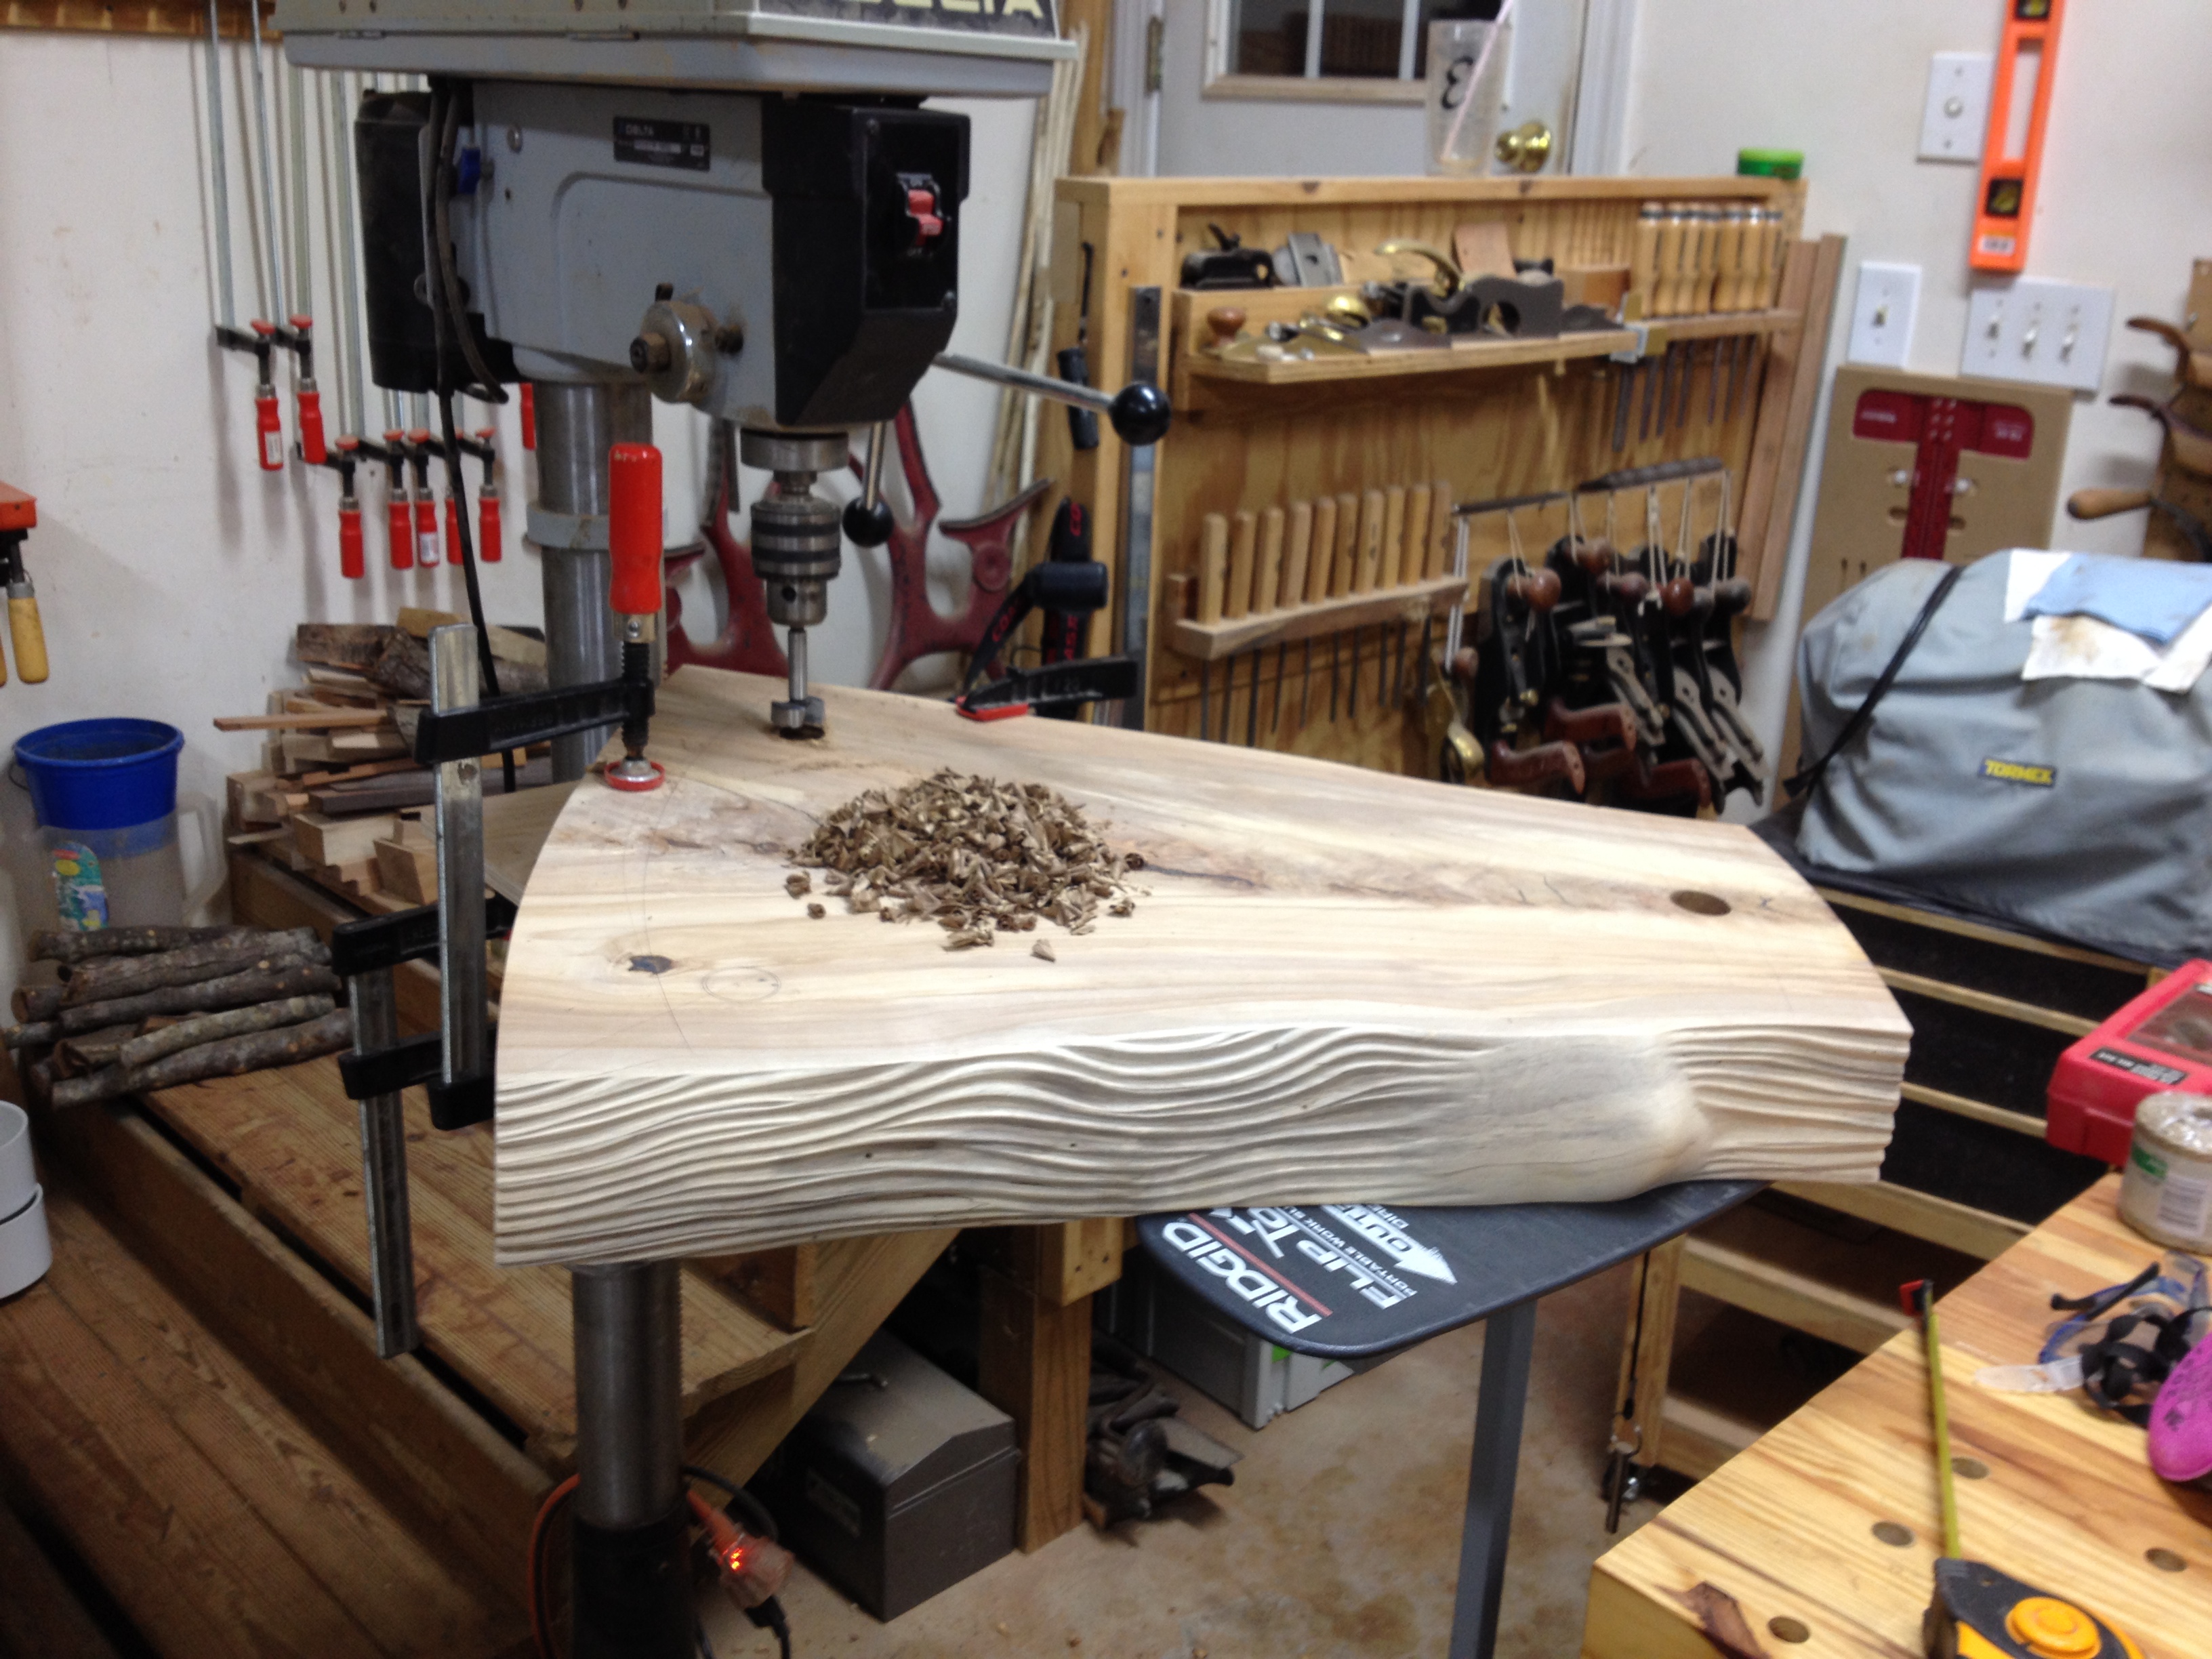
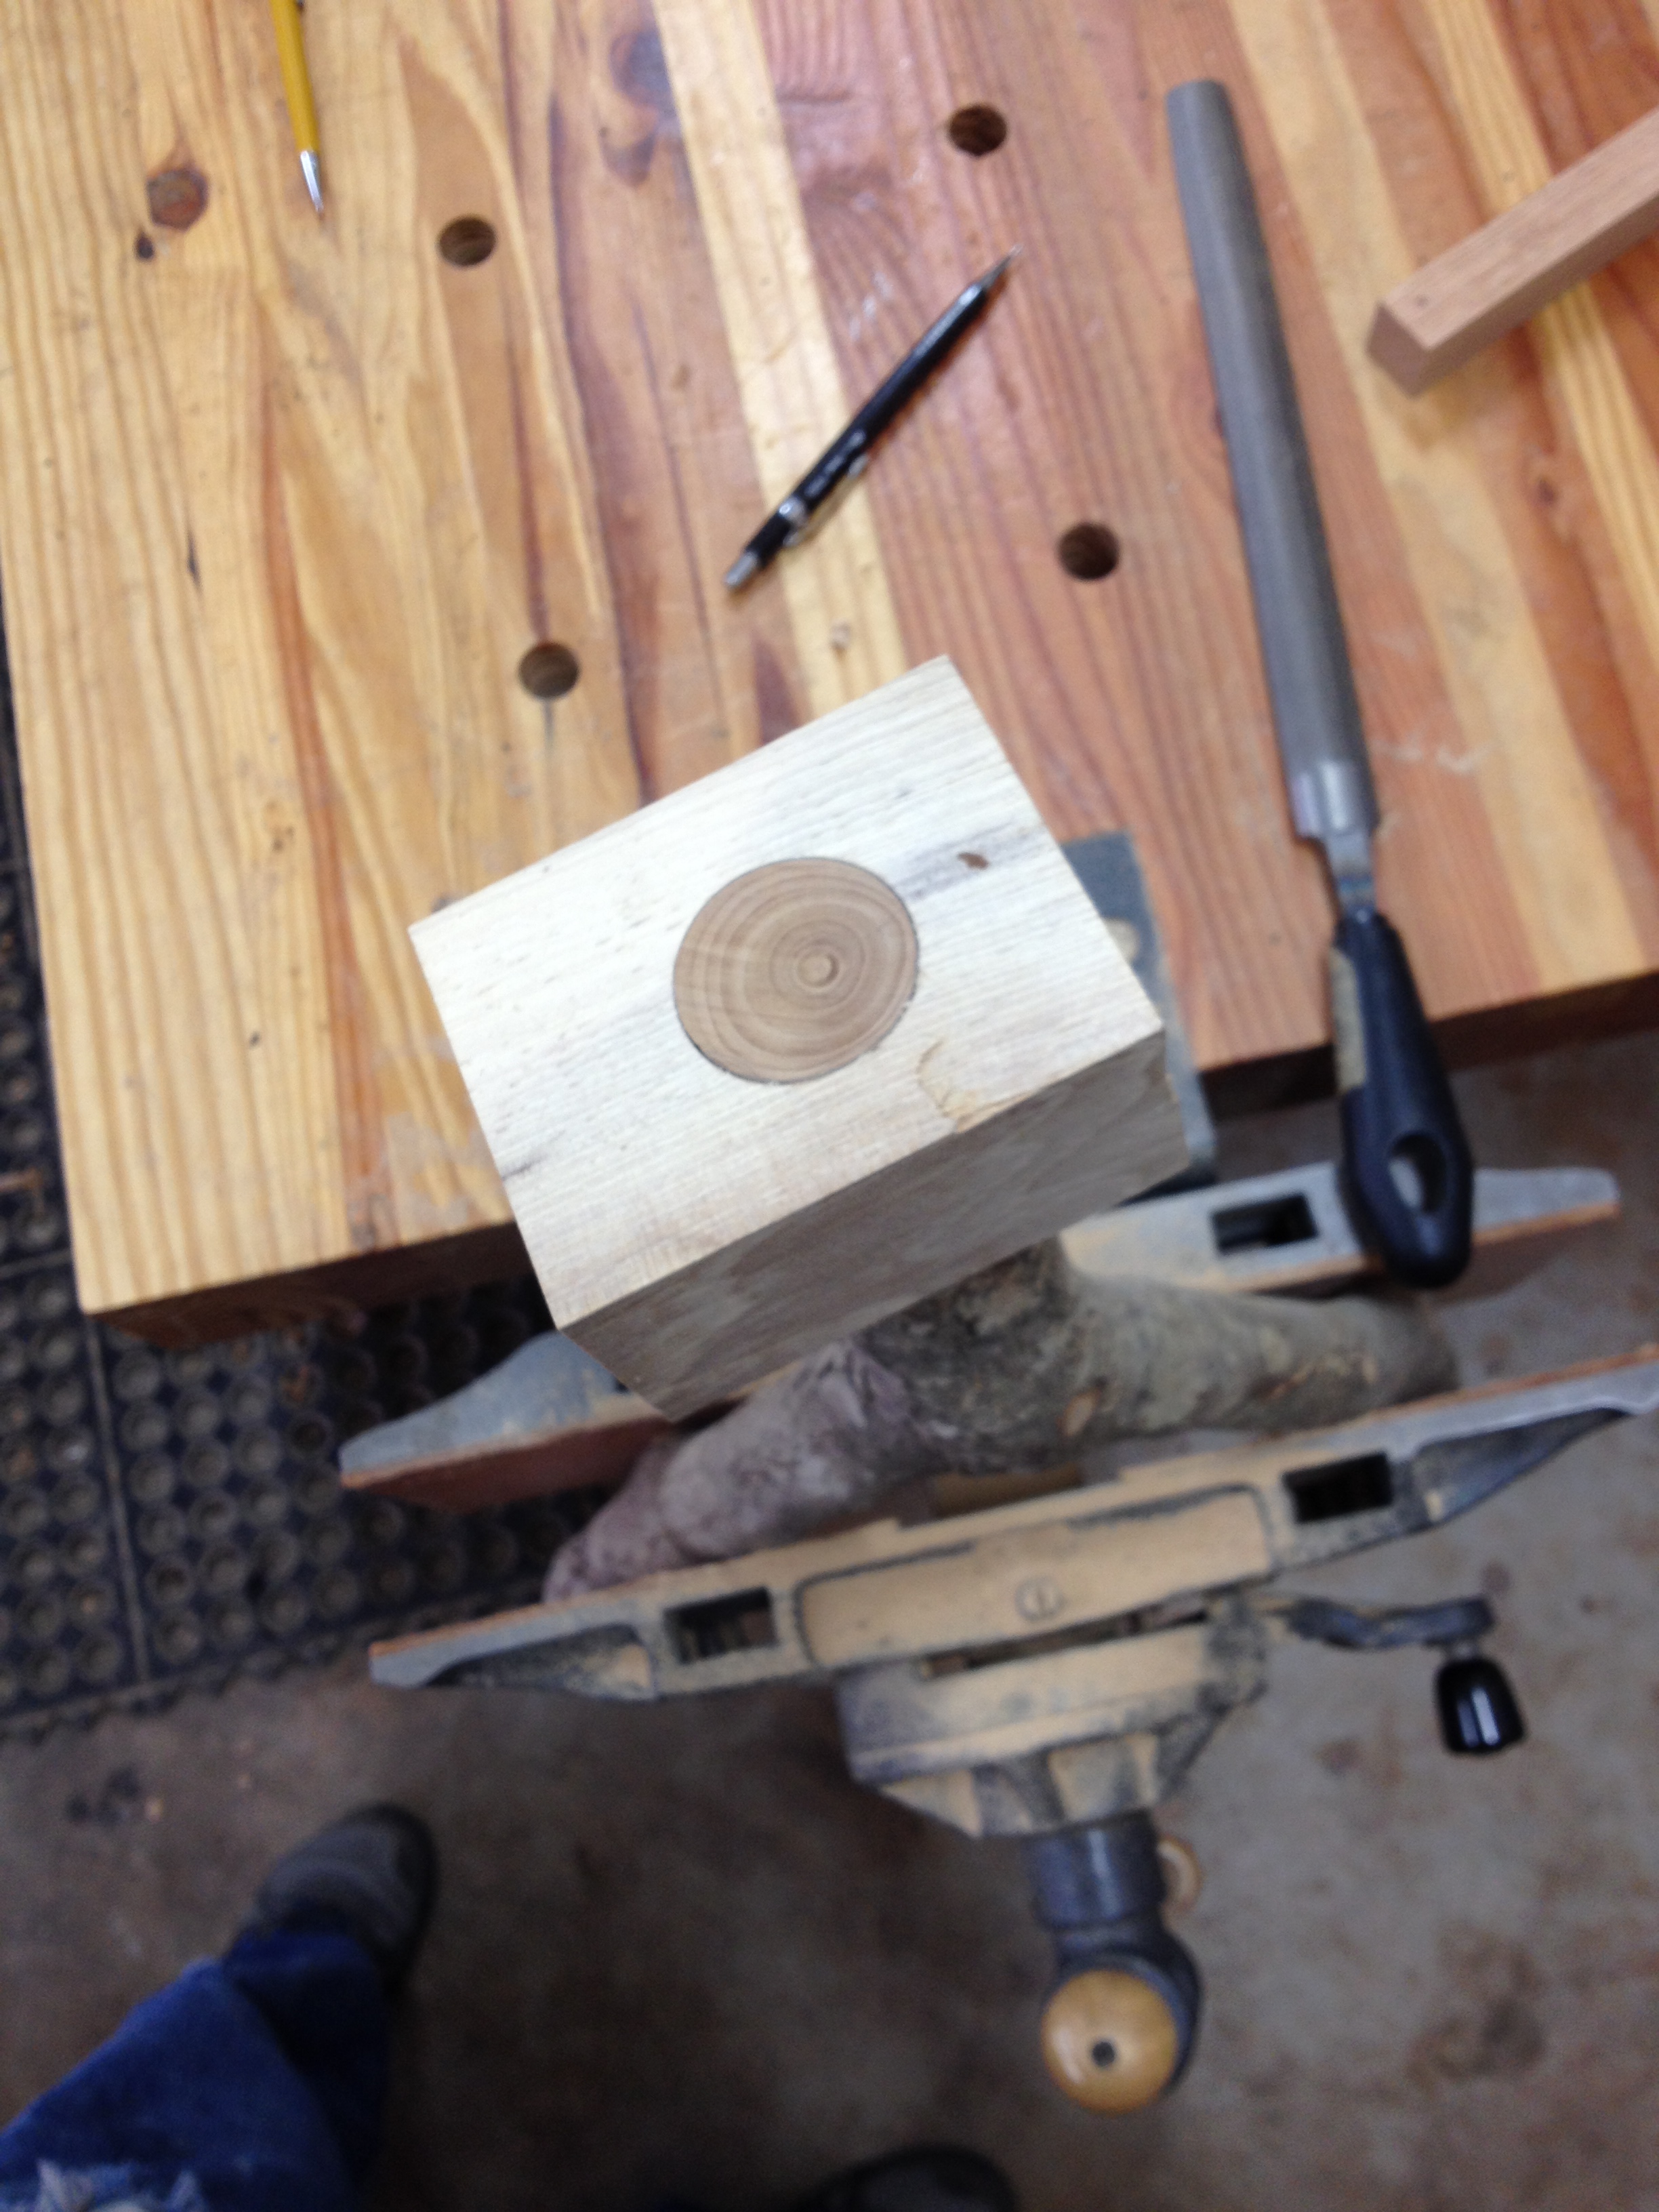
Since the legs are already more or less round I choose to use a round mortise (the hole the leg will go in) and round tenon, and keep each tenon as large a diameter as possible for strength. I use a plastic circle template to determine the diameter that works best based on the legs I have and grab a forstner drill bit that matches the chosen diameter. In this case the diameter I am going with is 1 3/8″. I also mark the top of each leg using the circle template placing the circle roughly in the centered on the leg. I will cut the tenon down to this pencil line later.
Now the holes (mortises) have to be drilled into the bottom side of the top at the correct angle and to the correct depth. I built a very simple jig that clamps to the drill press table to assist with this operation. The jig is made of two pieces of plywood connected by two heavy duty hinges that I sized to fit on my drill press table. To set it to any desired angle I place a dowel between the two pieces of jig and it holds it’s position. I draw a line across the jig, roughly in the center, this line allows me to line up the resultant angles that I marked on the top.
Line up the centerline on the jig with the centerline of the drill press table and clamp it down. Then tilt the jig to match the angle of the legs we setup on the bevel gauge.
Once the angle is set as shown in the above photo, I place the piece I want to drill on the platform, line up the resultant angle line on the workpiece with the centerline on the jig and align the center point of my drill bit to the mark that shows the center point of the leg (which was also marked out on the workpiece in the previous post), then drill to the desired depth. In this case the hole I drilled is 2 1/4 inches deep. This is a little difficult to
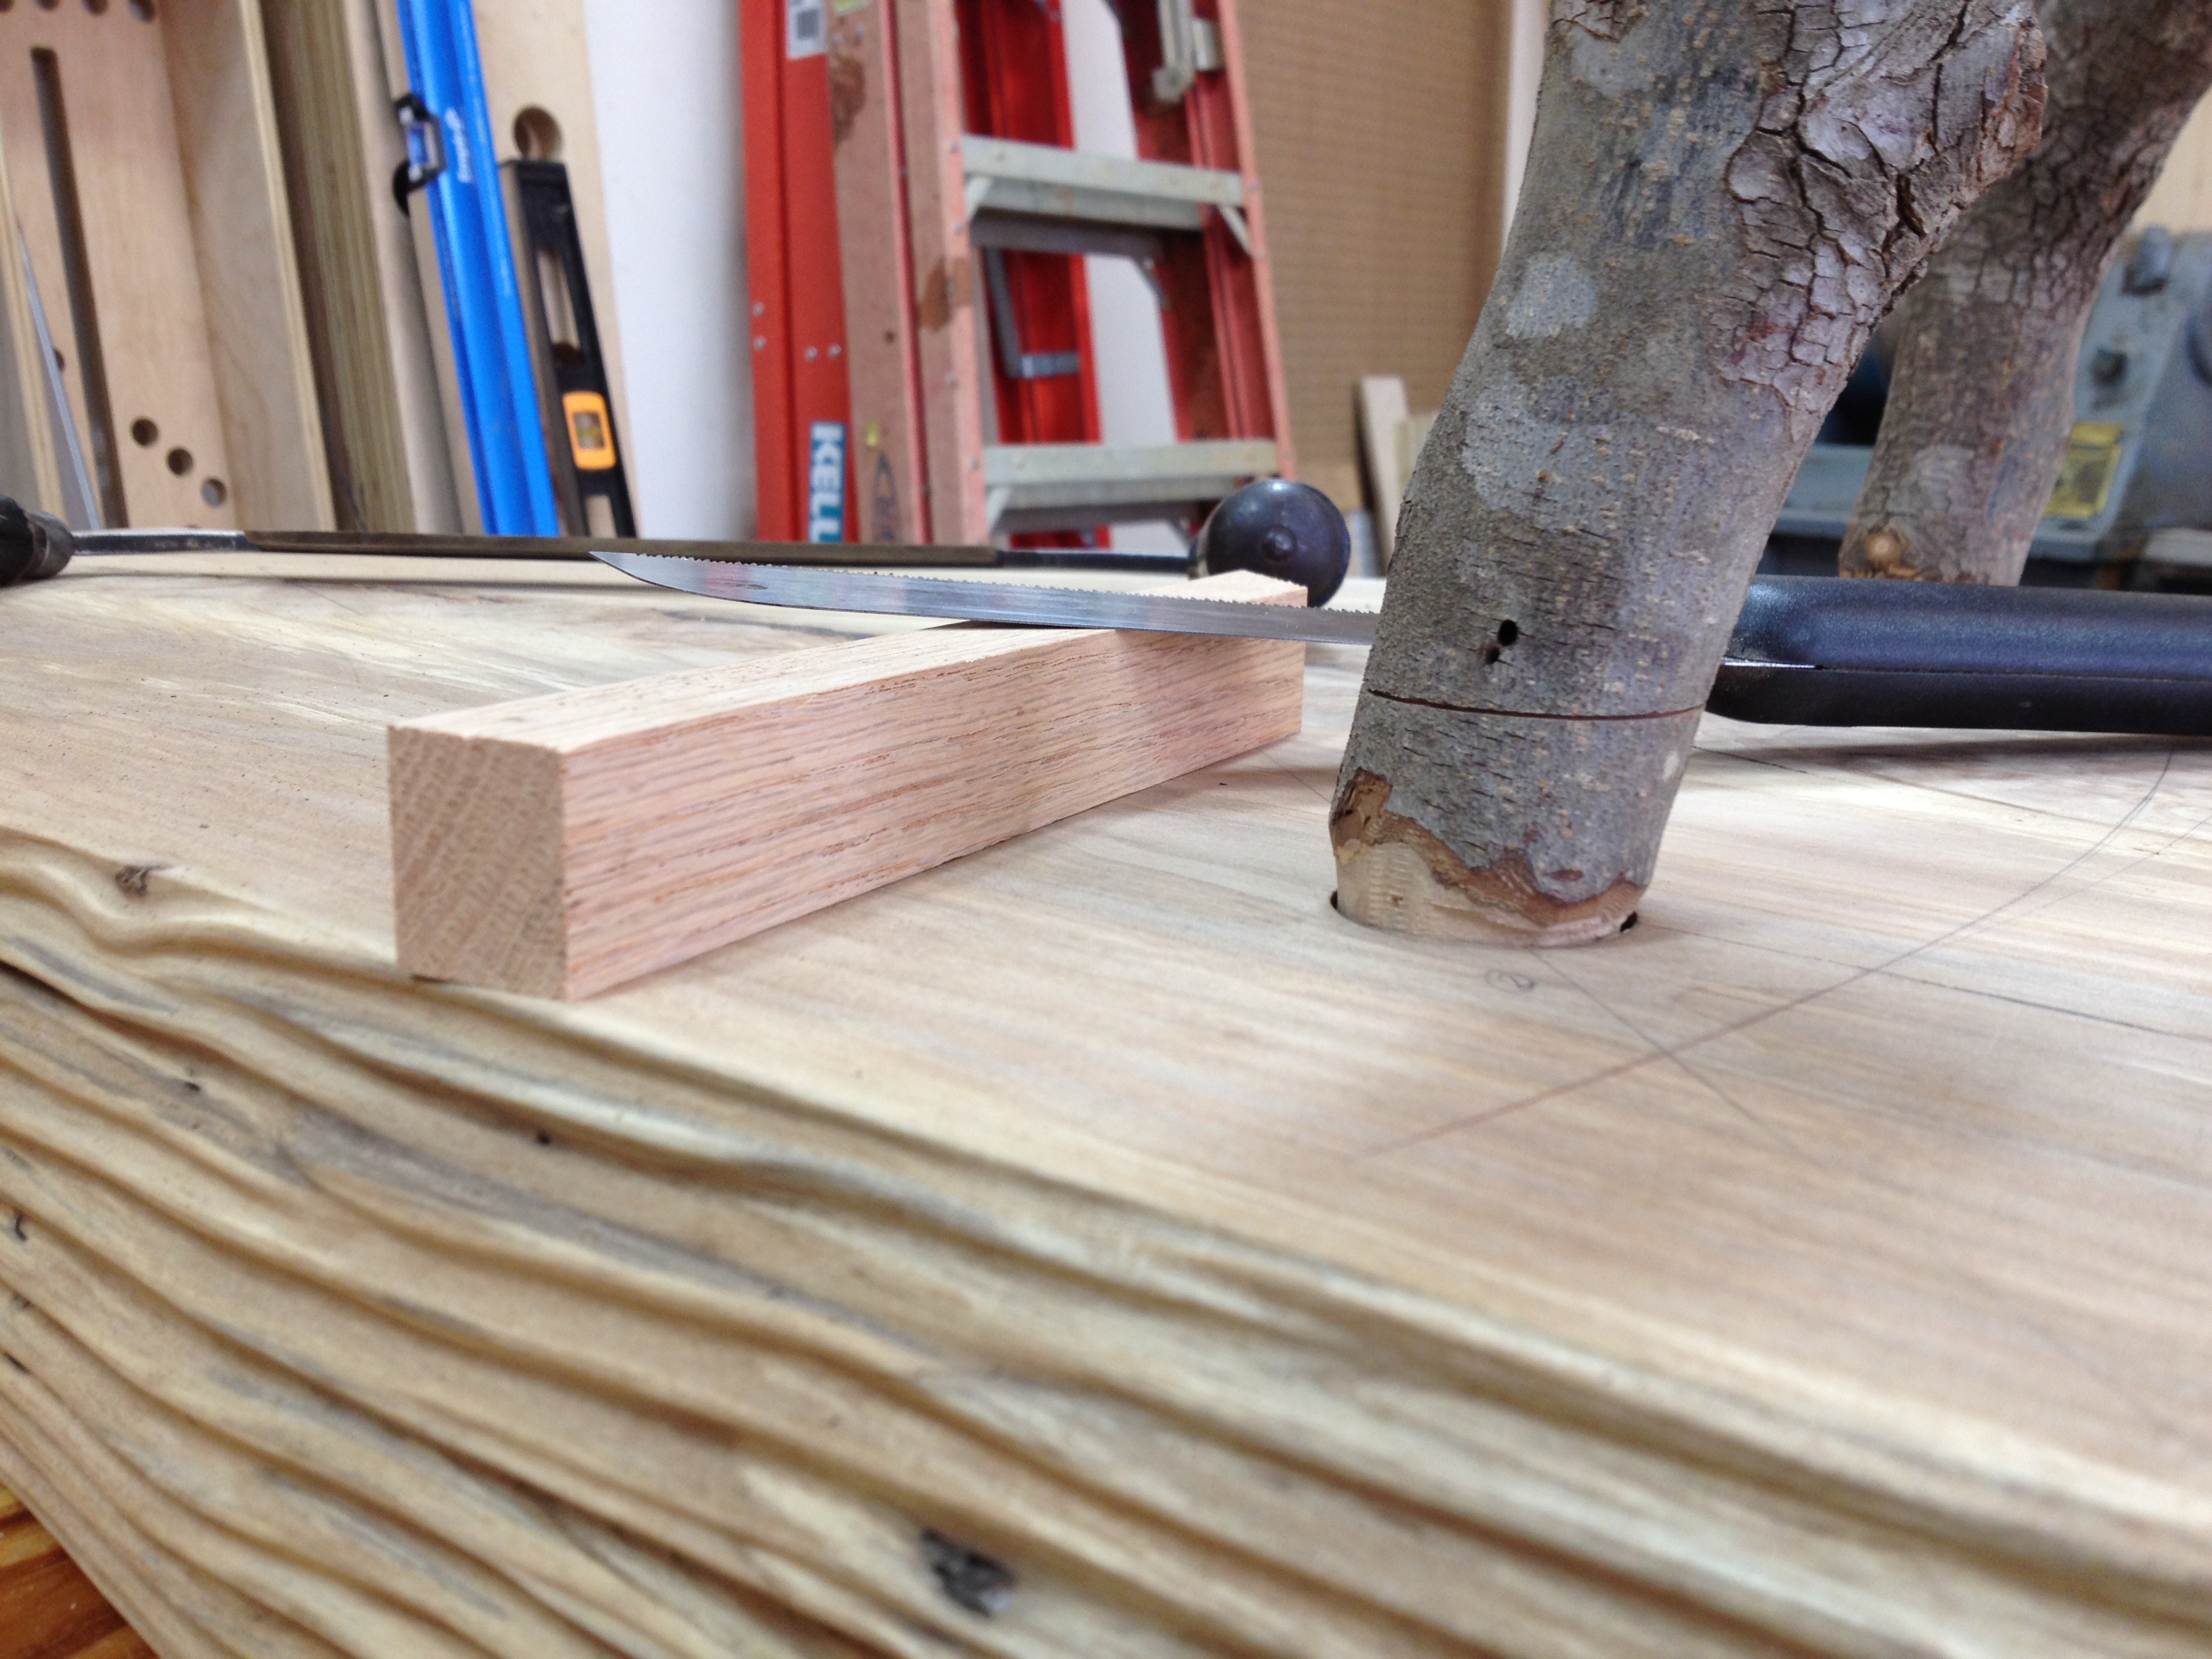
Now that all three holes have been drilled, I cut and fit the legs into each hole. Since the legs are irregular in shape it’s not possible to turn them on a lathe. You could use a tenon cutter like those used for log cabin style furniture but I don’t like the long highly visible taper that they leave on the leg, they are only available in a few sizes, and they are expensive. I cut my tenons using a draw knife and files. I like to leave a square shoulder so then the tenon is inserted into the leg it sits flush with the bottom surface.
So there is not a lot going on here other than I cut down as close to the circle I marked on the top of the legs with the draw knife without going over the line. I mark the length of the tenon on the end of the leg so I don’t cut the past where I want to go. Once i get close to the circle I laid out on the end of the leg I start checking the fit of the tenon using a piece of wood with a hold drilled in it the same diameter as the holes in the top piece. I can easily and continually check my progress using this block. This takes quite a bit of time to get the last bit of material filed off and the legs all fit well….so be patient. The photo below represent what I’m talking about I hope.
Once the fit of all the legs into the test block is good I insert them into to top as determined by the markings I made earlier. I labeled the legs 1, 2, and 3. So at this point I still have legs that have a rounded over shoulder. What I want are legs where the shoulder of the tenon on each leg will sit flush with the top when the tenon is inserted. The photo below shows how the round tenon at the top has a rounded over shoulder where it goes from wood to the outer bark layer.
To cut this shoulder square so that when the leg is inserted into the top it sits flush, first insert the leg in the correct hole and turn the leg to the alignment marks made during the previous post. The leg will not go all the way into the hole because of the rounded over material that still has to be removed.
The photos below show what I’m about to explain but I just take a block of wood and use flush-cut type handsaw to saw a light line all the way around each leg while it’s inserted into it’s respective hole. This method ensures that shoulder line where I cut around the leg will be parrallel to the surface of the top piece. Once these shoulder lines are sawn all the way around each leg I go back to removing the material down to the diameter of the tenon. At this point your tenon will likely be a little bit long so I always go back and make a final cut on the end so it does not bottom out when I inset the legs.
At this point I have good fitting legs ready to glue into the top. My next post will focus on the woven shelf I am working on and the finishing process for this table. I like a close to the wood finish personally but since this is a coffee table I am going to be using an oil and poly combination. Thanks for reading and shalom.