Where to focus

Hello Friends!  I like to try to start all my posts with some observation in order to generate brain activity prior to boring everyone to death with the technical step-by-step furniture making stuff.  I would like to hear your feedback if you are following along. No seriously stop and drop me a note (good, bad, or otherwise) I would love it.

In the 1960’s when Ali was in his fighting prime and peak of fame, he boarded a commercial airline flight bound for a location that does not matter at this point.  During the pre-flight announcements he was talking and talking and talking as was his custom and the stewardesses of course could not help but notice his behavior from the second he stepped on the plane.  Of course his prideful manner was attention grabbing and engaging.  One of the stewardesses approached Ali and asked him politely to put on his seat belt or the plane would not be allowed to take off.  In response Ali stated “Superman don’t need no seat belt!”.  To which the stewardess quickly replied “Superman don’t need no plane either”.

I have been waking up more and more frequently with thoughts that are unusual even for me.  I would sum these thoughts up as resembling pride, which could be a good or bad thing.  Trust me when I say it’s not that anything great has happened to me recently.  I have not sold a single piece of furniture since going all in, I did not make a measurable difference in lives of others, and as hard as it is to say it I have a long way to go to stand out from the crowd in the fine furniture world.

In this generation and time, it’s difficult to promote yourself without making a lot of noise.  No matter what you do for a living, gross self-promotion and pride are elements that will get you noticed in a noisy world.  We have all known that guy or gal at the office who just seems to keep getting the high profile assignments no matter how strongly we disagree with them and their approach. We find ourselves asking “Why doesn’t anyone else see what I see here?”.

You know what I’m talking about here, and before you know it emotions have derailed your agenda and effectiveness.  It’s almost ridiculous how often I use to find myself discussing rumors and opinions in the workplace that only serve to break down momentum and stifle the real objectives which could lead to the satisfaction of doing your job well and wholeheartedly.

Pride is an interesting emotion with two very different meanings.  On one hand its the sense of attachment toward another person or group of people in response to their choices or actions where you associate positively.  So powerful in fact, that it forces us to reach outward and give a word of encouragement to those whom we are proud of. This can be a instrument of change in your life.

The other side of the emotion is isolating, inward seeking, and falsely self inflating.  I don’t think I need to say much more about it except we all know it when we see it in Others. We just can’t seem to make a genuine connection to that person no matter how hard we try.  But few of us see it in ourselves and we should beware.

One big challenge for me in the construction field was getting the best out of myself (first and foremost) and the people around me consistently, developing trust and building relationship constantly.  My approach was simple and it served me well, be humble, focus on the Client, under-promise, over-deliver, give all the credit away.

So what does this have to do with furniture making?  Nothing, but I find a direct relationship between the satisfaction I feel  from any work I devote myself to, and the direction in which I am focused.  I have to snap myself out of the inward self service thinking, I am great “fill in whatever you want” because it only works for me and that just doesn’t work for me.

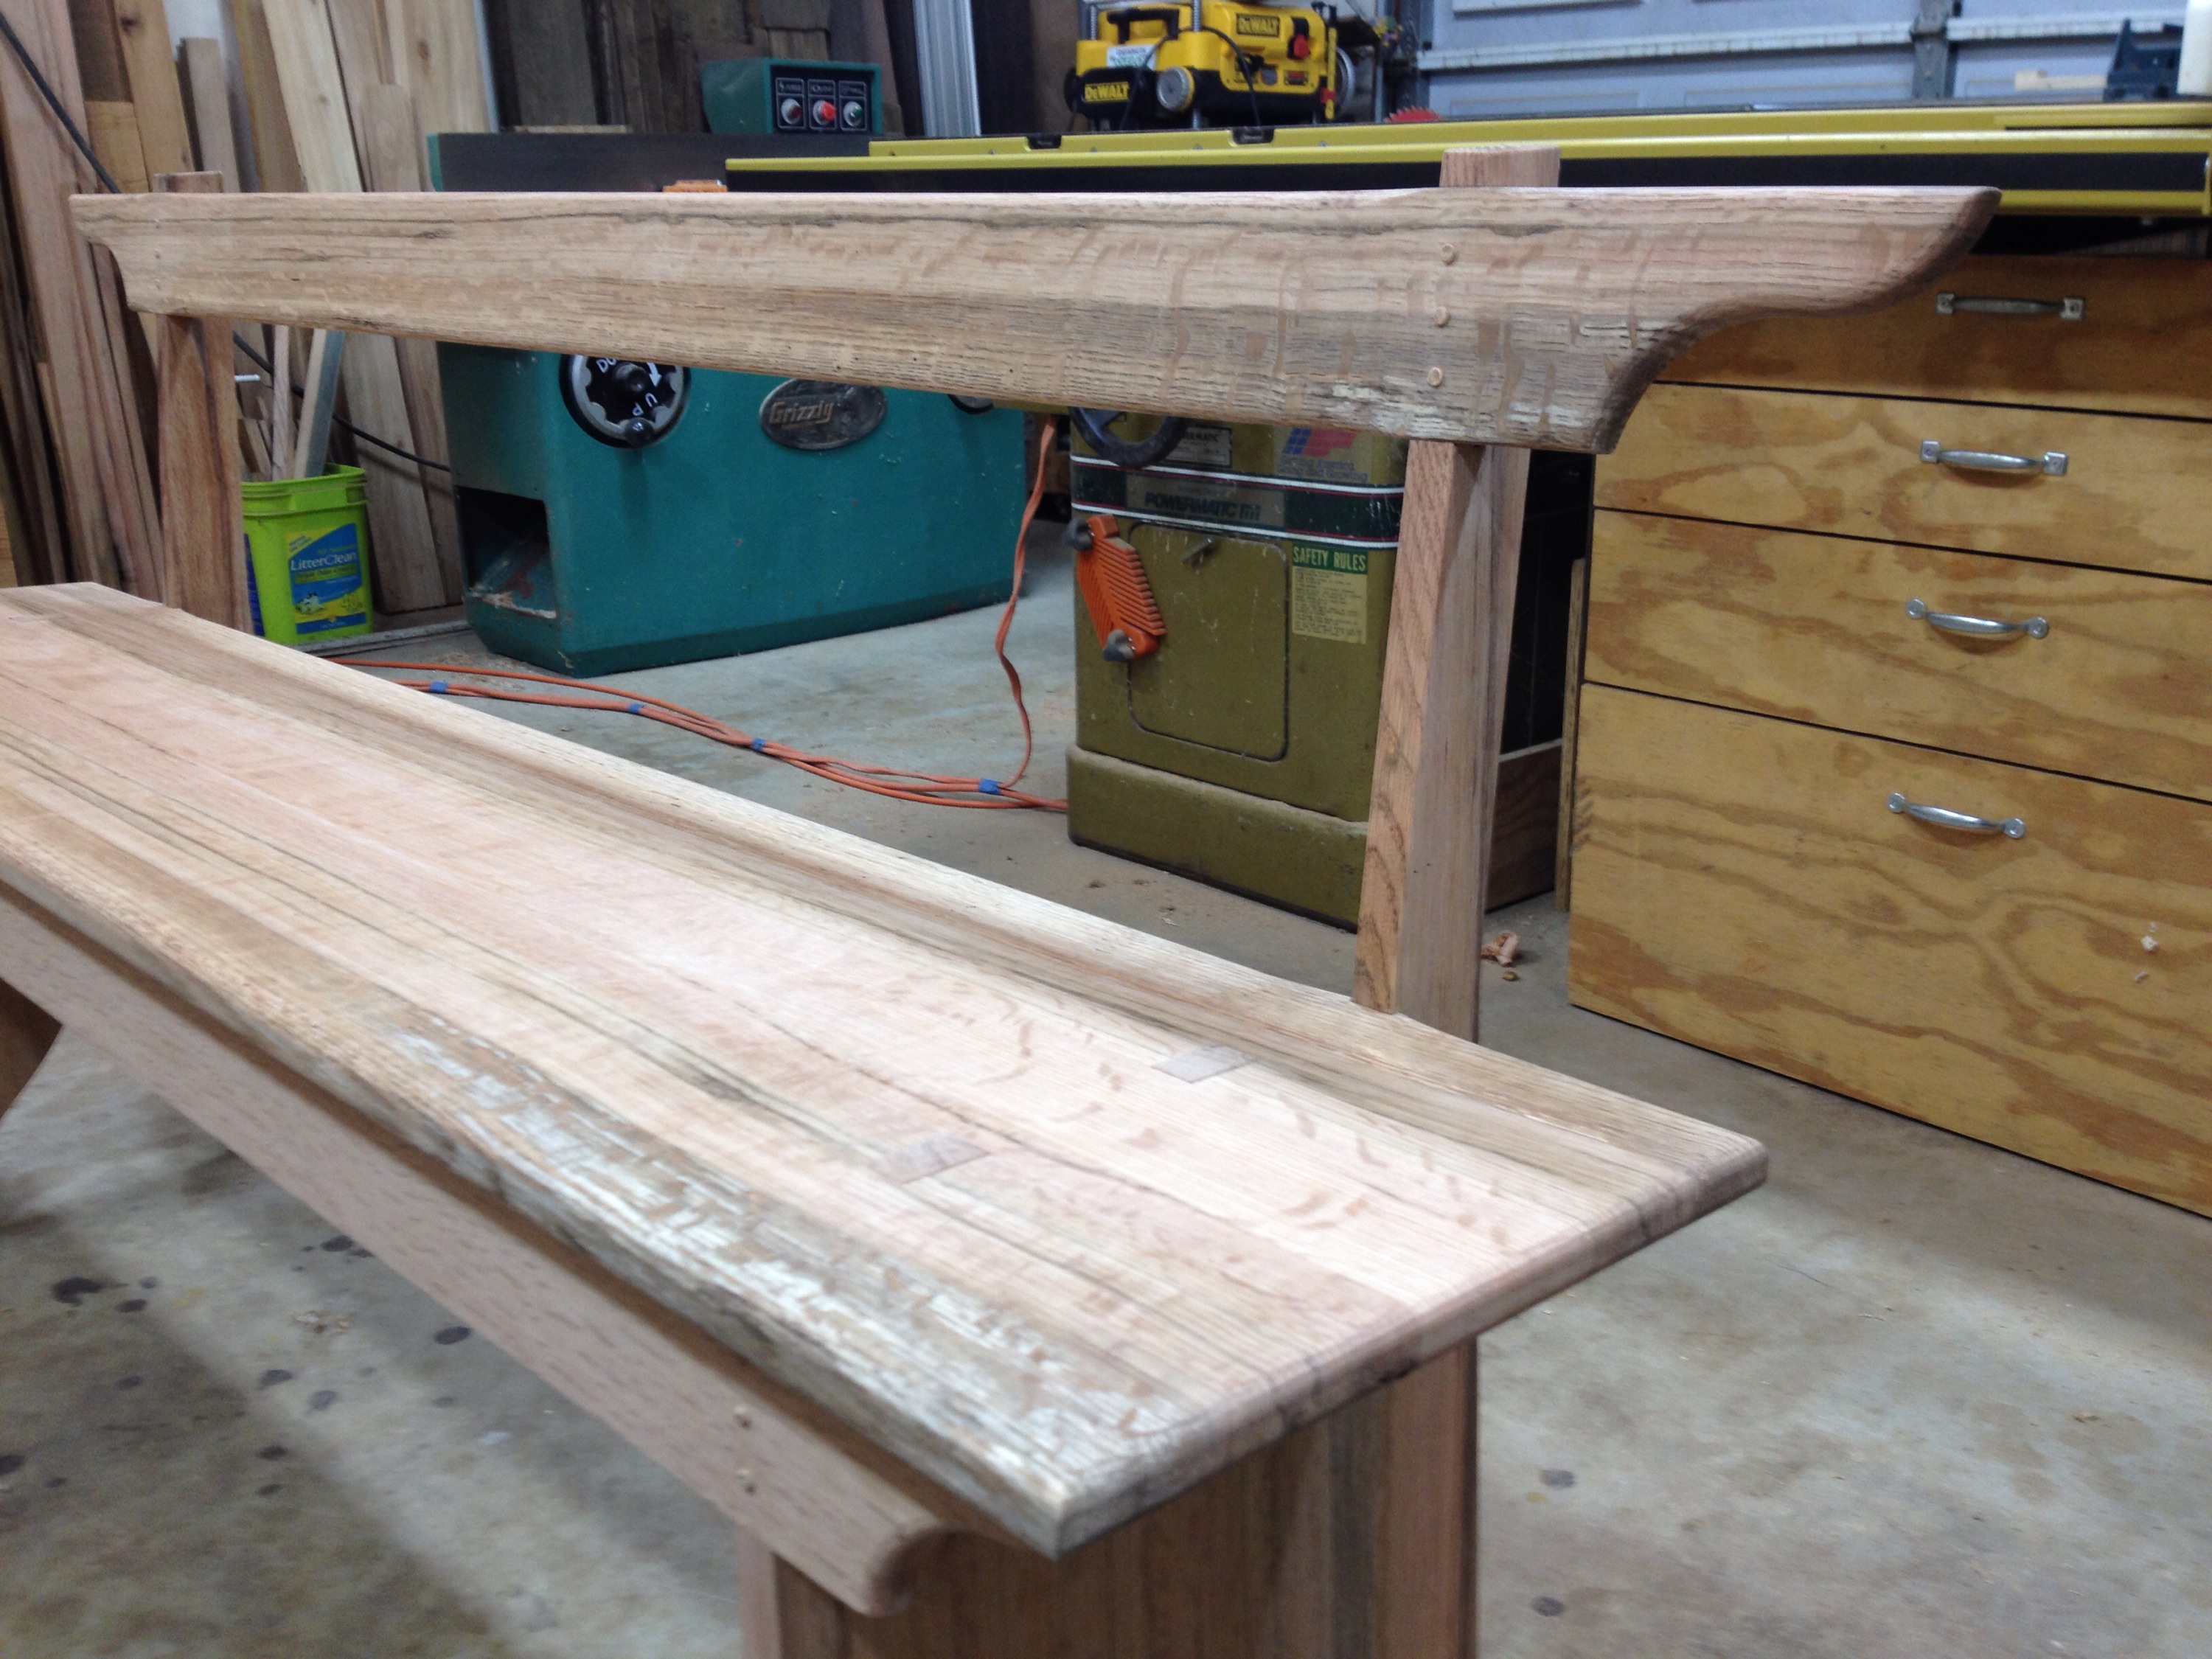
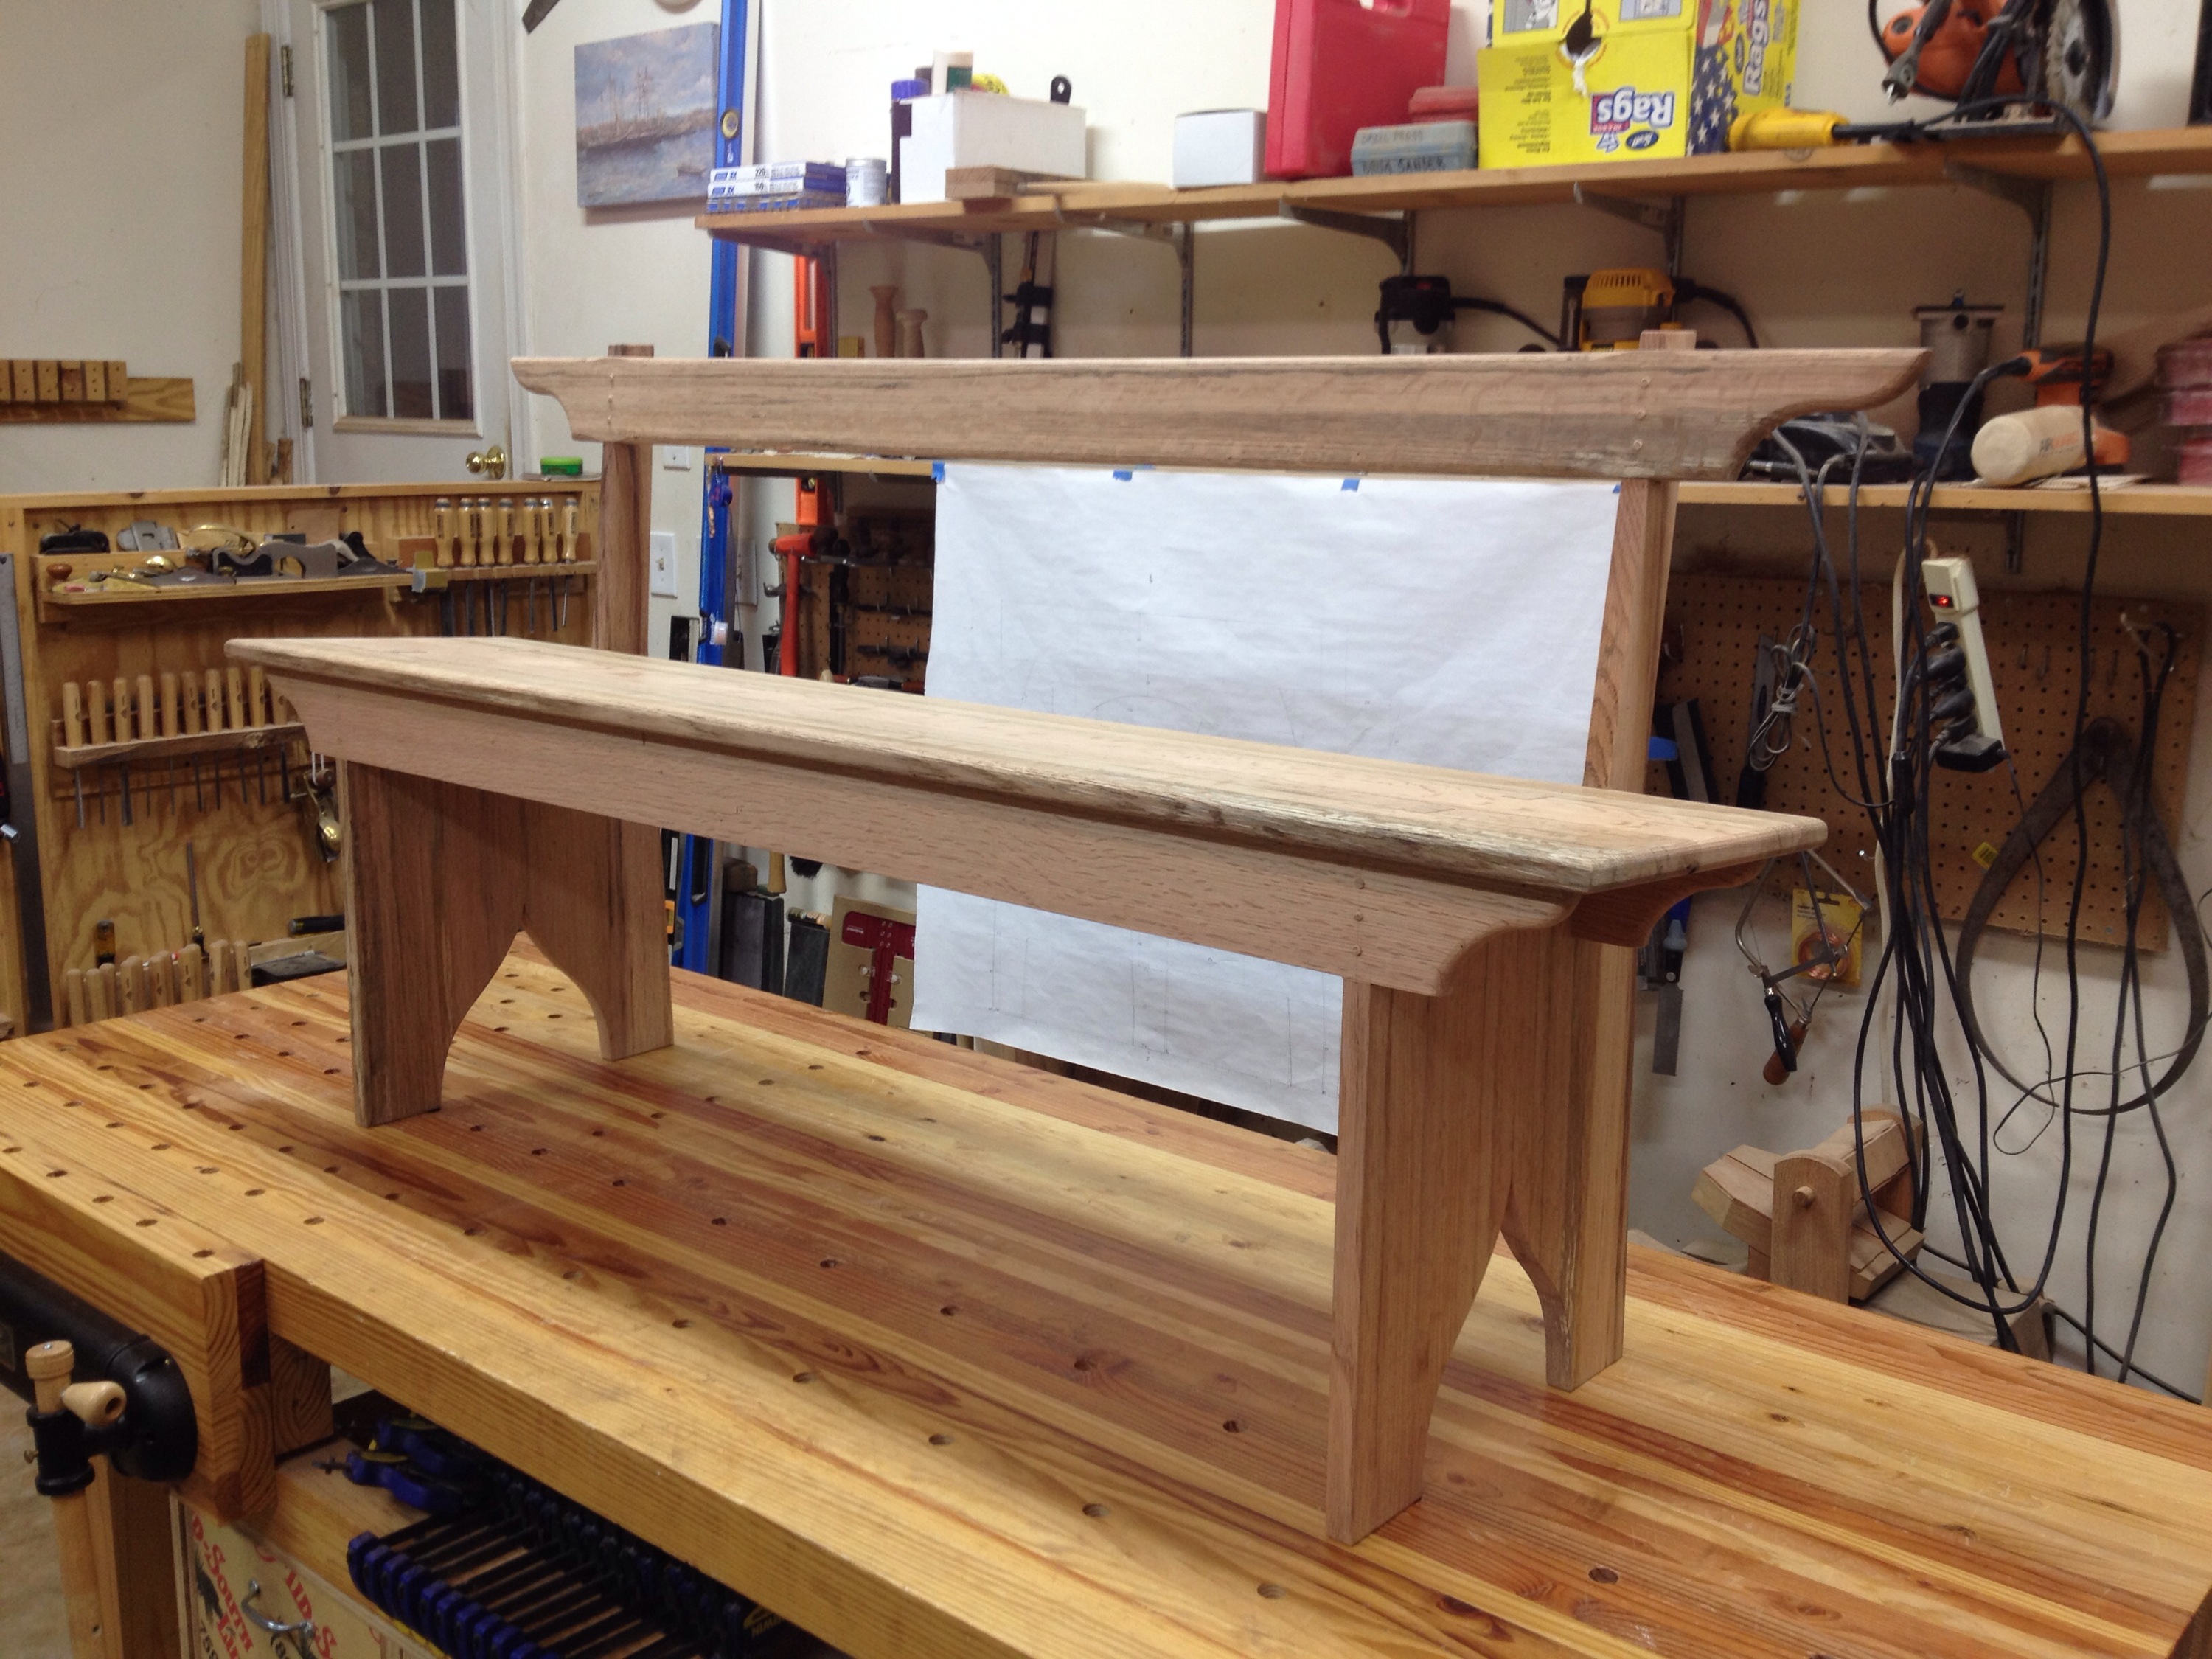
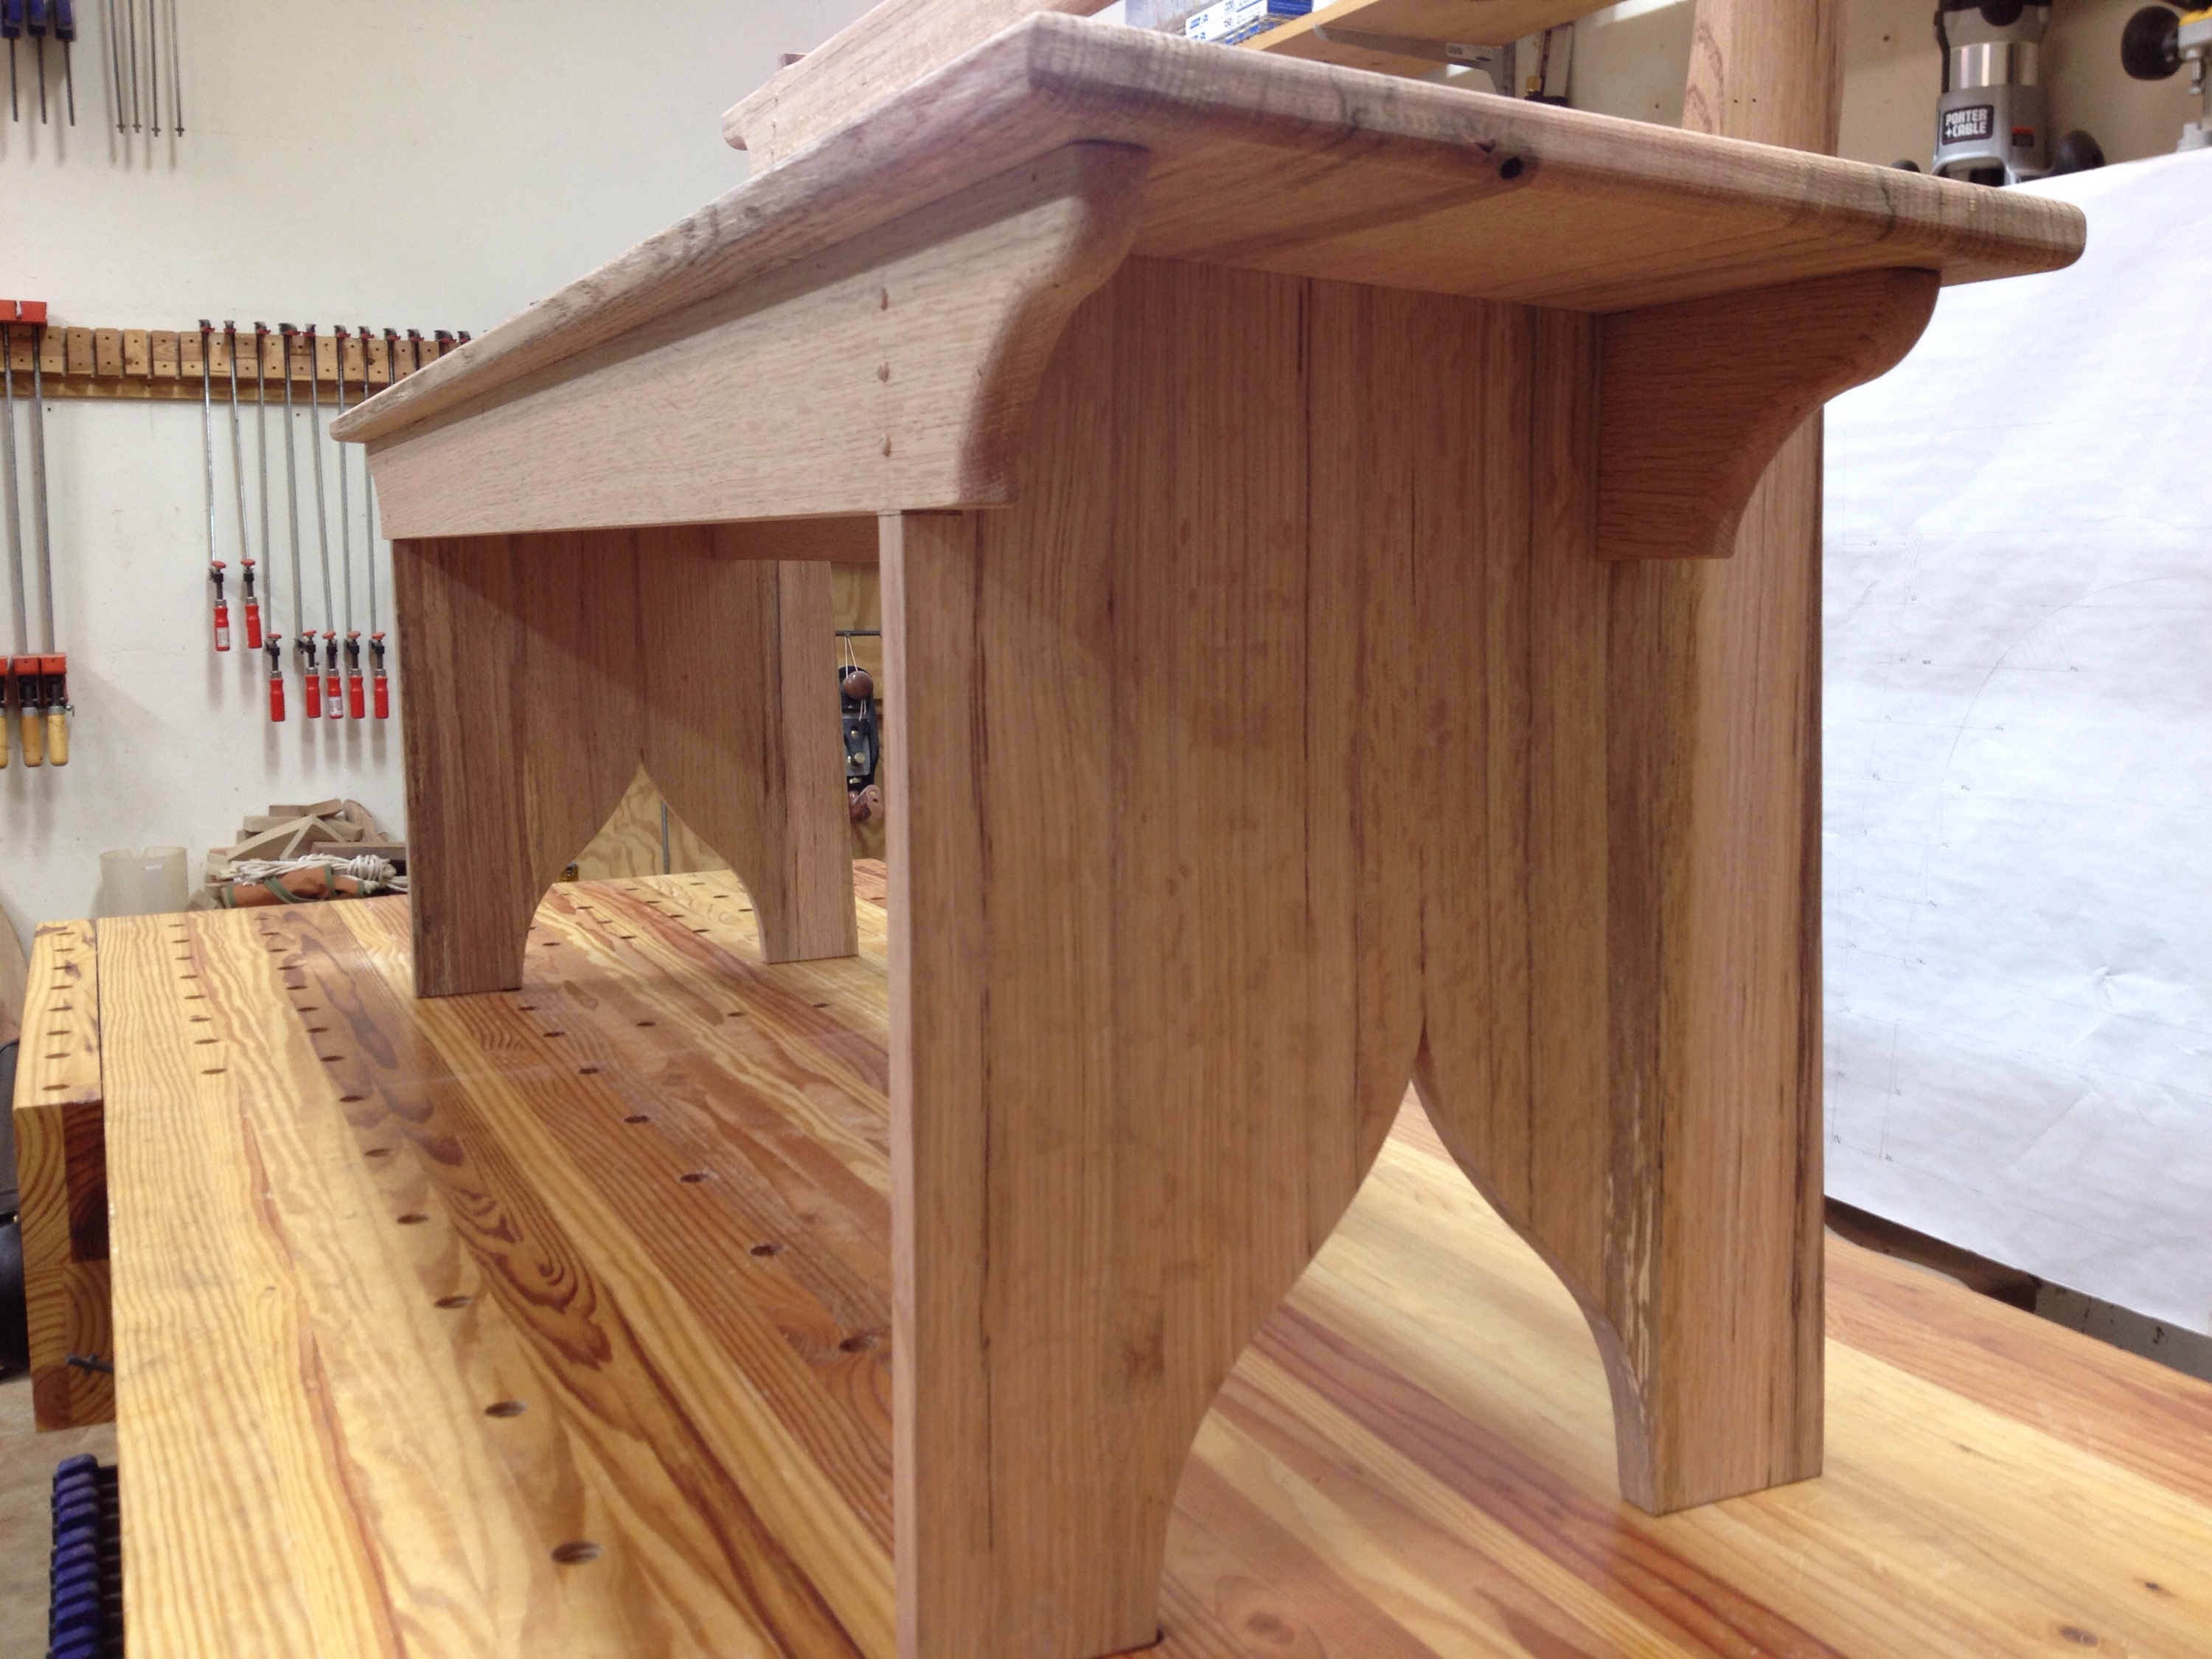
Later today I will continue the previous post cardboard creativity outlining the most recent natural leg coffee table build.  The coffee table is now in the finishing process and everyone should be able to view a new set of portfolio pics by the end of the week.  I am trying to stay ahead of my writing segments by staying ahead in the shop, genius I know.  I will do anything to make the writing process easier for myself, short of not writing.

And of course I will continue saying in many words what could be said in few. Thanks for reading and let’s make a difference.

Cardboard Creativity

There is a lot to be said about the importance of creativity to our overall well-being.  While I was planning out the latest build outlined further below, the process of creativity was something I was thinking about.  I ran across a great quote a long time ago and can’t remember the author but something to the effect of “Life is not about finding yourself, it’s about creating yourself”.

For me the resistance to creativity and opening new doors stems from fear, doubt, anxiety.  While I am greatfull to have opportunity too challenge myself creatively in this new endeavor, the focus to succeed leaves openings in other areas of my life vulnerable.  Fact is we all have aspects of our lives that challenge us positively and bring forth creativity but on the other hand we also all have things that lay stagnant and it holds us back.

If I’m not pushing against the resistance in areas of importance (usually this involves Lisa pushing as well  in order to get any measurable progress!), then I become blindly content and life is too short to be content.  What I’m trying to say may be better served by the age old metaphor about the frog and boiling water.  Is this a call to action?  It’s more of a reminder, I have a lot to work on.

For anyone out there curious about the process I go through in creating one of the natural leg pieces, please keep reading this and future blog posts.  In this series of posts I will be highlighting my process of designing and building a natural leg coffee table. The title of this post is telling in that you don’t need sophisticated methods to generate a design or idea for furniture or anything really.

I use cardboard and pencil and paper almost exclusively in the process of working out proportions and “feel” of a design.  For these natural leg pieces I simply draw what I call a story board or story stick to build a pleasing ratio of height, width, depth, etc. Honestly, sometimes I nail it, sometimes I don’t.    I draw this out based on the material I plan to build with.  The photo is hard to see I know.  The second photo is the finished top of the table and the legs as I cut them off the tree, is that inspiring or what!  Like any furniture it is critical that your material be dried sufficiently unless you like really warped furniture.

IMG_1701

IMG_1700

The construction is similar to a windsor chair where round leg tenons are inserted into round mortises.  The trick is drilling compound angle(s) into the receiving piece of wood knowing that you are using a leg that is not symmetrical in any sense of the word.  Assuming that the top of the table is cut to its final size, shape, thickness, etc.  Flip the top upside down for the following steps in the design process.

1. Getting the final orientation of each leg-

This final design step if you will is done with the components of the piece in hand.  The actual angles you end up with in this type of build are irrelevant.  Don’t waste your time trying to draw it out on paper or hit a specific angle of 11.2234433 degrees. You will end up as frustrated as a cat scratching turds on an ice pond.

It is important that the legs be cut to about 1-1/2″ longer than the final length prior to determining the angles of the legs.  If the legs are longer than they need to be it is really easy to deceive yourself on where the legs will be in relationship to the edge of the top and each other when they are cut to final length later.  For example the leg(s) can stick too far out or in, or just not look like what you thought.  Trust me on this.

I eyeball the legs and move them around to determine the ideal location of each hole, noting the distance from the leg to the edges of the table. I like the distance from the edge of top to the edge of leg roughly the same for each leg, leaving enough material to support the connection, in this case I measured in about 3″.  I also look carefully at the rotation of the leg making a mark on the leg and table top that I can align again later.

Then I mark the approximate center point for each leg on the table top (which I have flipped upside down so as not to drill into the wrong side) and number each leg, the angles will be determined in the next step.

IMG_1704

2. Getting the final angle of each leg-

Place the leg you selected in the location marked out in the above step and at an angle that pleases the eye without it being too steep as to jeapordize the strength of the leg or stick out or in too far as mentioned above.  This is the last opportunity to save yourself from disaster by taking a hard look at the final location and angles.

Without boring (no pun intended) you with terminology and reasoning behind it, when you look at a piece of furniture with legs that sit at a compound angle you’d see the front legs are pitched forward, which is called rake, and to the sides, which is called splay.  The combination of those two angles is what is called the resultant angle.  This is the angle we are interested in and the angle that will be drilled.  I will show you how I drill these holes to the “right” angle in the next post but its relevant now because we have to draw lines that show these angles visually on the bottom of the table top in order to accurately drill the holes.    I wont go into the layout of these angles for this piece because I honestly just eyeballed it based on my previous experience.

Once you have calmed yourself down, set a bevel gauge parallel to your resultant angle line and lock it in at the approx. centerline of the leg while holding the leg in position. Yes, you need 4 hands to complete this process which is why the next photo is a setup.  The photo below illustrates this step, but this was actually me checking the leg after the final fitting of the joint as there is no way I could have held everything in position and take a photo.

IMG_1710

Again, It does not matter that you know what the angle is as long as you have a way to transfer that angle from one object to another.  In the case of this table I had each leg at a slightly different angle.  I just transferred the bevel gauge measurement to my cardboard piece for each leg and that allows me to reset the gauge later when setting up to drill the holes.

So that’s about all there is too it on the design and layout of these natural leg tables.  My next post will focus on the actual setup and drilling of mortises for the legs, sizing and fitting the legs, and I might talk about sticky situations.  Anyhow I have to get my hands on some wood, thanks for hanging in there on this post and shalom.

My fingers are bleeding!!!

First and foremost I am thankful for anyone visiting the site and the blog.  My intention is simply to share knowledge and what I have learned in furniture making and life.  I’ll be posting more frequently about what I am currently doing, sharing prophetic ideas and life changing philosophy, …or not.  I am a self taught furniture maker and designer, but this term is misleading in that I did not start down this path in a cave with nothing but my hands and thoughts. I learned for free by intentionally studying “how-to” content, looking at what other inspiring builders were making, the techniques they use to execute their designs, etc., and simply getting hands on with my own ideas.  So in a sense I am well studied furniture maker using proven techniques and applying principles of sound design that have been around for centuries.

So the beautiful Shaker influenced bench with the back is finished, literally.  I’m thinking I will be building a few of these in the near future in a softwood species or poplar, then painting them to provide a more cost effective piece and possibly add 3 pull out drawers beneath the seat for more functionality.

Now every blue moon or so I do come up with a technique or process I think is new or at least worth sharing again if it’s not.  Most people who have a fair amount of knowledge of wood know hardwood species like oak, hickory, and ash have what is called an open-grain structure which gives the wood unique properties (steam bending ability is one primary example).  This open grain presents us two choices to consider from strictly a finishing or refinishing perspective.

To fill the grain or not fill the grain?

I typically fill open grain woods prior to finishing where there is a horizontal surface such a seat, table top, etc., because it provides a smoother finish when that what I am shooting for but does not mute the facets and details from hand tools.

At any rate, a cheaper and way cooler alternative product for filling open grain wood is paint.  The clear benefit is the ability paint gives us to contrast color, highlight grain, blend color, and other subtle physical surface textures.

The type of paint is debatable in my mind due to the fact that I have only used latex paint and enamel paint and this is still very much experimentation at this point. What I have learned is enamel scrapes with much better results than latex, but scraping enamel paint is difficult unless you like to torture yourself with mind numbing work that makes your fingers bleed.  Latex scrapes off more easily but it does not look as good in my opinion.  Most could not tell the difference honestly.  The downside of all these possibilities is the additional step of scraping off the paint that you just applied.

Below I have boiled down the steps of the bench finishing to the basics and noted things I do and don’t do in order to achieve the results you see in photos.  Thanks again for visiting and shalom.

Step 1 – Start with a very clean surface!  What this means to me is blowing the entire piece down with compressed air.  At this point the surface should be free from machine cuts and rough sanded with 150 grit paper or scraped with the grain.  Do not use a random orbit sander as tempting as it is, they leave tiny circular scratches no matter how good you are with a power tool those small circular scratches will get filled by the paint and required more scraping than you will ever want to do and a discerning eyes will pick this is up.  Here is the bench prior to paint.

IMG_1667

Step 2 – Prior to painting, please take some time to think about how the color will effect the piece.  I typically do samples of two or three paint colors I am considering using off cuts from the project, prior to diving down the rabbit hole.  The application of paint is best done by brushing on a heavy coat and really working it into the wood and then using a plastic squeegee to wipe the excess paint off the surface.  Wiping the excess paint off will save you a lot of time and four letter expletives later.

IMG_1674

Step 3 – Once the piece is dry enough you just start scraping.  This is the part where you think all hope is lost and why the *$&% did I paint this thing?  No point in describing this process further other than I scrape with the grain using a card scraper and/or razor blades.  I scraped the piece to a point where the flat grain of all the surfaces was clean enough that the black paint only remained in the open pores of the wood and in the corners giving a more aged appearance.  This is the only close up shot of the surface after the paint was scraped off and prior to the application of the next step.

IMG_1673

Step 4 – The next two steps are fairly simple.  Apply a wipe on/wipe off stain.  I blend my stains using commercial oil based products.  I find this is the best way to get a color that works the best with the material used but does take more time, to again pull together samples.

Step 5 – The last step I perform is using a simple wipe on Watco Danish Oil finish according to mfg. reccomended application instructions.

IMG_1303

IMG_1293

IMG_1302

Begin Again

Well sometimes we have to sit down and begin something less than desirable when there are always several other options we can immediately get excited about. I am always asking myself what is urgent and what is important and what fits my goals for the “X” period of time. For me the undesirable is just about anything outside of furniture making and design (those who know me can vouch for the extremism in my work ethic and patience). To show anyone who might read this that I am serious about doing the important things, I will be coming out of the shop. This will be slowly and for short periods of time only to work on important things like calling my Mom more frequently and focusing on the business of beginning again. In the mean time I’ll be finishing the sitting bench below and plan to post a write up on the history of the beautiful wood itself and the design particulars.

IMG_1669-1

IMG_1665-2

IMG_1666

IMG_1671

IMG_1673